
Packages
Overview
Devon4Net is made up of several components, all of which are described in this document. This components are available in the form of NuGet packages. In the Devon4Net repository this packages are placed in the Infrastructure layer which is a cross-cutting layer that can be referenced from any level on the architecture.
Components are class librarys that collaborate with each other for a purpose. They group the necessary code so that they can work according to the specified configuration. For example, the package Devon4Net.Infrastructure.Swagger has isolated the swagger essential pieces of code and has been developed in such a manner that you just need to write a few lines and specify a couple options to get it working the way you need.
Component structure
All of the components follow a similar structure which includes the next directories:
-
Configuration: Static configuration class (or multiple classes) that contains extension methods used to configure the component.
-
Handlers: Classes that are required to manage complex operations or communications.
-
Helpers: Normally static classes that help in small conversions and operations.
-
Constants: Classes that contain static constants to get rid of hard-coded values.
| Because each component is unique, you may find some more directories or less than those listed above. |
Configuration basics
Any configuration for .Net Core 6.0 projects needs to be done in the Program.cs files which is placed on the startup application, but we can extract any configuration needed to an extension method and call that method from the component. As a result, the component will group everything required and the configuration will be much easier.
Extension methods
Extension methods allow you to "add" methods to existing types without having to create a new derived type, or modify it in any way. Although they are static methods, they are referred to as instance methods on the extended type. For C# code, there is no difference in calling a extension method and a method defined in a type.
For example, the next extension method will extend the class ExtendedClass and it will need an OptionalParameter instance to do some configuration:
public static class ExtensionMethods
{
    public static void DoConfiguration(this ExtendedClass class,  OptionalParameter extra)
    {
        // Do your configuration here
        class.DoSomething();
        class.AddSomething(extra)
    }
}
Thanks to the this modifier preceeding the first parameter, we are able to call the method directly on a instance of ExtendedClass as follows:
ExtendedClass class = new();
OptionalParameter extra = new();

class.DoConfiguration(extra);
As you can see, we don’t need that a class derived from ExtendedClass to add some methods and we don’t need those methods placed in the class itself either. This can be seen easily when extending a primitive type such as string:
public static class ExtensionMethods
{
    public static int CountWords(this string word,  char[] separationChar = null)
    {
        if(separationChar == null) separationChar = new char[]{' '};
        return word.Split(separationChar, StringSplitOptions.RemoveEmptyEntries).Length;
    }
}
In the previous example we created a method that can count words given a list of separation characters. And now we can use it over any string as follows:
string s = "Hello World";
Console.WriteLine(s.CountWords());
2
Remember to reference the class so you can use the extension methods (using directive).
|
Options pattern
The options design pattern allows you to have strong typed options and provides you the ability to inject them into your services. To follow this pattern, the configuration present on the appsettings.json needs to be mapped into an object.
This means, the following configuration:
"essentialoptions" : {
  "value1": "Hello",
  "value2": "World"
}
Would need the following class:
public class EssentialOptions
{
    public string Value1 { get; set; }
    public string Value2 { get; set; }
}
In .Net we can easily map the configuration thanks to the Configure<T>() method from IServiceCollection and GetSection() method from IConfiguration. We could be loading the configuration as follows:
services.Configure<EssentialOptions>(configuration.GetSection("essentialoptions"));And then injecting it making use of IOptions<T> interface:
public class MyService : IMyService
{
    private readonly EssentialOptions _options;

    public MyService(IOptions<EssentialOptions> options)
    {
        _options = options.Value;
    }
}
In devon4net, there is an IServiceCollection extension available that uses the methods described above and also returns the options injected thanks to IOptions<T>. So, to load the same options, we should use the following:
EssentialOptions options = services.GetTypedOptions<EssentialOptions>(configuration, "essentialoptions");Dependency Injection
Dependency Injection is a technique for achieving Inversion of Control Principle. In .Net it is a built-in part that comes with the framework.
Using a service provider IServiceProvider available in .Net, we are able to add any service or option to a service stack that will be available for injection in constructors of the classes where it’s used.
Services can be registered with one of the following lifetimes:
Lifetime |
Description |
Example |
Transient |
Transient lifetime services are created each time they’re requested from the service container. Disposed at the end of the request. |
services.AddTransient<IDependency, Dependency>(); |
Scoped |
A scoped lifetime indicates that services are created once per client request (connection). Disposed at the end of the request. |
services.AddScoped<IDependency, Dependency>(); |
Singleton |
Singleton lifetime services are created either the first time they’re requested or by the developer. Every subsequent request of the service implementation from the dependency injection container uses the same instance. |
services.AddSingleton<IDependency, Dependency>(); |
This injections would be done in the startup project in Program.cs file, and then injected in constructors where needed.
Devon4Net.Infrastructure.CircuitBreaker
The Devon4Net.Infrastructure.CircuitBreaker component implements the retry pattern for HTTP/HTTPS calls. It may be used in both SOAP and REST services.
Configuration
Component configuration is made on file appsettings.{environment}.json as follows:
"CircuitBreaker": {
    "CheckCertificate": false,
    "Endpoints": [
      {
        "Name": "SampleService",
        "BaseAddress": "http://localhost:5001",
        "Headers": {
        },
        "WaitAndRetrySeconds": [
          0.0001,
          0.0005,
          0.001
        ],
        "DurationOfBreak": 0.0005,
        "UseCertificate": false,
        "Certificate": "localhost.pfx",
        "CertificatePassword": "localhost",
        "SslProtocol": "Tls12", //Tls, Tls11,Tls12, Tls13, none
        "CompressionSupport": true,
        "AllowAutoRedirect": true
      }
    ]
}| Property | Description |
|---|---|
|
True if HTTPS is required. This is useful when developing an API Gateway needs a secured HTTP, disabling this on development we can use communications with a valid server certificate |
Endpoints |
Array with predefined sites to connect with |
Name |
The name key to identify the destination URL |
Headers |
Not ready yet |
WaitAndRetrySeconds |
Array which determines the number of retries and the lapse period between each retry. The value is in milliseconds. |
Certificate |
Ceritificate client to use to perform the HTTP call |
CertificatePassword |
The password that you assign when exporting the certificate |
|
The secure protocol to use on the call |
Protocols
| Protocol | Key | Description |
|---|---|---|
SSl3 |
48 |
Specifies the Secure Socket Layer (SSL) 3.0 security protocol. SSL 3.0 has been superseded by the Transport Layer Security (TLS) protocol and is provided for backward compatibility only. |
TLS |
192 |
Specifies the Transport Layer Security (TLS) 1.0 security protocol. The TLS 1.0 protocol is defined in IETF RFC 2246. |
TLS11 |
768 |
Specifies the Transport Layer Security (TLS) 1.1 security protocol. The TLS 1.1 protocol is defined in IETF RFC 4346. On Windows systems, this value is supported starting with Windows 7. |
TLS12 |
3072 |
Specifies the Transport Layer Security (TLS) 1.2 security protocol. The TLS 1.2 protocol is defined in IETF RFC 5246. On Windows systems, this value is supported starting with Windows 7. |
TLS13 |
12288 |
Specifies the TLS 1.3 security protocol. The TLS protocol is defined in IETF RFC 8446. |
Setting up in Devon
For setting it up using the Devon4NetApi template just configure it in the appsettings.{environment}.json file.
Add it using Dependency Injection on this case we instanciate Circuit Breaker in a Service Sample Class
public class SampleService: Service<SampleContext>, ISampleService
    {
        private readonly ISampleRepository _sampleRepository;
        private IHttpClientHandler _httpClientHandler { get; }

        /// <summary>
        /// Constructor
        /// </summary>
        /// <param name="uoW"></param>
        public SampleService(IUnitOfWork<SampleContext> uoW, IHttpClientHandler httpClientHandler) : base(uoW)
        {
            _httpClientHandler = httpClientHandler;
            _sampleRepository = uoW.Repository<ISampleRepository>();
        }
    }
Add the necessary references.
using Devon4Net.Infrastructure.CircuitBreaker.Common.Enums;
using Devon4Net.Infrastructure.CircuitBreaker.Handlers;
You must give the following arguments to make a POST call:
await _httpClientHandler.Send<YourOutPutClass>(HttpMethod.POST, NameOfTheService, EndPoint, InputData, MediaType.ApplicationJson);Where:
| Property | Description |
|---|---|
YourOutputClass |
The type of the class that you are expecting to retrieve from the call |
NameOftheService |
The key name of the endpoint provided in the appsettings.json file at Endpoints[] node |
|
Part of the url to use with the base address. E.g: /validate |
|
Your instance of the class with values that you want to use in the call |
|
The media type flag for the call |
Setting up in other projects
Install the package on your solution using the Package Manager Console:
Install-Package Devon4Net.Infrastructure.CircuitBreakernext add via Dependency Injection the circuit breaker instance.On this case we use a Service
public class SampleService : ISampleService
 {
   private IHttpClientHandler _httpClientHandler { get; }

    public SampleService(IHttpClientHandler httpClientHandler)
      {
        _httpClientHandler = httpClientHandler;
      }
 }
Don’t forget to provide the necessary references.
using Devon4Net.Infrastructure.CircuitBreaker.Common.Enums;
using Devon4Net.Infrastructure.CircuitBreaker.Handlers;
And configure CircuitBreaker in Program.cs adding the following lines:
using Devon4Net.Infrastructure.CircuitBreaker;
.
.
.
builder.Services.SetupCircuitBreaker(builder.Configuration);
You must add the default configuration shown in the configuration section and at this point you can use the circuit breaker functionality in your code.
To perform a GET call you should use your circuit breaker instance as follows:
await _httpClientHandler.Send<YourOutPutClass>(HttpMethod.Get, NameOfTheService, EndPoint, InputData, MediaType.ApplicationJson);Where:
| Property | Description |
|---|---|
YourOutputClass |
The type of the class that you are expecting to retrieve from the call |
NameOftheService |
The key name of the endpoint provided in the appsettings.json file at Endpoints[] node |
|
Part of the url to use with the base address. E.g: /validate |
|
Your instance of the class with values that you want to use in the call |
|
The media type flag for the call |
Devon4Net.Infrastructure.Nexus
This section of the wiki explains how to use the Nexus module, which internally uses the CircuitBreaker module to make requests to Nexus.
Key Classes
The INexusHandler interface contains the methods needed to use the component, we can divide them into the following sections:
Component Management
Method |
Description |
Task<IList<Component>> GetComponents(string repositoryName) |
Returns the list of existing components based on the repository name. |
Task<IList<Component>> GetComponents(string repositoryName, string componentGroup) |
Returns the list of existing components based on the repository name and component group name. |
Task<Component> GetComponent(string repositoryName, string componentName) |
Returns a component based on the repository name and the component name. |
Task<Component> GetComponent(string componentId) |
Returns a component based on the component’s unique identifier. |
Task UploadComponent<T>(T uploadComponent) |
Uploads a new component. The types of components supported to be uploaded are:
Thus, in order to upload a new component, a new class must first be created, whose name must follow the following structure {ComponentType}UploadComponent As an example the name of the class that will be needed to upload a new Nuget Component will be: NugetUploadComponent Remark: It is important that the type of repository to which you want to upload the component is of the same type and format. |
Task DeleteComponent(string componentId) |
A component will be deleted based on its unique identifier. |
Asset Management
Method |
Description |
Task<IList<Asset>> GetAssets(string repositoryName) |
Returns the list of existing assets based on the repository name. |
Task<IList<Asset>> GetAssets(string repositoryName, string assetGroup) |
Returns the list of existing assets based on the repository name and asset group name. |
Task<Asset> GetAsset(string repositoryName, string assetName) |
Returns an asset based on the repository name and the asset name. |
Task<Asset> GetAsset(string assetId) |
Returns an asset based on the asset’s unique identifier. |
Task<string> DownloadAsset(string repositoryName, string assetName) |
The content of the asset will be obtained in string format. Content will be obtained based on the repository name and asset name provided. |
Task DeleteAsset(string assetId) |
An asset will be deleted based on its unique identifier. |
Repository Management
Method |
Description |
Task CreateRepository<T>(T repositoryDto) |
A repository of defined type will be created. In order to create a repository, it will first be necessary to create this repository format class. Nexus allows to work with three different types of repositories which are "Proxy", "Group" and "Hosted". For each of these types, the following repositories formats can be created:
The name of the class to be created shall follow the following structure: {RepositoryFormat}{RepositoryType}Repository As an example the name of the class that will need to be created to create a Hosted repository for the Apt format will be: AptHostedRepository |
Task DeleteRepository(string repositoryName) |
A repository will be deleted based on repository name provided. |
Configuration
In order to configure the Nexus module, the following steps are necessary:
-
Add to the application options (
appsettings.{environment}.json) the object that will host the nexus access credentials. This object is:"Nexus": { "Username": "username", "Password": "password" }Property Description Username
nexus user username
Password
nexus user password
-
Finally it will be necessary to configure the Circuitbreaker module options with the host where the Nexus service is hosted. The following example shows an example configuration:
"CircuitBreaker": {
    "CheckCertificate": false,
    "Endpoints": [
      {
        "Name": "Nexus",
        "BaseAddress": "{http_protocol}://{hostname}:{port}/",
        "WaitAndRetrySeconds": [
          0.0001,
          0.0005,
          0.001
        ],
        "DurationOfBreak": 0.0005
      }
    ]
}
| Extra information about CircuitBreaker component configuration can be found here. |
Setting up in Devon
To set this component up in devon4net template will be necessary to call the SetUpNexus method from program class in region "devon services". An example of this step is shown below:
#region devon services
builder.Services.SetupDevonfw(builder.Configuration);
builder.Services.SetupMiddleware(builder.Configuration);
builder.Services.SetupLog(builder.Configuration);
builder.Services.SetupSwagger(builder.Configuration);
builder.Services.SetupNexus(builder.Configuration);
#endregion
Add it using Dependency Injection on this case we instanciate Nexus Handler in a Service Sample Class
public class SampleService: Service<SampleContext>, ISampleService
    {
        private readonly ISampleRepository _sampleRepository;
        private readonly INexusHandler _nexusHandler;

        /// <summary>
        /// Constructor
        /// </summary>
        /// <param name="uoW"></param>
        /// <param name="nexusHandler"></param>
        public SampleService(IUnitOfWork<SampleContext> uoW, INexusHandler nexusHandler) : base(uoW)
        {
            _nexusHandler = nexusHandler;
            _sampleRepository = uoW.Repository<ISampleRepository>();
        }
    }
Add the necessary references.
using Devon4Net.Infrastructure.Nexus.Handler;Setting up in other projects
Install the package on your solution using the Package Manager Console:
Install-Package Devon4Net.Infrastructure.NexusFirst it is needed to configure Nexus component in Program.cs adding the following lines:
using Devon4Net.Infrastructure.Nexus;
.
.
.
builder.Services.SetupNexus(builder.Configuration);
In order to start using it in a service class, it will be needed to add via Dependency Injection the nexus instance.
public class SampleService : ISampleService
 {
   private readonly INexusHandler _nexusHandler;

    public SampleService(INexusHandler nexusHandler)
      {
        _nexusHandler = nexusHandler;
      }
 }
Devon4Net.Infrastructure.Swagger
Swagger is a set of open source software tools for designing, building, documenting, and using RESTful web services. This component provides a full externalized configuration for the Swagger tool.
It primarily provides the swagger UI for visualizing and testing APIs, as well as automatic documentation generation via annotations in controllers.
Configuration
Component configuration is made on file appsettings.{environment}.json as follows:
"Swagger": {
    "Version": "v1",
    "Title": "My Swagger API",
    "Description": "Swagger API for devon4net documentation",
    "Terms": "https://www.devonfw.com/terms-of-use/",
    "Contact": {
      "Name": "devonfw",
      "Email": "sample@mail.com",
      "Url": "https://www.devonfw.com"
    },
    "License": {
      "Name": "devonfw - Terms of Use",
      "Url": "https://www.devonfw.com/terms-of-use/"
    },
    "Endpoint": {
      "Name": "V1 Docs",
      "Url": "/swagger/v1/swagger.json",
      "UrlUi": "swagger",
      "RouteTemplate": "swagger/v1/{documentName}/swagger.json"
    }
},
In the following list all the configuration fields are described:
-
Version: Actual version of the API. -
Title: Title of the API. -
Description: Description of the API. -
Terms: Link to the terms and conditions agreement. -
Contact: Your contact information. -
License: Link to the License agreement. -
Endpoint: Swagger endpoints information.
Setting up in Devon
For setting it up using the Devon4NetApi template just configure it in the appsettings.{environment}.json file.
Setting up in other projects
Install the package on your solution using the Package Manager Console:
> install-package Devon4Net.Infrastructure.SwaggerConfigure swagger in Program.cs adding the following lines:
using Devon4Net.Infrastructure.Swagger;
.
.
.
builder.Services.SetupSwagger(builder.Configuration);
.
.
.
app.ConfigureSwaggerEndPoint();
Add the default configuration shown in the configuration section.
Tips
-
In order to generate the documentation annotate your actions with summary, remarks and response tags:
/// <summary>
/// Method to make a reservation with potential guests. The method returns the reservation token.
/// </summary>
/// <param name="bookingDto"></param>
/// <response code="201">Ok.</response>
/// <response code="400">Bad request. Parser data error.</response>
/// <response code="401">Unauthorized. Authentication fail.</response>
/// <response code="403">Forbidden. Authorization error.</response>
/// <response code="500">Internal Server Error. The search process ended with error.</response>
[HttpPost]
[HttpOptions]
[Route("/mythaistar/services/rest/bookingmanagement/v1/booking")]
[AllowAnonymous]
[EnableCors("CorsPolicy")]
public async Task<IActionResult> Booking([FromBody]BookingDto bookingDto)
{
    try
    {

    ...
-
You can access the swagger UI on
http://localhost:yourport/swagger/index.html
Devon4Net.Infrastructure.Logger
Previously known as Devon4Net.Infrastructure.Log(v5.0 or lower)
Logging is an essential component of every application’s life cycle. A strong logging system becomes a critical component that assists developers to understand and resolve emerging problems.
Starting with .NET 6, logging services no longer register the ILogger type. When using a logger, specify the generic-type alternative ILogger<TCategoryName> or register the ILogger with dependency injection (DI).
|
Default .Net log levels system:
Type |
Description |
Critical |
Used to notify failures that force the program to shut down |
Error |
Used to track major faults that occur during program execution |
Warning |
Used to report non-critical unexpected behavior |
Information |
Informative messages |
Debug |
Used for debugging messages containing additional information about application operations |
Trace |
For tracing the code |
None |
If you choose this option the loggin category will not write any messages |
Configuration
Component setup is done in the appsettings.{environment}.json file using the following structure:
  "Logging": {
    "UseLogFile": true,
    "UseSQLiteDb": true,
    "UseGraylog": true,
    "UseAOPTrace": false,
    "LogLevel": {
      "Default": "Information",
      "Microsoft.AspNetCore": "Warning"
    },
    "SqliteDatabase": "logs/log.db",
    "LogFile": "logs/{0}_devonfw.log",
    "SeqLogServerHost": "http://127.0.0.1:5341",
    "GrayLog": {
      "GrayLogHost": "127.0.0.1",
      "GrayLogPort": "12201",
      "GrayLogProtocol": "UDP",
      "UseSecureConnection": true,
      "UseAsyncLogging": true,
      "RetryCount": 5,
      "RetryIntervalMs": 15,
      "MaxUdpMessageSize": 8192
    }
  }
Where:
-
UseLogFile: When you set this option to true, you can store the log output to a file. -
UseSQLiteDb: True when you wish to insert the log output into a SQLiteDb -
UseGrayLog: This option enables the use of GrayLog for loggin -
UseAOPTrace: True if you need to trace the attributes of the controllers
| Don’t set to true on production environments, doing so may expose critical information. |
-
LogLevel: Sets the minimum level of logs to be captured -
SqliteDatabase: path to SQlite database -
LogFile: path to the log file -
SeqLogServerHost: url for Seq server, you need to install Seq in order to use it, you can install it clicking here -
GrayLog: Some configuration parameters for Graylog service you can install it using this link
Setting up in Devon
For setting it up using the Devon4NetApi template just configure it in the appsettings.{environment}.json file.
You can use the methods implemented in Devon4NetLogger class, each method corresponds with a log level in .Net log levels system, for example:
Devon4NetLogger.Debug("Executing GetTodo from controller TodoController");Setting up in other projects
Install the package on your solution using the Package Manager Console:
install-package Devon4Net.Infrastructure.LoggerAdd the following line of code to Progam.cs:
builder.Services.SetupLog(builder.Configuration);Add the default configuration shown in the configuration section.
use the Devon4NetLogger class methods as explanied above:
Devon4NetLogger.Information("Executing GetSample from controller SampleController");Devon4Net.Infrastructure.Cors
Allows CORS settings for the devon4Net application. Configuration may be used to configure several domains. Web clients (for example, Angular) must follow this rule to avoid performing AJAX calls to another domain.
Cross-Origin Resource Sharing (CORS) is an HTTP-header-based mechanism that allows a server to specify any origin (domain, scheme, or port) outside of its own from which a browser should allow resources to be loaded. CORS also makes use of a process in which browsers send a "preflight" request to the server hosting the cross-origin resource to ensure that the server will allow the actual request. During that preflight, the browser sends headers indicating the HTTP method as well as headers that will be used in the actual request.
You may find out more by going to Microsoft CORS documentation
Configuration
Component setup is done in the appsettings.{environment}.json file using the following structure:
 "Cors": //[], //Empty array allows all origins with the policy "CorsPolicy"
  [
    {
      "CorsPolicy": "CorsPolicy",
      "Origins": "http://localhost:4200,https://localhost:4200,http://localhost,https://localhost;http://localhost:8085,https://localhost:8085",
      "Headers": "accept,content-type,origin,x-custom-header,authorization",
      "Methods": "GET,POST,HEAD,PUT,DELETE",
      "AllowCredentials": true
    }
  ]
You may add as many policies as you like following the JSON format. for example:
 "Cors": //[], //Empty array allows all origins with the policy "CorsPolicy"
  [
    {
      "CorsPolicy": "FirstPolicy",
      "Origins": "http://localhost:4200",
      "Headers": "accept,content-type,origin,x-custom-header,authorization",
      "Methods": "GET,POST,DELETE",
      "AllowCredentials": true
    },
    {
      "CorsPolicy": "SecondPolicy",
      "Origins": "https://localhost:8085",
      "Headers": "accept,content-type,origin",
      "Methods": "GET,POST,HEAD,PUT,DELETE",
      "AllowCredentials": false
    }
  ]
In the following table all the configuration fields are described:
Property |
Description |
CorsPolicy |
Name of the policy |
Origins |
The origin’s url that you wish to accept. |
Headers |
Permitted request headers |
Methods |
Allowed Http methods |
AllowCredentials |
Set true to allow the exchange of credentials across origins |
Setting up in Devon
For setting it up using the Devon4NetApi template just configure it in the appsettings.{environment}.json file.
You can enable CORS per action, per controller, or globally for all Web API controllers in your application:
-
Add this annotation in the Controller Class you want to use CORS policy
[EnableCors("CorsPolicy")]As an example, consider this implementation on the EmployeeController class
namespace Devon4Net.Application.WebAPI.Implementation.Business.EmployeeManagement.Controllers
{
    /// <summary>
    /// Employees controller
    /// </summary>
    [ApiController]
    [Route("[controller]")]
    [EnableCors("CorsPolicy")]
    public class EmployeeController: ControllerBase
    {
      .
      .
      .
    }
}
The example above enables CORS for all the controller methods.
-
In the same way, you may enable CORS on any controller method:
[EnableCors("FirstPolicy")]
public async Task<ActionResult> GetEmployee()
{

}

public async Task<ActionResult> ModifyEmployee(EmployeeDto employeeDto)
{

}

[EnableCors("SecondPolicy")]
public async Task<ActionResult> Delete([Required]long employeeId)
{

}
The example above enables CORS for the GetEmployee and Delete method.
Setting up in other projects
Using the Package Manager Console, install the the next package on your solution:
install-package Devon4Net.Infrastructure.CorsAdd the following lines of code to Progam.cs:
builder.Services.SetupCors(builder.Configuration);
.
.
.
app.SetupCors();
Add the default configuration shown in the configuration section.
You can enable CORS per action, per controller, or globally for all Web API controllers in your application:
-
Add this annotation to the controller class that will be using the CORS policy.
[EnableCors("SamplePolicy")]
    public class SampleController: ControllerBase
    {
      .
      .
      .
    }
Where "SamplePolicy" is the name you give the Policy in the
appsettings.{environment}.json.The example above enables CORS for all the controller methods.
-
In the same way, you may enable any CORS-policy on any controller method:
[EnableCors("FirstPolicy")]
public async Task<ActionResult> GetSample()
{

}

public async Task<ActionResult> Modify(SampleDto sampleDto)
{

}

[EnableCors("SecondPolicy")]
public async Task<ActionResult> Delete([Required]long sampleId)
{

}
The example above enables CORS for the GetSample and Delete method.
Tips
-
If you specify the CORS in the
appsettings.{environment}.jsonconfiguration file as empty array, a default CORS-policy will be used with all origins enabled:
"Cors": [], //Empty array allows all origins with the policy "CorsPolicy"| Only use this policy in development environments |
This default CORS-policy is defined as "CorsPolicy," and it should be enabled on the Controller Class as a standard Policy:
[EnableCors("CorsPolicy")]
public IActionResult Index() {
    return View();
}-
if you want to disable the CORS check use the following annotation on any controller method:
[DisableCors]
public IActionResult Index() {
    return View();
}-
If you set the EnableCors attribute at more than one scope, the order of precedence is:
-
Action
-
Controller
-
Global
-
Devon4Net.Infrastructure.JWT
JSON Web Token (JWT) is an open standard (RFC 7519) that defines a compact and self-contained way for securely transmitting information between parties as a JSON object. This information can be verified and trusted because it is digitally signed. JWTs can be signed using a secret (with theHMACalgorithm) or a public/private key pair usingRSAorECDSA.
In other words, a JSON Web Token is a JSON object encoded into an encrypted string that can be decoded and verified making use of cryptographic methods and algorithms. This tokens are mostly used to authenticate users in the context of websites, web applications and web services, but they can also be used to securely exchange information between parties.
Configuration
Component configuration is made on file appsettings.{environment}.json as follows:
 "JWT": {
    "Audience": "devon4Net",
    "Issuer": "devon4Net",
    "ValidateIssuer": true,
    "ValidateIssuerSigningKey": true,
    "ValidateLifetime": true,
    "RequireSignedTokens": true,
    "RequireExpirationTime": true,
    "RequireAudience": true,
    "ClockSkew": 5,
    "Security": {
      "SecretKeyEncryptionAlgorithm": "",
      "SecretKey": "",
      "Certificate": "",
      "CertificatePassword": "",
      "CertificateEncryptionAlgorithm": "",
      "RefreshTokenEncryptionAlgorithm": ""
    }
  },
In the following list all the configuration fields are described:
-
Audience: Represents a valid audience that will be used to check against the token’s audience. -
Issuer: Represents a valid issuer that will be used to check against the token’s issuer. -
ValidateIssuer: Boolean that controls if validation of the Issuer is done. -
ValidateIssuerSigningKey: Boolean that controls if validation of the SecurityKey that signed the securityToken is called. -
ValidateLifetime: Boolean to control if the lifetime will be validated during token validation. -
RequireSignedTokens: Boolean that indicates wether a security token has to be signed oe not. -
RequireExpirationTime: Boolean that tells the handler if tokens need an expiration time specified or not. -
RequireAudience: Boolean that indicates tokens need to have an audience specified to be valid or not. -
ClockSkew: Expiration time in minutes. -
Security: Certificate properties will be found in this part.-
SecretKeyEncryptionAlgorithm: Algorithm used to encrypt the secret key. If no argument is specified,HmacSha512is used. -
SecretKey: Private key used to sign with the certificates. This key will be encrypted and hashed using the specified algorithm. -
Certificate: Name of certificate file or its path (if it is not in the same directory). If it doesn’t exist an exception will be raised. -
CertificatePassword: Password for the certificate selected. -
CertificateEncryptionAlgorithm: Algorithm used to encrypt the certificate. If no argument is specified,HmacSha512is used. -
RefreshTokenEncryptionAlgorithm: Algorithm used to encrypt the refresh token. If no argument is specified,HmacSha512is used.
-
There are two ways of using and creating tokens:
-
Secret key: A key to encrypt and decrypt the tokens is specified. This key will be encrypted using the specified algorithm.
-
Certificates: A certificate is used to manage token encryption and decryption.
| Because the secret key takes precedence over the other option, JWT with the secret key will be used if both configurations are supplied. |
Encryption algorithms
The supported and tested algorithms are the following:
Algorithm |
Value |
|
HS256 |
|
HS384 |
|
HS512 |
|
|
|
|
|
For the refresh token encryption algorithm you will be able to use any algoritm from the previous table and the following table:
Algorithm |
Value |
|
MD5 |
|
SHA |
| You will need to specify the name of the algorithm (shown in 'algorithm' column) when configuring the component. |
| Please check Windows Documentation to get the latest updates on supported encryption algorithms. |
Setting up in Devon
For setting it up using the Devon4NetApi template configure it in the appsettings.{environment}.json file.
You will need to add a certificate that will be used for signing the token, please check the documentation about how to create a new certificate and add it to a project if you are not aware of how it’s done.
Remember to configure your certificates in the JWT configuration.
Navigate to Devon4Net.Application.WebAPI.Implementation.Business.AuthManagement.Controllers. There you will find AuthController sample class which is responsible of generating the token thanks to login method.
public AuthController(IJwtHandler jwtHandler)
{
    JwtHandler = jwtHandler;
}
You can see how the IJwtHandler is injected in the constructor via its interface, which allows you to use its methods.
In the following piece of code, you will find how the client token is created using a variety of claims. In this case this end-point will be available to not identified clients thanks to the AllowAnonymous attribute. The client will also have a sample role asigned, depending on which it will be able to access some end-points and not others.
[AllowAnonymous]
.
.
.
var token = JwtHandler.CreateJwtToken(new List<Claim>
{
    new Claim(ClaimTypes.Role, AuthConst.DevonSampleUserRole),
    new Claim(ClaimTypes.Name,user),
    new Claim(ClaimTypes.NameIdentifier,Guid.NewGuid().ToString()),
});

return Ok(new LoginResponse { Token = token });
The following example will require clients to have the sample role to be able to use the end-point, thanks to the attribute Authorize with the Roles value specified.
It also shows how you can obtain information directly from the token using the JwtHandler injection.
[Authorize(AuthenticationSchemes = AuthConst.AuthenticationScheme, Roles = AuthConst.DevonSampleUserRole)]
.
.
.
//Get claims
var token = Request.Headers["Authorization"].ToString().Replace($"{AuthConst.AuthenticationScheme} ", string.Empty);
.
.
.
// Return result with claims values
var result = new CurrentUserResponse
{
    Id = JwtHandler.GetClaimValue(userClaims, ClaimTypes.NameIdentifier),
    UserName = JwtHandler.GetClaimValue(userClaims, ClaimTypes.Name),
    CorporateInfo = new List<CorporateBasicInfo>
    {
        new CorporateBasicInfo
        {
            Id = ClaimTypes.Role,
            Value = JwtHandler.GetClaimValue(userClaims, ClaimTypes.Role)
        }
    }
};

return Ok(result);| Please check devon documentation of Security and Roles to learn more about method attributtes. |
Setting up in other projects
Install the package on your solution using the Package Manager Console:
> install-package Devon4Net.Infrastructure.JWTConfigure swagger in Program.cs adding the following lines:
using Devon4Net.Application.WebAPI.Configuration;
.
.
.
builder.Services.SetupJwt(builder.Configuration);
At this moment you’ll need to have at least one certificate added to your project.
| Please read the documentation of how to create and add certificates to a project. |
Now we will configure the JWT component in appsettings.{environment}.json as shown in the next piece of code:
"JWT": {
    "Audience": "devon4Net",
    "Issuer": "devon4Net",
    "ValidateIssuer": true,
    "ValidateIssuerSigningKey": true,
    "ValidateLifetime": true,
    "RequireSignedTokens": true,
    "RequireExpirationTime": true,
    "RequireAudience": true,
    "ClockSkew": 5,
    "Security": {
      "SecretKeyLengthAlgorithm": "",
      "SecretKeyEncryptionAlgorithm": "",
      "SecretKey": "",
      "Certificate": "localhost.pfx",
      "CertificatePassword": "12345",
      "CertificateEncryptionAlgorithm": "HmacSha512",
      "RefreshTokenEncryptionAlgorithm": "Sha"
    }
  },
For using it, you will need a method that provides you a token. So lets create an AuthController controller and add those methods:
[Route("api/[controller]")]
[ApiController]
public class AuthController : ControllerBase
{
    private readonly IJwtHandler _jwtHandler;

    public AuthController(IJwtHandler jwtHandler)
    {
        _jwtHandler = jwtHandler;
    }

    [HttpGet]
    [Route("/Auth")]
    [AllowAnonymous]
    public IActionResult GetToken()
    {
        var token = _jwtHandler.CreateJwtToken(new List<Claim>
        {
            new Claim(ClaimTypes.Role, "MyRole"),
            new Claim(ClaimTypes.Name, "MyName"),
            new Claim(ClaimTypes.NameIdentifier, Guid.NewGuid().ToString()),
        });
        return Ok(token);
    }

    [HttpGet]
    [Route("/Auth/CheckToken")]
    [Authorize(AuthenticationSchemes = "Bearer", Roles = "MyRole")]
    public IActionResult CheckToken()
    {
        var token = Request.Headers["Authorization"].ToString().Replace($"Bearer ", string.Empty);
        var userClaims = _jwtHandler.GetUserClaims(token).ToList();
        var result = new
        {
            Id = _jwtHandler.GetClaimValue(userClaims, ClaimTypes.NameIdentifier),
            UserName = _jwtHandler.GetClaimValue(token, ClaimTypes.Name),
            Role = _jwtHandler.GetClaimValue(userClaims, ClaimTypes.Role)
        };
        return Ok(result);
    }
}
Reading the code of this controller you have to take in mind a few things:
-
IJwtHandlerclass is injected via dependency injection.-
string CreateClientToken(List<Claim> list)will allow you to create the token through a list of claims. The claims shown are hard-coded examples. -
List<Claim> GetUserClaims(string token)will allow you to get a list of claims given a token. -
string GetClaimValue(List<Claim> list, string claim)will allow you to get the value given the ClaimType and either a list of claims or a token thanks to thestring GetClaimValue(string token, string claim)overload.
-
-
[AllowAnonymous]attribute will allow access any client without authentication. -
[Authorize(AuthenticationSchemes = "Bearer", Roles = "MyRole")]attribute will allow any client authenticated with a bearer token and the role"MyRole".
Devon4Net.Infrastructure.LiteDb
LiteDb is an open-source NoSQL embedded database for .NET. Is a document store inspired by MongoDB database. It stores data in documents, which are JSON objects containing key-value pairs. It uses BSON which is a Binary representation of JSON with additional type information.
One of the advantages of using this type of NoSQL database is that it allows the use of asynchronous programming techniques following ACID properties on its transactions. This properties are: Atomicity, Consistency, Isolation and Durability, and they ensure the highest possible data reliability and integrity. This means that you will be able to use async/await on your operations.
Configuration
The component configuration can be done in appsettings.{environment}.json with the following section:
"LiteDb": {
  "EnableLiteDb": true,
  "DatabaseLocation": "devon4net.db"
}-
EnableLiteDb: Boolean to activate the use of LiteDb. -
DatabaseLocation: Relative path of the file containing all the documents.
Setting up in Devon
For setting it up using the Devon4Net WebApi template just configure it in the appsettings.{environment}.json.
Then you will need to inject the repositories. For that go to Devon4Net.Application.WebAPI.Implementation.Configuration.DevonConfiguration and add the folowing lines in SetupDependencyInjection method:
using Devon4Net.Infrastructure.LiteDb.Repository;
.
.
.
services.AddTransient(typeof(IRepository<>), typeof(Repository<>));
Now you can use the IRepository<T> by injecting it wherever you want to use it. T will be the entity you will be working with in the repository.
private readonly IRepository<Todo> _todoRepository;

public TodoController(IRepository<Todo> todoRepository)
{
    _todoRepository = todoRepository;
}
Setting up in other projects
For setting it up in other projects install it running the following command in the Package Manager Console, or using the Package Manager in Visual Studio:
install-package Devon4Net.Infrastructure.LiteDbNow set the configuration in the appsettings.{enviroment}.json:
"LiteDb": {
  "EnableLiteDb": true,
  "DatabaseLocation": "devon_database.db"
}
Remember to set EnableLiteDb to true.
|
Navigate to your Program.cs file and add the following line to configure the component:
using Devon4Net.Application.WebAPI.Configuration;
.
.
.
builder.Services.SetupLiteDb(builder.Configuration);
You will need also to add the repositories you will be using to your services, either by injecting the generic:
builder.Services.AddTransient(typeof(IRepository<>), typeof(Repository<>));Or by choosing to inject them one by one:
builder.Services.AddTransient<IRepository<WeatherForecast>, Repository<WeatherForecast>>();Now you will be able to use the repositories in your class using dependency injection, for example:
[ApiController]
[Route("[controller]")]
public class WeatherForecastController : ControllerBase
{
    private readonly IRepository<WeatherForecast> _weatherForecastRepository;

    public WeatherForecastController(IRepository<WeatherForecast> weatherForecastRepository)
    {
        _weatherForecastRepository = weatherForecastRepository;
    }

    [HttpGet]
    public IEnumerable<WeatherForecast> Get()
    {
        return _weatherForecastRepository.Get();
    }

    [HttpPost]
    public IEnumerable<WeatherForecast> PostAndGetAll(WeatherForecast weatherForecast)
    {
        _weatherForecastRepository.Create(weatherForecast);
        return _weatherForecastRepository.Get();
    }
}
Devon4Net.Infrastructure.Kafka
Apache Kafka is an open-source distributed event streaming platform. Event streaming is the practice of capturing a stream of events and store it for later being able to retrieve it for processing it in the desired form. It guarantees a continuous flow of data between components in a distributed system. You can think of it as a data bus where components of a system can publish some events and can subscribe to others, the following diagram shows perfectly how the system works:
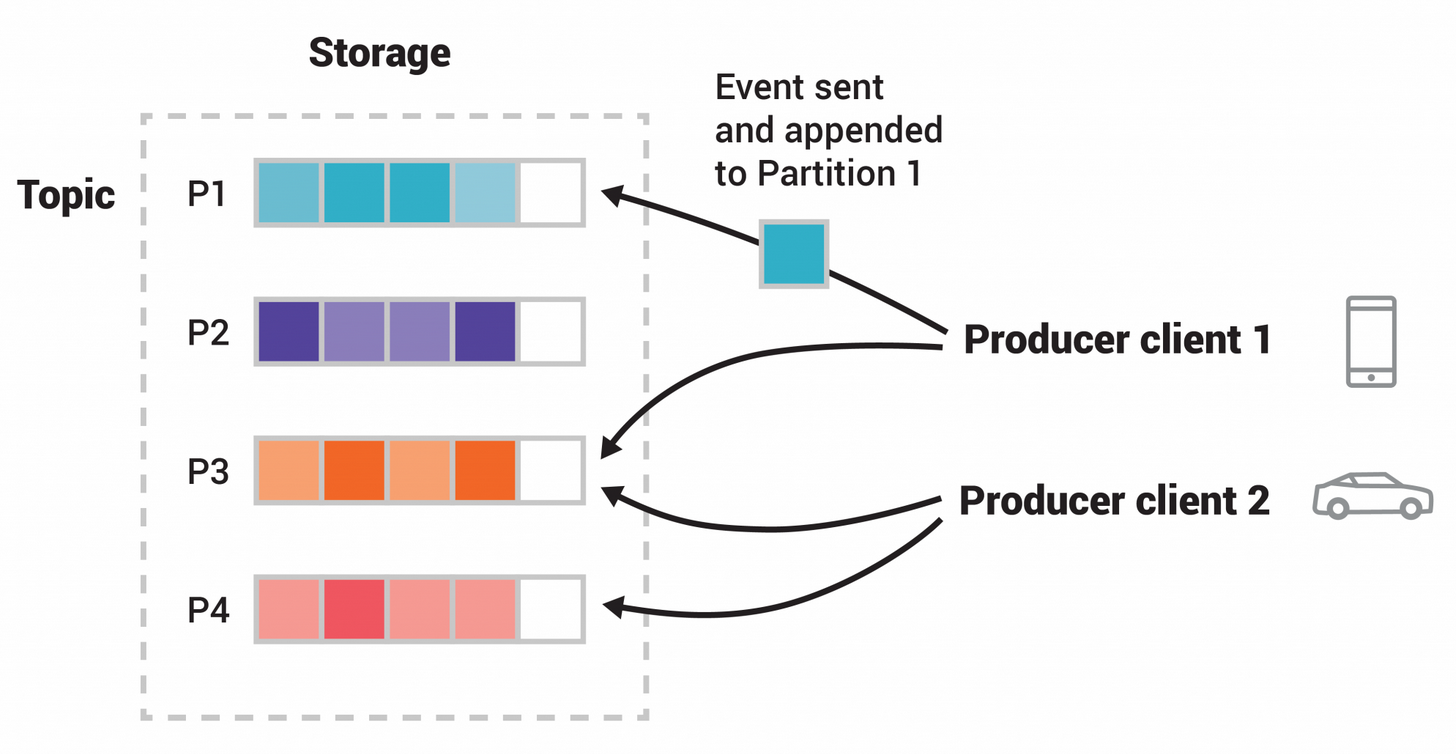
In the image you can see how an event is sent to the Kafka server. This Event is a record of an action that happened and typically contains a key, value, timestamp and some metadata.
This events are published by Producers, who are those client applications that write to Kafka; and readed and processed by Consumers, who are the clients subscribed to the different topics.
Topics are the organization type of Kafka events, similar to a folder on a filesystem, being events the files in that folder. Unlike message queues, Kafka events are not deleted after being read. Instead you can choose how much time should Kafka keep track of the events.
Other interesting concepts about Kafka are:
-
Partitions: Topics are divided into partitions. When a new event is published to a topic, it is actually appended to one of the topic’s partitions. Events with the same event key are written to the same partition.
-
Replication: To make your data fault-tolerant and highly-available, every topic can be replicated so that there are always multiple brokers that have a copy of the data just in case things go wrong.
Configuration
The component configuration can be done in appsettings.{environment}.json with the following section:
"Kafka": {
    "EnableKafka": true,
    "Administration": [
      {
        "AdminId": "Admin1",
        "Servers": "127.0.0.1:9092"
      }
    ],
    "Producers": [
      {
        "ProducerId": "Producer1",
        "Servers": "127.0.0.1:9092",
        "ClientId": "client1",
        "Topic": "devonfw",
        "MessageMaxBytes": 1000000,
        "CompressionLevel": -1,
        "CompressionType": "None",
        "ReceiveMessageMaxBytes": 100000000,
        "EnableSslCertificateVerification": false,
        "CancellationDelayMaxMs": 100,
        "Ack": "None",
        "Debug": "",
        "BrokerAddressTtl": 1000,
        "BatchNumMessages": 1000000,
        "EnableIdempotence": false,
        "MaxInFlight": 5,
        "MessageSendMaxRetries": 5,
        "BatchSize": 100000000
      }
    ],
    "Consumers": [
      {
        "ConsumerId": "Consumer1",
        "Servers": "127.0.0.1:9092",
        "GroupId": "group1",
        "Topics": "devonfw",
        "AutoCommit": true,
        "StatisticsIntervalMs": 0,
        "SessionTimeoutMs": 10000,
        "AutoOffsetReset": "Largest",
        "EnablePartitionEof": true,
        "IsolationLevel": "ReadCommitted",
        "EnableSslCertificateVerification": false,
        "Debug": ""
      }
    ]
}-
EnableKafka: Boolean to activate the use of Apache Kafka. -
Administration:-
AdminId: Admin Identifier -
Servers: Host address and port number in the form ofhost:port.
-
-
Producers: List of all kafka producers configuration.-
ProducerId: Identifier of the producer in devon. -
Servers: Host address and port number in the form ofhost:port. -
ClientId: Identifier of the client in Kafka. -
Topic: Topics where the event will be delivered. -
MessageMaxBytes: Maximum Kafka protocol request message size. Due to differing framing overhead between protocol versions the producer is unable to reliably enforce a strict max message limit at produce time and may exceed the maximum size by one message in protocol ProduceRequests, the broker will enforce the the topic’smax.message.byteslimit (see Apache Kafka documentation). -
CompressionLevel: Compression level parameter for algorithm selected by configuration property compression.codec. Higher values will result in better compression at the cost of more CPU usage. Usable range is algorithm-dependent:[0-9] for gzip; [0-12] for lz4; only 0 for snappy; -1 = codec-dependent
Default is
-1. -
CompressionType: compression codec to use for compressing message sets. This is the default value for all topics, may be overridden by the topic configuration property compression.codec. Types are:None,Gzip,Snappy,Lz4,Zstd. Default isNone. -
ReceiveMessageMaxBytes: Maximum Kafka protocol response message size. Default is100000000. -
EnableSslCertificateVerification: Enable OpenSSL’s builtin broker (server) certificate verification. Default istrue. -
CancellationDelayMaxMs: The maximum time in milliseconds before a cancellation request is acted on. Low values may result in measurably higher CPU usage. Default is100. -
Ack:Value
Description
None- defaultBroker does not send any response/ack to client
LeaderThe leader will write the record to its local log but will respond without awaiting full acknowledgement from all followers
AllBroker will block until message is committed by all in sync replicas (ISRs). If there are less than min.insync.replicas (broker configuration) in the ISR set the produce request will fail
Default is
None. -
Debug: A comma-separated list of debug contexts to enable. Detailed Producer debugging: broker,topic,msg. Consumer: consumer,cgrp,topic,fetch -
BrokerAddressTtl: How long to cache the broker address resolving results in milliseconds. -
BatchNumMessages: Maximum size (in bytes) of all messages batched in one MessageSet, including protocol framing overhead. This limit is applied after the first message has been added to the batch, regardless of the first message’s size, this is to ensure that messages that exceedbatch.sizeare produced. The total MessageSet size is also limited bybatch.num.messagesandmessage.max.bytes -
EnableIdempotence: When set totrue, the producer will ensure that messages are successfully produced exactly once and in the original produce order. The following configuration properties are adjusted automatically (if not modified by the user) when idempotence is enabled:max.in.flight.requests.per.connection=5(must be less than or equal to 5),retries=INT32_MAX(must be greater than 0),acks=all,queuing.strategy=fifo. Producer instantation will fail if user-supplied configuration is incompatible -
MaxInFlight: Maximum number of in-flight requests per broker connection. This is a generic property applied to all broker communication, however it is primarily relevant to produce requests. In particular, note that other mechanisms limit the number of outstanding consumer fetch request per broker to one. Default is5. -
MessageSendMaxRetries: How many times to retry sending a failing Message. Default is5. -
BatchSize: Maximum size (in bytes) of all messages batched in one MessageSet, including protocol framing overhead. This limit is applied after the first message has been added to the batch, regardless of the first message’s size, this is to ensure that messages that exceed batch.size are produced. The total MessageSet size is also limited by batch.num.messages andmessage.max.bytes. Default is1000000.
-
-
Consumers: List of consumers configurations.-
ConsumerId: Identifier of the consumer for devon. -
Servers: Host address and port number in the form ofhost:port. -
GroupId: Client group id string. All clients sharing the same group.id belong to the same group. -
Topics: Topics where the event will be read from. -
AutoCommit: Automatically and periodically commit offsets in the background. Note: setting this to false does not prevent the consumer from fetching previously committed start offsets. To circumvent this behaviour set specific start offsets per partition in the call to assign() -
StatisticsIntervalMs: librdkafka statistics emit interval. The application also needs to register a stats callback usingrd_kafka_conf_set_stats_cb(). The granularity is 1000ms. A value of 0 disables statistics -
SessionTimeoutMs: Client group session and failure detection timeout. The consumer sends periodic heartbeats (heartbeat.interval.ms) to indicate its liveness to the broker. If no hearts are received by the broker for a group member within the session timeout, the broker will remove the consumer from the group and trigger a rebalance. Default is0. -
AutoOffsetReset: Action to take when there is no initial offset in offset store or the desired offset is out of range: 'smallest','earliest' - automatically reset the offset to the smallest offset, 'largest','latest' - automatically reset the offset to the largest offset, 'error' - trigger an error which is retrieved by consuming messages and checking 'message->err' -
EnablePartitionEof: Verify CRC32 of consumed messages, ensuring no on-the-wire or on-disk corruption to the messages occurred. This check comes at slightly increased CPU usage -
IsolationLevel: Controls how to read messages written transactionally:ReadCommitted- only return transactional messages which have been committed.ReadUncommitted- return all messages, even transactional messages which have been aborted. -
EnableSslCertificateVerification: Enable OpenSSL’s builtin broker (server) certificate verification. Default istrue. -
Debug: A comma-separated list of debug contexts to enable. Detailed Producer debugging: broker,topic,msg. Consumer: consumer,cgrp,topic,fetch
-
Setting up in Devon
For setting it up using the Devon4Net WebApi template just configure it in the appsettings.Development.json. You can do this by copying the previously showed configuration with your desired values.
| Please refer to the "How to use Kafka" and "Kafka template" documentation to learn more about Kafka. |
Setting up in other projects
For setting it up in other projects install it running the following command in the Package Manager Console, or using the Package Manager in Visual Studio:
install-package Devon4Net.Infrastructure.KafkaThis will install all the packages the component needs to work properly. Now set the configuration in the appsettings.{enviroment}.json:
"Kafka": {
    "EnableKafka": true,
    "Administration": [
      {
        "AdminId": "Admin1",
        "Servers": "127.0.0.1:9092"
      }
    ],
    "Producers": [
      {
        "ProducerId": "Producer1",
        "Servers": "127.0.0.1:9092",
        "ClientId": "client1",
        "Topic": "devonfw",
        "MessageMaxBytes": 1000000,
        "CompressionLevel": -1,
        "CompressionType": "None",
        "ReceiveMessageMaxBytes": 100000000,
        "EnableSslCertificateVerification": false,
        "CancellationDelayMaxMs": 100,
        "Ack": "None",
        "Debug": "",
        "BrokerAddressTtl": 1000,
        "BatchNumMessages": 1000000,
        "EnableIdempotence": false,
        "MaxInFlight": 5,
        "MessageSendMaxRetries": 5,
        "BatchSize": 100000000
      }
    ],
    "Consumers": [
      {
        "ConsumerId": "Consumer1",
        "Servers": "127.0.0.1:9092",
        "GroupId": "group1",
        "Topics": "devonfw",
        "AutoCommit": true,
        "StatisticsIntervalMs": 0,
        "SessionTimeoutMs": 10000,
        "AutoOffsetReset": "Largest",
        "EnablePartitionEof": true,
        "IsolationLevel": "ReadCommitted",
        "EnableSslCertificateVerification": false,
        "Debug": ""
      }
    ]
  }
Navigate to your Program.cs file and add the following lines to configure the component:
using Devon4Net.Application.WebAPI.Configuration;
.
.
.
builder.Services.SetupKafka(builder.Configuration);
As you will be able to tell, the process is very similar to installing other components. Doing the previous actions will allow you to use the different handlers available with kafka. You can learn more
| Please refer to the "How to use Kafka" and "Kafka template" documentation to learn more about Kafka. |
Devon4Net.Infrastructure.Grpc
As you may know at this point in Grpc communication two parties are involved: the client and the server. The server provides an implementation of a service that the client can access. Both have access to a file that acts as a contract between them, this way each of them can be written in a different language. This file is the protocol buffer.
To learn more you can read "Grpc Template" and "How to use Grpc" in devon documentation or forward to gRPC official site.
Configuration
Grpc server
The server does not need any type of specific configuration options other than the certificates, headers or other components that need to be used in the same project.
Grpc Client
On the other hand, the client needs the following configuration on the appsettings.{environment}.json file:
"Grpc" : {
    "EnableGrpc": true,
    "UseDevCertificate": true,
    "GrpcServer": "https://localhost:5002",
    "MaxReceiveMessageSize": 16,
    "RetryPatternOptions": {
      "MaxAttempts": 5,
      "InitialBackoffSeconds": 1,
      "MaxBackoffSeconds": 5,
      "BackoffMultiplier": 1.5,
      "RetryableStatus": "Unavailable"
    }
}-
EnableGrpc: Boolean to enable the use of Grpc component. -
UseDevCertificate: Boolean to bypass validation of client certificate. Only for development purposes. -
GrpcServer: Grpc server host and port number in the form ofHost:Port -
MaxReceiveMessageSize: Maximum size of message that can be received by the server in MB. -
RetryPatternOptions: Options for the retry pattern applied when communicating with the server.-
MaxAttempts: Maximum number of communication attempts. -
InitialBackoffSeconds: Initial delay time for next try in seconds. A randomized delay between 0 and the current backoff value will determine when the next retry attempt is made. -
MaxBackoffSeconds: Maximum time in seconds that work as an upper limit on exponential backoff growth. -
BackoffMultiplier: The backoff time will be multiplied by this number in its growth. -
RetryableStatus: Status of the requests that may be retried.Status
Code
OK
0
Cancelled
1
Unknown
2
InvalidArgument
3
DeadlineExceeded
4
NotFound
5
AlreadyExists
6
PermissionDenied
7
Unauthenticated
0x10
ResourceExhausted
8
FailedPrecondition
9
Aborted
10
OutOfRange
11
Unimplemented
12
Internal
13
Unavailable
14
DataLoss
0xF
-
For macOS and older versions of Windows systems such as Windows 7, please disable TLS from the kestrel configuration in the appsettings.json. HTTP/2 without TLS should only be used during app development. Production apps should always use transport security. For more information, Refer to How to: Create a new devon4net project section for more information.
|
Setting up in Devon
Grpc Server
For setting up a Grpc server in a devon project you will need to first create the service that implements the contract specified in the proto file. Below an example of service is shown:
[GrpcDevonServiceAttribute]
public class GreeterService : Greeter.GreeterBase
{
    public GreeterService() { }

    public override Task<HelloReply> SayHello(HelloRequest request, ServerCallContext context)
    {
        return Task.FromResult(new HelloReply
        {
            Message = "Hello " + request.Name
        });
    }
}
This previous example of service will be extending the following protocol buffer (.proto file):
syntax = "proto3";
option csharp_namespace = "Devon4Net.Application.GrpcServer.Protos";
package greet;

service Greeter {
  rpc SayHello (HelloRequest) returns (HelloReply);
}

message HelloRequest {
  string name = 1;
}

message HelloReply {
  string message = 1;
}
Once you have all your services created you will need to add them as Grpc services on your server. All of the services marked with the GrpcDevonService attribute will be automatically added, but you need to specify the assembly names where they are implemented. For that you can modify the following lines in the Program.cs file:
app.SetupGrpcServices(new List<string> { "Devon4Net.Application.GrpcServer" });SetupGrpcServices method will accept a list of assembly names so feel free to organize your code as desired.
Grpc Client
In the client side, you will need to add the configuration with your own values on the appsettings.{environment}.json file, for that copy the configuration JSON shown in the previous part and add your own values.
Everything is ready if you are using the template. So next step will be use the GrpcChanel via dependency injection and use the service created before as shown:
[ApiController]
[Route("[controller]")]
public class GrpcGreeterClientController : ControllerBase
{
    private GrpcChannel GrpcChannel { get; }

    public GrpcGreeterClientController(GrpcChannel grpcChannel)
    {
        GrpcChannel = grpcChannel;
    }

    [HttpGet]
    [ProducesResponseType(typeof(HelloReply), StatusCodes.Status200OK)]
    [ProducesResponseType(StatusCodes.Status400BadRequest)]
    [ProducesResponseType(StatusCodes.Status404NotFound)]
    [ProducesResponseType(StatusCodes.Status500InternalServerError)]
    public async Task<HelloReply> Get(string name)
    {
        try
        {
            var client = new Greeter.GreeterClient(GrpcChannel);
            return await client.SayHelloAsync(new HelloRequest { Name = name }).ResponseAsync.ConfigureAwait(false);
        }
        catch (Exception ex)
        {
            Devon4NetLogger.Error(ex);
            throw;
        }
    }
}
Setting up in other projects
Grpc Server
For setting up a Grpc server in other projects you will need to install the component running the following command in the Package Manager Console, or using the Package Manager in Visual Studio:
install-package Devon4Net.Infrastructure.GrpcThis will install all the packages the component needs to work properly. Navigate to your Program.cs file and add the following lines to configure the component.
using Devon4Net.Infrastructure.Grpc;
.
.
.
builder.Services.AddGrpc();
You will need to add the assembly names for the services you created in the following line, so they can be automatically deployed to your server:
app.SetupGrpcServices(new List<string> { "Devon4Net.Application.GrpcServer" });| Please refer to "Grpc template" and "How to use Grpc" documentation to learn more. |
Grpc Client
For setting up a Grpc client in other projects you will need to install the component running the following command in the Package Manager Console, or using the Package Manager in Visual Studio:
install-package Devon4Net.Infrastructure.GrpcNow set the configuration in the appsettings.{enviroment}.json file as follows:
"Grpc" : {
    "EnableGrpc": true,
    "UseDevCertificate": true,
    "GrpcServer": "https://localhost:5002",
    "MaxReceiveMessageSize": 16,
    "RetryPatternOptions": {
      "MaxAttempts": 5,
      "InitialBackoffSeconds": 1,
      "MaxBackoffSeconds": 5,
      "BackoffMultiplier": 1.5,
      "RetryableStatus": "Unavailable"
    }
}
Navigate to your Program.cs file and add the following lines to configure the component:
using Devon4Net.Infrastructure.Grpc;
.
.
.
builder.Services.SetupGrpc(builder.Configuration);
Following this steps will allow you to use GrpcChannel via dependency injection in your classes, so you can call any procedure through Grpc communication.
Devon4Net.Infrastructure.FluentValidation
Validation is an automatic check to ensure that data entered is sensible and feasible. It is critical to add validation for data inputs when programming. This avoids unexpected or anomalous data from crashing your application and from obtaining unrealistic garbage outputs.
In the following table some validation methods are described:
Validation Method |
Description |
Range check |
Checks if the data is inside a given range. |
Type check |
Checks that the data entered is of an expected type |
Length check |
Checks the number of characters meets expectations |
Presence check |
Checks that the user has at least inputted something |
Check digit |
An additional digit added to a number that is computed from the other digits; this verifies that the remainder of the number has been input correctly. |
FluentValidation is a.NET library that allows users to create strongly-typed validation rules.
Setting up in Devon
To establish a set of validation criteria for a specific object, build a class that inherits from CustomFluentValidator<T>, where T is the type of class to validate. For example:
public class EmployeeFluentValidator : CustomFluentValidator<Employee>
    {
    }
Where Employee is the class to validate.
Create a constructor for this class that will handle validation exceptions, and override the CustomValidate() method from the CustomFluentValidator<T> class to include the validation rules.
public class EmployeeFluentValidator : CustomFluentValidator<Employee>
    {
        /// <summary>
        ///
        /// </summary>
        /// <param name="launchExceptionWhenError"></param>
        public EmployeeFluentValidator(bool launchExceptionWhenError) : base(launchExceptionWhenError)
        {
        }

        /// <summary>
        ///
        /// </summary>
        public override void CustomValidate()
        {
            RuleFor(Employee => Employee.Name).NotNull();
            RuleFor(Employee => Employee.Name).NotEmpty();
            RuleFor(Employee => Employee.SurName).NotNull();
            RuleFor(Employee => Employee.Surname).NotEmpty();
        }
    }
In this example, we want Employee entity to not accept Null or empty data. We can notice this error if we do not enter the needed data:

We can also develop Custom Validators by utilizing the Predicate Validator to define a custom validation function. In the example above we can add:
 RuleFor(x => x.Todos).Must(list => list.Count < 10)
      .WithMessage("The list must contain fewer than 10 items");
This rule restricts the Todo List from having more than ten items.
| For more information about Validators (Rules, Custom Validators, etc…) please refer to this link |
Setting up in other projects
Install the package on your solution using the Package Manager Console:
install-package Devon4Net.Infrastructure.FluentValidationFollow the instructions described in the previous section.
References
Devon4Net.Infrastructure.Common
Library that contains common classes to manage the web api template configuration.
The main classes are described in the table below:
Folder |
Classes |
Description |
Common |
AutoRegisterData.cs |
Contains the data supplied between the various stages of the AutoRegisterDi extension methods |
Http |
ProtocolOperation.cs |
Contains methods to obtain the Http or Tls protocols |
IO |
FileOperations.cs |
Contains methods for managing file operations. |
Constants |
AuthConst.cs |
Default values for AuthenticationScheme property in the JwtBearerAuthenticationOptions |
Enums |
MediaType.cs |
Static class providing constants for different media types for the CircuitBreaker Handlers. |
Exceptions |
HttpCustomRequestException.cs |
Public class that enables to create Http Custom Request Exceptions |
Exceptions |
IWebApiException.cs |
Interface for webapi exceptions |
Handlers |
OptionsHandler.cs |
Class with a method for retrieving the configuration of the components implementing the options pattern |
Helpers |
AutoRegisterHelpers.cs |
Contains the extension methods for registering classes automatically |
Helpers |
StaticConstsHelper.cs |
Assists in the retrieval of an object’s value through reflection |
Options pattern
The options pattern uses classes to provide strongly typed access to groups of related settings.
It is usually preferable to have a group of related settings packed together in a highly typed object rather than simply a plain key-value pair collection.
For the other hand strong typing will always ensure that the configuration settings have the required data types.
Keeping related settings together ensures that the code meets two crucial design criteria: encapsulation and separation of concerns.
| If you require more information of the options pattern, please see the official Microsoft documentation. |
On this component, we have an Options folder that has the classes with all the attributes that store all of the configuration parameters.
Devon4Net.Infrastructure.Extensions
Miscellaneous extension library which contains :
-
ObjectTypeHelper
-
JsonHelper
-
GuidExtension
-
HttpContextExtensions
-
HttpRequestExtensions
ObjectTypeHelper
Provides a method for converting an instance of an object in the type of an object of a specified class name.
JsonHelper (Json Serializer)
Serialization is the process of transforming an object’s state into a form that can be saved or transmitted. Deserialization is the opposite of serialization in that it transforms a stream into an object. These procedures, when combined, allow data to be stored and transferred.
| More information about serializacion may be found in the official Microsoft documentation. |
This helper is used in the devon4net components CircuitBreaker, MediatR, and RabbitMQ.
GuidExtension
This class has basic methods for managing GUIDs. Some devon4net components, such as MediatR or RabbitMQ, implement it in their Backup Services.
HttpContextExtensions
Provides methods for managing response headers for example:
-
TryAddHeadermethod is used ondevon4Net.Infrastructure.Middlewarecomponent to add automatically response header options such authorization. -
TryRemoveHeadermethod is used ondevon4Net.Infrastructure.Middlewarecomponent to remove automatically response header such AspNetVersion header.
HttpRequestExtensions
Provides methods for obtaining Culture and Language information from a HttpRequest object.
Configuration
Install the package on your solution via Package Manager Console by running the following command:
Install-Package devon4Net.Infrastructure.ExtensionsDevon4Net.Infrastructure.MediatR
This component employs the MediatR library, which is a tool for implementing CQRS and Mediator patterns in .Net.
MediatR handles the decoupling of the in-process sending of messages from handling messages.
Patterns
-
Mediator pattern:
The mediator pattern is a behavioral design pattern that aids in the reduction of object dependencies. The pattern prevents the items from communicating directly with one another, forcing them to collaborate only through a mediator object. Mediator is used to decrease the communication complexity between multiple objects or classes. This pattern offers a mediator class that manages all communications between distinct classes and allows for easy code maintenance through loose coupling.
-
CQRS pattern:
The acronym CQRS stands for Command and Query Responsibility Segregation, and it refers to a design that separates read and update processes for data storage. By incorporating CQRS into your application, you may improve its performance, scalability, and security. The flexibility gained by moving to CQRS enables a system to grow more effectively over time and prevents update instructions from triggering merge conflicts at the domain level.
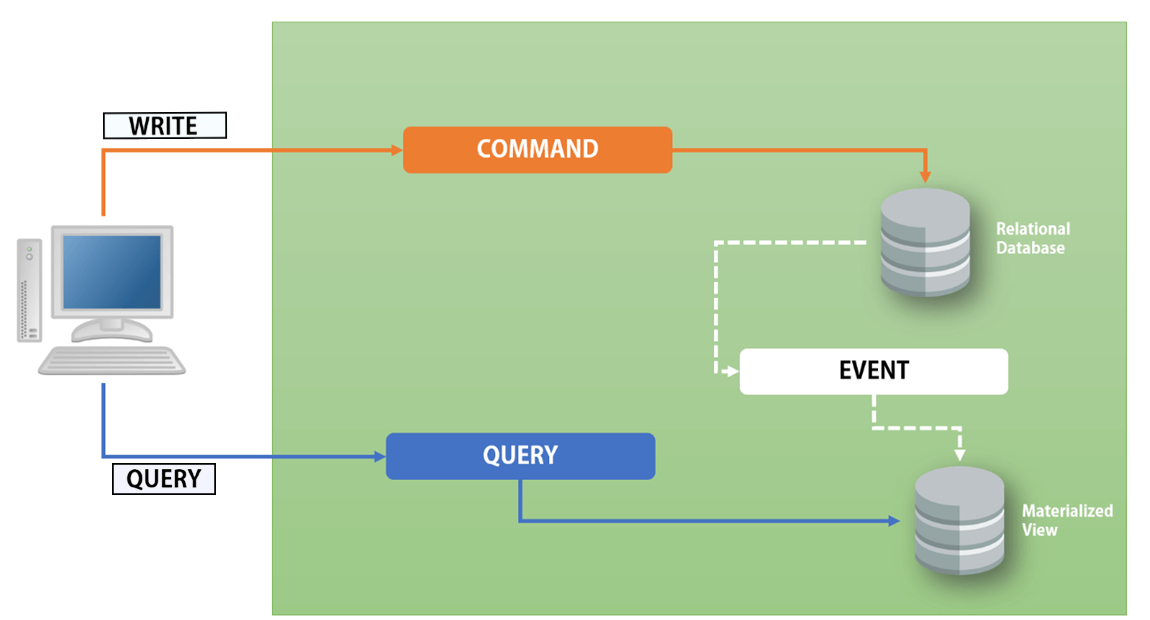 Figure 136. CQRS Diagram
In this figure, we can see how we may implement this design by utilizing a Relational Database for Write operations and a Materialized view of this Database that is synchronized and updated via events.
Key Classes
In MediatR, you build a basic class that is identified as an implementation of the IRequest or IAsyncRequest interface.
All of the properties that are required to be in the message will be defined in your message class.
In the case of this component the messages are created in the ActionBase<T> class:
public class ActionBase<T> : IRequest<T> where T : class
    {
        public DateTime Timestamp { get; }
        public string MessageType { get; }
        public Guid InternalMessageIdentifier { get; }

        protected ActionBase()
        {
            Timestamp = DateTime.Now;
            InternalMessageIdentifier = Guid.NewGuid();
            MessageType = GetType().Name;
        }
    }
This ActionBase<T> class is then inherited by the CommandBase<T> and QueryBase<T> classes.
Now that we’ve built a request message, we can develop a handler to reply to any messages of that type. We must implement the IRequestHandler or IAsyncRequestHandler interfaces, describing the input and output types.
In the case of this component MediatrRequestHandler<TRequest, TResponse> abstract class is used for making this process generecic
public abstract class MediatrRequestHandler<TRequest, TResponse> : IRequestHandler<TRequest, TResponse> where TRequest : IRequest<TResponse>This interface defines a single method called Handle, which returns a Task of your output type.
This expects your request message object as an argument. In the MediatrRequestHandler<TRequest, TResponse> class has been implemented in this way.
public async Task<TResponse> Handle(TRequest request, CancellationToken cancellationToken)
        {
            MediatrActions status;
            TResponse result = default;
            try
            {
                result = await HandleAction(request, cancellationToken).ConfigureAwait(false);
                status = MediatrActions.Handled;
            }
            catch (Exception ex)
            {
                Devon4NetLogger.Error(ex);
                status = MediatrActions.Error;
            }
            await BackUpMessage(request, status).ConfigureAwait(false);
            return result;
        }
The HandleAction method is defined in the following lines:
public abstract Task<TResponse> HandleAction(TRequest request, CancellationToken cancellationToken);This method should be overridden in the application’s business layer Handlers.
Configuration
Component configuration is made on file appsettings.{environment}.json as follows:
  "MediatR": {
    "EnableMediatR": true,
    "Backup": {
      "UseLocalBackup": true,
      "DatabaseName": "devon4netMessageBackup.db"
    }
  },
Property |
Description |
EnableMediatR |
True for enabling the use of MediatR component |
UseLocalBackup |
True for using a LiteDB database as a local backup for the |
DatabaseName |
The name of the LiteDB database |
Setting up in Devon
For setting it up using the Devon4NetApi template just configure it in the appsettings.{environment}.json file.
A template is available in the MediatRManagement folder of the Devon4Net.Application.WebAPI.Implementation Business Layer:
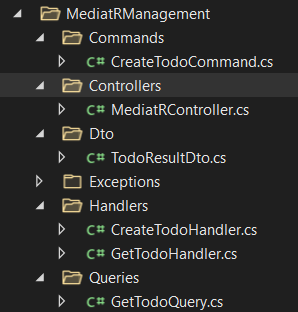
As we can see, this example adheres to the CQRS pattern structure, with Commands for writing methods and Queries for reading operations, as well as one handler for each method:
-
CreateTodoCommand.cs:public class CreateTodoCommand : CommandBase<TodoResultDto> { public string Description { get; set; } public CreateTodoCommand(string description) { Description = description; } }The CreateTodoCommand inherits from
CommandBase<T>, in this situation, the request message’s additional properties, such asDescriptionof theTodoentity, will be included. -
GetTodoQuery.cs:public class GetTodoQuery : QueryBase<TodoResultDto> { public long TodoId{ get; set; } public GetTodoQuery(long todoId) { TodoId = todoId; } }Because GetTodoQuery inherits from
QueryBase<T>, anTodoIdof theTodoobject will be attached to the message’s properties in this case. -
CreateTodoHandler.cs:public class CreateTodoHandler : MediatrRequestHandler<CreateTodoCommand, TodoResultDto> { private ITodoService TodoService { get; set; } public CreateTodoHandler(ITodoService todoService, IMediatRBackupService mediatRBackupService, IMediatRBackupLiteDbService mediatRBackupLiteDbService) : base(mediatRBackupService, mediatRBackupLiteDbService) { Setup(todoService); } public CreateTodoHandler(ITodoService todoService, IMediatRBackupLiteDbService mediatRBackupLiteDbService) : base(mediatRBackupLiteDbService) { Setup(todoService); } public CreateTodoHandler(ITodoService todoService, IMediatRBackupService mediatRBackupService) : base(mediatRBackupService) { Setup(todoService); } private void Setup(ITodoService todoService) { TodoService = todoService; } public override async Task<TodoResultDto> HandleAction(CreateTodoCommand request, CancellationToken cancellationToken) { var result = await TodoService.CreateTodo(request.Description).ConfigureAwait(false); return new TodoResultDto { Id = result.Id, Done = result.Done, Description = result.Description }; } }This class must to inherit from
MediatrRequestHandler<TRequest, TResponse>class that is explained above. On first place we inject the TodoService via dependency injection using theSetup(ITodoService todoService)method, and then we overload theHandleAction(TRequest request, CancellationToken cancellationToken)method calling the service and returning the new DTO -
GetTodoHandler.cs:All handlers may be configured using the same structure as
CreateTodoHandler.cs.To do the required operation, just change the method called by the service.
Setting up in other projects
Install the package in your solution using the Package Manager Console:
Install-Package Devon4Net.Infrastructure.MediatRCreate a Configuration static class in order to add the IRequestHandler services, for example:
 public static class Configuration
    {

        public static void SetupDependencyInjection(this IServiceCollection services, IConfiguration configuration)
        {

            var mediatR = serviceProvider.GetService<IOptions<MediatROptions>>();

            if (mediatR?.Value != null && mediatR.Value.EnableMediatR)
            {
                SetupMediatRHandlers(services);
            }
        }

        private static void SetupMediatRHandlers(IServiceCollection services)
        {
            services.AddTransient(typeof(IRequestHandler<GetTodoQuery, TodoResultDto>), typeof(GetTodoHandler));
            services.AddTransient(typeof(IRequestHandler<CreateTodoCommand, TodoResultDto>), typeof(CreateTodoHandler));
        }
    }
Add the following lines in the Program.cs class:
builder.Services.SetupMediatR(builder.Configuration);
builder.Services.SetupDependencyInjection(builder.Configuration);
After adding the default settings provided in the configuration section, you may use the MediatR component in your code.
Devon4Net.Infrastructure.RabbitMQ
RabbitMQ is an open-source message-broker software (also known as message-oriented middleware) that was developed to support the Advanced Message Queuing Protocol (AMQP) and has since been expanded with a plug-in architecture to support the Streaming Text Oriented Messaging Protocol (STOMP), MQ Telemetry Transport (MQTT), and other protocols.
In RabbitMQ, queues are defined to store messages sent by producers until they are received and processed by consumer applications.
Patterns
-
Publisher-Subscriber pattern
Publish-Subscribe is a design pattern that allows loose coupling between the application components.
Message senders, known as publishers, do not configure the messages to be sent directly to specific receivers, known as subscribers. Messages are released with no information of what they are or if any subscribers to that information exist. Delegate is the core of this C# design pattern.
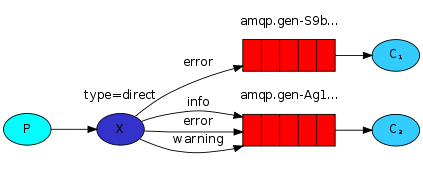 Figure 138. RabbitMQ Queue system
To summarize :
-
A producer is a user application that sends messages.
-
A queue is a buffer that stores messages.
-
A consumer is a user application that receives messages.
-
Key Classes
In the case of this component the messages are created in the Message abstract class:
public abstract class Message
    {
        public string MessageType { get; }
        public Guid InternalMessageIdentifier { get; set; }

        protected Message()
        {
            MessageType = GetType().Name;
        }
    }
Then the Command serializable class inherits from Message class:
[Serializable]
public class Command : Message
    {
        public DateTime Timestamp { get; protected set; }
        protected Command()
        {
            Timestamp = DateTime.Now;
            InternalMessageIdentifier = Guid.NewGuid();
        }
    }
The message will have from base a Timestamp, a Guid as message identifier and the message type.
Configuration
Component configuration is made on file appsettings.{environment}.json as follows:
  "RabbitMq": {
    "EnableRabbitMq": true,
    "Hosts": [
      {
        "Host": "127.0.0.1",
        "Port": 5672,
        "Ssl": false,
        "SslServerName": "localhost",
        "SslCertPath": "localhost.pfx",
        "SslCertPassPhrase": "localhost",
        "SslPolicyErrors": "RemoteCertificateNotAvailable" //None, RemoteCertificateNotAvailable, RemoteCertificateNameMismatch, RemoteCertificateChainErrors
      }
    ],

    "VirtualHost": "/",
    "UserName": "admin",
    "Password": "password",
    "Product": "devon4net",
    "RequestedHeartbeat": 10, //Set to zero for no heartbeat
    "PrefetchCount": 50,
    "PublisherConfirms": false,
    "PersistentMessages": true,
    "Platform": "localhost",
    "Timeout": 10,
    "Backup": {
      "UseLocalBackup": true,
      "DatabaseName": "devon4netMessageBackup.db"
    }
},| Please refer to the official EasyNetQ documentation for further details about connection parameters. |
Setting up in Devon
For setting it up using the Devon4NetApi template configure it in the appsettings.{environment}.json file.
A template is available in the RabbitMqManagement folder of the Devon4Net.Application.WebAPI.Implementation Business folder:
-
TodoCommand.cs:public class TodoCommand : Command { public string Description { get; set; } }The
TodoCommandinherits fromCommand, in this case, theDescriptionwill be added to theMessage. -
TodoRabbitMqHandler.cs:public class TodoRabbitMqHandler: RabbitMqHandler<TodoCommand> { private ITodoService TodoService { get; set; } public TodoRabbitMqHandler(IServiceCollection services, IBus serviceBus, bool subscribeToChannel = false) : base(services, serviceBus, subscribeToChannel) { } public TodoRabbitMqHandler(IServiceCollection services, IBus serviceBus, IRabbitMqBackupService rabbitMqBackupService, bool subscribeToChannel = false) : base(services, serviceBus, rabbitMqBackupService, subscribeToChannel) { } public TodoRabbitMqHandler(IServiceCollection services, IBus serviceBus, IRabbitMqBackupLiteDbService rabbitMqBackupLiteDbService, bool subscribeToChannel = false) : base(services, serviceBus, rabbitMqBackupLiteDbService, subscribeToChannel) { } public TodoRabbitMqHandler(IServiceCollection services, IBus serviceBus, IRabbitMqBackupService rabbitMqBackupService, IRabbitMqBackupLiteDbService rabbitMqBackupLiteDbService, bool subscribeToChannel = false) : base(services, serviceBus, rabbitMqBackupService, rabbitMqBackupLiteDbService, subscribeToChannel) { } public override async Task<bool> HandleCommand(TodoCommand command) { TodoService = GetInstance<ITodoService>(); var result = await TodoService.CreateTodo(command.Description).ConfigureAwait(false); return result!=null; } }This class must to inherit from
RabbitMqHandler<T>class.HandleCommand(T command)method should be overridden in order to send command to the queue, this method returns true if the message has been published.
Setting up in other projects
Install the package in your solution using the Package Manager Console:
Install-Package Devon4Net.Infrastructure.RabbitMQCreate a Configuration static class in order to add the RabbitMqHandler services, for example:
 public static class Configuration
    {

        public static void SetupDependencyInjection(this IServiceCollection services, IConfiguration configuration)
        {

            var rabbitMq = serviceProvider.GetService<IOptions<RabbitMqOptions>>();

            if (rabbitMq?.Value != null && rabbitMq.Value.EnableRabbitMq)
            {
                SetupRabbitHandlers(services);
            }
        }

        private static void SetupRabbitHandlers(IServiceCollection services)
        {
            services.AddRabbitMqHandler<TodoRabbitMqHandler>(true);
        }
    }
Add the following lines in the Program.cs class:
builder.Services.SetupRabbitMq(builder.Configuration);
builder.Services.SetupDependencyInjection(builder.Configuration);
After adding the default settings provided in the configuration section, you may use the RabbitMQ component in your code.
| Please see the RabbitMQ official documentation for instructions on installing the RabbitMQ Server. You can also visit the RabbitMQ How-to section |
Devon4Net.Infrastructure.Middleware
Middleware is software that’s assembled into an app pipeline to handle requests and responses. Request delegates are used to construct the request pipeline. Each HTTP request is handled by a request delegate.
The diagram below represents the whole request processing pipeline for ASP.NET Core MVC and Razor Pages apps. You can see how existing middlewares are organized in a typical app and where additional middlewares are implemented.
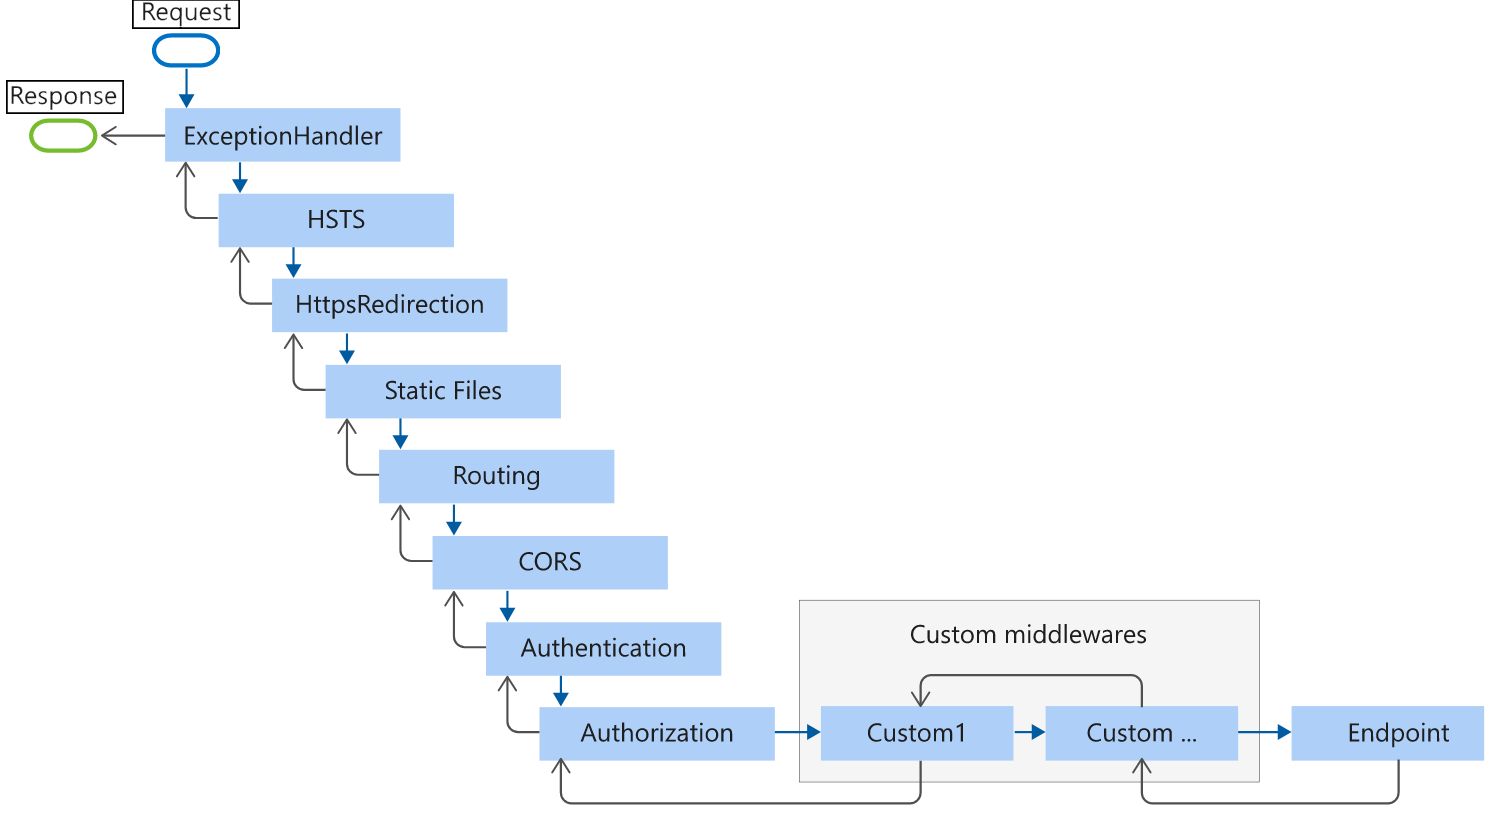
The ASP.NET Core request pipeline is composed of a number of request delegates that are called one after the other. This concept is illustrated in the diagram below. The execution thread is shown by the black arrows.
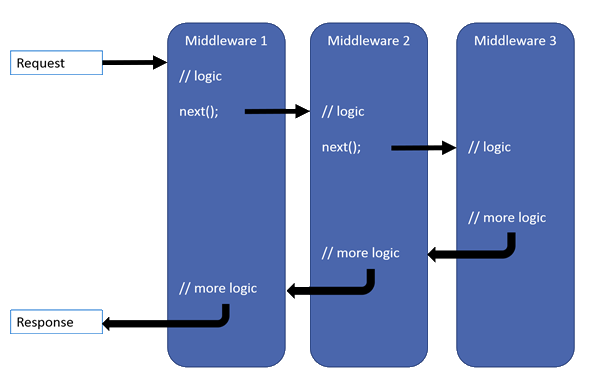
Configuration
In this component there are four custom Middlewares classes, configuration is made on file appsettings.{environment}.json as follows:
-
ClientCertificatesMiddleware.cs: For the management of client certificates."Certificates": { "ServerCertificate": { "Certificate": "", "CertificatePassword": "" }, "ClientCertificate": { "EnableClientCertificateCheck": false, "RequireClientCertificate": false, "CheckCertificateRevocation": true, "ClientCertificates": { "Whitelist": [ "" ] } } },The ClientCertificate Whitelist contains the client’s certificate thumbprint.
-
ExceptionHandlingMiddleware.cs: Handles a few different types of exceptions. -
CustomHeadersMiddleware.cs: To add or remove certain response headers."Headers": { "AccessControlExposeHeader": "Authorization", "StrictTransportSecurityHeader": "", "XFrameOptionsHeader": "DENY", "XssProtectionHeader": "1;mode=block", "XContentTypeOptionsHeader": "nosniff", "ContentSecurityPolicyHeader": "", "PermittedCrossDomainPoliciesHeader": "", "ReferrerPolicyHeader": "" },On the sample above, the server application will add to the response headers the
AccessControlExposeHeader,XFrameOptionsHeader,XssProtectionHeaderandXContentTypeOptionsHeaderheaders. If the header response attribute does not have a value, it will not be added to the response headers.Please refer to the How To: Customize Headers documentation for more information. 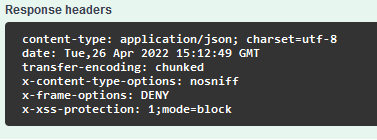 Figure 142. Response Headers
 -
KillSwicthMiddleware.cs: To enable or disable HTTP requests."KillSwitch": { "UseKillSwitch": false, "EnableRequests": true, "HttpStatusCode": 403 },Property Description UseKillSwitch
True to enable KillSwtich middleware
EnableRequests
True to enable HTTP requests.
HttpStatusCode
the HTTP status code that will be returned
Setting up in Devon
For setting it up using the Devon4NetApi template just configure it in the appsettings.{environment}.json file.
Setting up in other projects
Install the package on your solution using the Package Manager Console:
install-package Devon4Net.Infrastructure.MiddlewareConfigure the component in Program.cs adding the following lines:
using Devon4Net.Infrastructure.Middleware.Middleware;
.
.
.
builder.Services.SetupMiddleware(builder.Configuration);
.
.
.
app.SetupMiddleware(builder.Services);
Add the default configuration shown in the configuration section.
Devon4Net.Infrastructure.UnitOfWork
The idea of Unit of Work is related to the successful implementation of the Repository Pattern. It is necessary to first comprehend the Repository Pattern in order to fully understand this concept.
The Repository Pattern
A repository is a class defined for an entity, that contains all of the operations that may be executed on that entity. For example, a repository for an entity Employee will contain basic CRUD operations as well as any additional potential actions connected to it. The following procedures can be used to implement the Repository Pattern:
-
One repository per entity (non-generic) : This approach makes use of a single repository class for each entity. For instance, if you have two entities, Todo and Employee, each will have its own repository.
-
Generic repository: A generic repository is one that can be used for all entities.
Unit of Work in the Repository Pattern
Unit of Work is referred to as a single transaction that involves multiple operations of insert/update/delete. It means that, for a specific user action, all transactions are performed in a single transaction rather than several database transactions.

Configuration
Connection strings must be added to the configuration in the file appsettings.{environment}.json as follows:
"ConnectionStrings": {
    "Todo": "Add your database connection string here",
    "Employee": "Add your database connection string here"
  },
Setting up in Devon
For setting it up using the Devon4NetApi template just configure the connection strings in the appsettings.{environment}.json file.
To add Databases, use the SetupDatabase method in the DevonConfiguration.cs file:
  private static void SetupDatabase(IServiceCollection services, IConfiguration configuration)
        {
            services.SetupDatabase<TodoContext>(configuration, "Todo", DatabaseType.SqlServer, migrate:true).ConfigureAwait(false);
            services.SetupDatabase<EmployeeContext>(configuration, "Employee", DatabaseType.SqlServer, migrate:true).ConfigureAwait(false);
        }
You must provide the configuration, the connection string key, and the database type.
The supported databases are:
-
SqlServer
-
Sqlite
-
InMemory
-
Cosmos
-
PostgreSQL
-
MySql
-
MariaDb
-
FireBird
-
Oracle
-
MSAccess
Set the migrate property value to true if you need to use migrations, as shown above.
| For more information about the use of migrations please visit the official microsoft documentation. |
Our typed repositories must inherit from the generic repository of the Unit Of Work component, as seen in the example below:
  public class TodoRepository : Repository<Todos>, ITodoRepository
    {
        public TodoRepository(TodoContext context) : base(context)
        {

        }
        .
        .
        .
    }
Use the methods of the generic repository to perform your CRUD actions:
public Task<Todos> Create(string description)
        {

            var todo = new Todos {Description = description};
            return Create(todo);
        }
The default value for AutoSaveChanges to the Database is true, you may change it to false if you need to employ transactions.
Inject the Repository on the service of the business layer, as shown below:
public class TodoService: Service<TodoContext>, ITodoService
    {
        private readonly ITodoRepository _todoRepository;

        public TodoService(IUnitOfWork<TodoContext> uoW) : base(uoW)
        {
            _todoRepository = uoW.Repository<ITodoRepository>();
        }
        .
        .
        .
    }
Setting up in other projects
Install the package on your solution using the Package Manager Console:
install-package Devon4Net.Infrastructure.UnitOfWorkCreate a Configuration static class in order to add the IRequestHandler services, for example:
public static class Configuration
    {
        public static void SetupDependencyInjection(this IServiceCollection services, IConfiguration configuration)
        {
            SetupDatabase(services, configuration);
        }

        private static void SetupDatabase(IServiceCollection services, IConfiguration configuration)
        {
            services.SetupDatabase<TodoContext>(configuration, "Default", DatabaseType.SqlServer).ConfigureAwait(false);
        }
    }
Configure the component in Program.cs adding the following lines:
using Devon4Net.Domain.UnitOfWork;
.
.
.
builder.Services.SetupUnitOfWork(typeof(Configuration));
Add the default configuration shown in the configuration section and follow the same steps as the previous section.
Tips
Predicate expression builder
-
Use this expression builder to generate lambda expressions dynamically:
var predicate = PredicateBuilder.True<T>();Where T is a class. At this moment, you can build your expression and apply it to obtain your results in a efficient way and not retrieving data each time you apply an expression.
-
Example from My Thai Star .Net Core implementation:
public async Task<PaginationResult<Dish>> GetpagedDishListFromFilter(int currentpage, int pageSize, bool isFav, decimal maxPrice, int minLikes, string searchBy, IList<long> categoryIdList, long userId)
{
    var includeList = new List<string>{"DishCategory","DishCategory.IdCategoryNavigation", "DishIngredient","DishIngredient.IdIngredientNavigation","IdImageNavigation"};

    //Here we create our predicate builder
    var dishPredicate = PredicateBuilder.True<Dish>();

    //Now we start applying the different criteria:
    if (!string.IsNullOrEmpty(searchBy))
    {
        var criteria = searchBy.ToLower();
        dishPredicate = dishPredicate.And(d => d.Name.ToLower().Contains(criteria) || d.Description.ToLower().Contains(criteria));
    }

    if (maxPrice > 0) dishPredicate = dishPredicate.And(d=>d.Price<=maxPrice);

    if (categoryIdList.Any())
    {
        dishPredicate = dishPredicate.And(r => r.DishCategory.Any(a => categoryIdList.Contains(a.IdCategory)));
    }

    if (isFav && userId >= 0)
    {
        var favourites = await UoW.Repository<UserFavourite>().GetAllAsync(w=>w.IdUser == userId);
        var dishes = favourites.Select(s => s.IdDish);
        dishPredicate = dishPredicate.And(r=> dishes.Contains(r.Id));
    }

    // Now we can use the predicate to retrieve data from database with just one call
    return await UoW.Repository<Dish>().GetAllIncludePagedAsync(currentpage, pageSize, includeList, dishPredicate);
}
Devon4Net.Infrastructure.AWS.Lambda
This component is part of the AWS Stack in Devon4Net. It provides the necessary classes for creating and deploying Lambda Functions in AWS Cloud. In addition it includes some utilities for managing these functions.
Configuration
The following configuration is for AWS in general and can be done in appsettings.{environment}.json file as follows:
"AWS": {
  "UseSecrets": true,
  "UseParameterStore": true,
  "Credentials": {
    "Profile": "",
    "Region": "eu-west-1",
    "AccessKeyId": "",
    "SecretAccessKey": ""
  }
}-
UseSecrets: Boolean that indicates if AWS Secrets Manager is being used. -
UseParameterStore: Boolean to indicate if AWS Parameter Store is being used. -
Credentials: Credentials for connecting with AWS.-
Profile: A collection of settings is called a profile. This would be the name for the current settings. -
Region: AWS Region whose servers you want to send your requests to by default. This is typically the Region closest to you. -
AccessKeyId: Access key ID portion of the keypair configured to access your AWS account. -
SecretAccessKey: Secret access key portion of the keypair configured to access your AWS account.
-
| Access keys consist of an access key ID and secret access key, which are used to sign programmatic requests that you make to AWS. If you don’t have access keys, you can create them from the AWS Management Console. |
For the configuration of Lambda functions we also need to fill another file with our values. This file is the aws-lambda-tools-defaults.json. We can specify all the options for the Lambda commands in the .NET Core CLI:
{
  "Information" : [
    "This file provides default values for the deployment wizard inside Visual Studio and the AWS Lambda commands added to the .NET Core CLI.",
    "To learn more about the Lambda commands with the .NET Core CLI execute the following command at the command line in the project root directory.",

    "dotnet lambda help",

    "All the command line options for the Lambda command can be specified in this file."
  ],

  "profile":"default",
  "region" : "us-east-2",
  "configuration" : "Release",
  "framework" : "netcoreapp3.1",
  "function-runtime":"dotnetcore3.1",
  "function-memory-size" : 512,
  "function-timeout" : 30,
  "function-handler" : "blank-csharp::blankCsharp.Function::FunctionHandler"
}
Setting up in devon
For using it in a devon4net project, you could very easily do it by using the template.
| Read the template documentation to learn more about it. |
If you don’t want to use the template, you will need to create a class library with all your files for your functions and add the configuration shown in sections above.
If you don’t have it yet, you will need to install the following tool using CLI like so:
dotnet tool install -g Amazon.Lambda.Tools
You can learn more in the How to: AWS Lambda Function
|
Setting up in other projects
For setting it up in other projects you will need to install first both the component and the Amazon Lambda tool for developing with Visual Studio:
-
Install the tool:
dotnet tool install -g Amazon.Lambda.Tools -
Install the component in your project as a NuGet package, the project were we will install it and develop the functions will be a
Class library:install-package Devon4Net.Infrastructure.AWS.Lambda
Once you have it set up you will need to create your lambda function handlers. If you want to learn how to do it please read the How to: AWS Lambda Function guide.
Now you will need to create the following files:
-
appsettings.{environment}.jsonthat contains the following configuration options:"AWS": { "UseSecrets": true, "UseParameterStore": true, "Credentials": { "Profile": "", "Region": "eu-west-1", "AccessKeyId": "", "SecretAccessKey": "" } } -
aws-lambda-tools-defaults.jsonwith the default configuration values:{ "Information" : [ "This file provides default values for the deployment wizard inside Visual Studio and the AWS Lambda commands added to the .NET Core CLI.", "To learn more about the Lambda commands with the .NET Core CLI execute the following command at the command line in the project root directory.", "dotnet lambda help", "All the command line options for the Lambda command can be specified in this file." ], "profile":"default", "region" : "us-east-2", "configuration" : "Release", "framework" : "netcoreapp3.1", "function-runtime":"dotnetcore3.1", "function-memory-size" : 512, "function-timeout" : 30, "function-handler" : "blank-csharp::blankCsharp.Function::FunctionHandler" } -
[Optionally]
serverless.templatewith more detailed configuration, very useful if you want to add more than one function:{ "AWSTemplateFormatVersion": "2010-09-09", "Transform": "AWS::Serverless-2016-10-31", "Description": "An AWS Serverless Application that uses the ASP.NET Core framework running in Amazon Lambda.", "Parameters": {}, "Conditions": {}, "Resources": { "ToUpperFunction": { "Type": "AWS::Serverless::Function", "Properties": { "Handler": "Devon4Net.Application.Lambda::Devon4Net.Application.Lambda.Business.StringManagement.Functions.Upper.UpperFunction::FunctionHandler", "Runtime": "dotnet6", "CodeUri": "", "MemorySize": 256, "Timeout": 30, "Role": null, "Policies": [ "AWSLambdaFullAccess", "AmazonSSMReadOnlyAccess", "AWSLambdaVPCAccessExecutionRole" ], "Environment": { "Variables": {} }, "Events": { "ProxyResource": { "Type": "Api", "Properties": { "Path": "/{proxy+}", "Method": "ANY" } }, "RootResource": { "Type": "Api", "Properties": { "Path": "/", "Method": "ANY" } } } } }, "ToLowerFunction": { "Type": "AWS::Serverless::Function", "Properties": { "Handler": "Devon4Net.Application.Lambda::Devon4Net.Application.Lambda.business.StringManagement.Functions.Lower.LowerFunction::FunctionHandler", "Runtime": "dotnet6", "CodeUri": "", "MemorySize": 256, "Timeout": 30, "Role": null, "Policies": [ "AWSLambdaFullAccess", "AmazonSSMReadOnlyAccess", "AWSLambdaVPCAccessExecutionRole" ], "Environment": { "Variables": {} }, "Events": { "ProxyResource": { "Type": "Api", "Properties": { "Path": "/{proxy+}", "Method": "ANY" } }, "RootResource": { "Type": "Api", "Properties": { "Path": "/", "Method": "ANY" } } } } }, }, "Outputs": { "ApiURL": { "Description": "API endpoint URL for Prod environment", "Value": { "Fn::Sub": "https://${ServerlessRestApi}.execute-api.${AWS::Region}.amazonaws.com/Prod/" } } } }
Devon4Net.Infrastructure.AWS.Serverless
This component is part of the AWS Stack in Devon4Net. It has the necessary classes to configure the connection with the AWS Cloud.
Configuration
The component configuration must be done in the file appsettings.{environment}.json as follows:
{
"AWS": {
"EnableAws": true,
"UseSecrets": true,
"UseParameterStore": true,
"Credentials": {
"Profile": "default",
"Region": "eu-west-1",
"AccessKeyId": "",
"SecretAccessKey": ""
},
"Cognito": {
"IdentityPools": [
{
"IdentityPoolId": "",
"IdentityPoolName": "",
"ClientId": ""
}
]
},
"SqSQueueList": [
{
"QueueName": "", // Mandatory. Put the name of the queue here
"Url": "", //optional. If it is not present, it will be requested to AWS
"UseFifo": false,
"MaximumMessageSize": 256,
"NumberOfThreads": 2,
"DelaySeconds": 0,
"ReceiveMessageWaitTimeSeconds": 0,
"MaxNumberOfMessagesToRetrievePerCall": 1,
"RedrivePolicy": {
"MaxReceiveCount": 1,
"RedrivePolicy": {
"MaxReceiveCount": 1,
"DeadLetterQueueUrl": ""
}
}
}
]
}
}-
UseSecrets: Boolean to indicate if AWS Secrets Manager is being used. -
UseParameterStore: Boolean to indicate if AWS Parameter Store is being used. -
Credentials: Credentials for connecting the app with your AWS profile. -
Cognito: Amazon Cognito identity pools provide temporary AWS credentials for users who are guests (unauthenticated) and for users who have been authenticated and received a token. An identity pool is a store of user identity data specific to your account. In this section you can configure multiple IdentityPools. -
SqSQueueList: This section is used to configure the Amazon Simple Queue Service (SQS). You must configure some parameters about the queue:-
QueueName: The name of the queue, this field is required. -
Url: The queue’s url, this parameter is optional. -
UseFifo: We have two queue types in Amazon SQS, use false for Standard Queues or set this parameter to true for FIFO Queues. -
MaximumMessageSize: The maximum message size for this queue. -
NumberOfThreads: The number of threads of the queue. -
DelaySeconds: The amount of time that Amazon SQS will delay before delivering a message that is added to the queue. -
ReceiveMessageWaitTimeSeconds: The maximum amount of time that Amazon SQS waits for messages to become available after the queue gets a receive request. -
MaxNumberOfMessagesToRetrievePerCall: The maximum number of messages to retrieve per call. -
RedrivePolicy: Defines which source queues can use this queue as the dead-letter queue
-
| Read the AWS SQS documentation to learn more about the configuration of this kind of queues. |
Set up in devon
For using it in a devon project, you can use the Devon4Net.Application.WebAPI.AwsServerless template. This template is ready to be used.
| Read the template documentation to learn more about it. |
Once you create your project using the template, you can configure it following the parameters shown above.
Set up in other projects
For setting it up in other projects, you will need first to install the package via NuGet:
install-package Devon4Net.Infrastructure.AWS.ServerlessOnce installed you will need to add the configuration to your appsettings.{environment}.json and then add the following line to your Program.cs so that the configuration can be applied:
builder.Services.ConfigureDevonfwAWS(builder.Configuration, true);Devon4Net.Infrastructure.AWS.DynamoDb
This component is part of the AWS Stack in Devon4Net. It has the necessary classes to configure the connection with the AWS Cloud.
Key Classes
This section will provide a brief overview of the component’s most important classes. The component has the following structure:
-
Common: This folder contains the classes that allow us to use the DynamoDB query and scan methods.
-
Constants: Contains the
DynamoDbGeneralObjectStorageAttributesclass, which defines generic DynamoDb object attributes that we can use in our application. -
Converters: Folder containing a Nullable Date Converter, which is used to convert values to make them compatible with the DynamoDB database. It makes use of the
IPropertyConverterinterface from theAWSSDK.DynamoDBv2package. -
Domain: This folder contains the different repositories that we will explain in more detail in the following section.
-
Extensions: It includes a JSON Helper for performing operations like serialization and deserialization.
Entity Repository (DynamoDbEntityRepository.cs)
It works with the object persistence programming model.
This model is specifically designed for storing, loading, and querying .NET objects in DynamoDB. You may access this model through the Amazon.DynamoDBv2.DataModel namespace.
Is the easiest to code against whenever you are storing, loading, or querying DynamoDB data.
It makes use of annotations to define the tables and their properties.
Table Repository (DynamoDbTableRepository.cs)
It uses a low-level model to manage objects directly and converts .Net data types to their DynamoDB equivalents
It includes methods for searching, updating, and deleting database data.
Dynamo Search Criteria (DynamoSearchCriteria.cs)
DynamoDB provides two kinds of read operations: query and scan.
A query operation uses either the primary key or the index key to find information. Scan is a read call that, as the name suggests, scans the entire table for a specific result. Scan operations are less efficient than Query operations.
| In the 'How to: AWS DynamoDB' documentation, you can find examples of how to use the repositories and search methods. |
Configuration
The following configuration is for AWS in general and can be done in appsettings.{environment}.json file as follows:
"AWS": {
  "UseSecrets": true,
  "UseParameterStore": true,
  "Credentials": {
    "Profile": "",
    "Region": "eu-west-1",
    "AccessKeyId": "",
    "SecretAccessKey": ""
  }
}-
UseSecrets: Boolean that indicates if AWS Secrets Manager is being used. -
UseParameterStore: Boolean to indicate if AWS Parameter Store is being used. -
Credentials: Credentials for connecting with AWS.-
Profile: A collection of settings is called a profile. This would be the name for the current settings. -
Region: AWS Region whose servers you want to send your requests to by default. This is typically the Region closest to you. -
AccessKeyId: Access key ID portion of the keypair configured to access your AWS account. -
SecretAccessKey: Secret access key portion of the keypair configured to access your AWS account.
-
| Access keys consist of an access key ID and secret access key, which are used to sign programmatic requests that you make to AWS. If you don’t have access keys, you can create them from the AWS Management Console. |
Set up in devon
For using it in a devon4net project, you could very easily do it by using the template.
| Read the template documentation to learn more about it. |
Set up in other projects
Install the package on your solution using the Package Manager Console:
install-package Devon4Net.Infrastructure.AWS.DynamoDb| Please see the 'How to: AWS DynamoDB' documentation for more information and examples of how to use the component. |
Devon4Net.Infrastructure.AWS.S3
This component is part of the AWS Stack in Devon4Net. It has the necessary classes to manage Amazon Simple Storage Service (S3).
Providing durability, availability, scalability and optimal performance, amazon simple storage service gives you the oportunity to store any type of object, which allows you to use it for any purpose you want, it being backups, storage for internet applications, data lakes for analytics. Amazon S3 provides management features so that you can optimize, organize, and configure access to your data to meet your specific business, organizational, and compliance requirements.
In S3 objects consist of data, a unique key and some information in the form of metadata. This objects are stored in buckets. A bucket is a container for objects stored in Amazon S3. You can store any number of objects in a bucket and have many buckets in your account.
In the NuGet package you have a handler available with a number of different methods that will help you manage your buckets and store and retrieve objects from them. The IAwsS3Handler interface and AwsS3Handler implementation provides you with some syncrhonous and asynchronous operations like the following:
Returns |
Method |
Description |
Task<Stream> |
GetObject(string bucketName, string objectKey) |
Retreives an object from an S3 bucket by its key. |
Task<bool> |
UploadObject(Stream streamFile, string keyName, string bucketName, string contentType, bool autoCloseStream = false, List<Tag> tagList = null) |
Uploads an object to a bucket. |
Set up in devon
For using it in a devon project you only need to inject the class AwsS3Handler provided with the package or create an instance. The handler instance will need the region, the secret key id and the secret key to be linked to your account.
There is no configuration class for the component so you will need to do something similar to the following in your startup project if you want to use it via depencency injection:
AwsS3Handler awsS3Handler = new AwsS3Handler(myRegion, myKeyId, mySecretKey);
services.AddSingleton<IAwsS3Handler>(awsS3Handler);Set up in other projects
For setting it up in other projects you will need to install the package:
install-package Devon4Net.Infrastructure.AWS.S3And then you can start using via dependency injection or by creating instances as shown in the previous section.
References
Devon4Net.Infrastructure.AWS.ParameterStore
AWS Systems Manager’s Parameter Store offers safe, hierarchical storage for the administration of configuration data and secrets.
You can store any type of data in the form of text by using a key-value form where you choose a name for the parameter (key) and store a value for it. It can be any type of configuration value such as connections, api keys, encrypted credentials…
You can use tags to organize and restrict access to your parameter creating policies.
Parameter Store is also integrated with Secrets Manager. You can retrieve Secrets Manager secrets when using other AWS services that already support references to Parameter Store parameters.
The main difference with Secrets Manager is that it was designed specifically for storing confidential information (like database credentials, API keys) that needs to be encrypted. It also gives additional functionality like rotation of keys.
Configuration
The following configuration is for AWS in general and can be done in appsettings.{environment}.json file as follows:
"AWS": {
  "UseSecrets": true,
  "UseParameterStore": true,
  "Credentials": {
    "Profile": "",
    "Region": "eu-west-1",
    "AccessKeyId": "",
    "SecretAccessKey": ""
  }
}-
UseSecrets: Boolean that indicates if AWS Secrets Manager is being used. -
UseParameterStore: Boolean to indicate if AWS Parameter Store is being used. -
Credentials: Credentials for connecting with AWS.-
Profile: A collection of settings is called a profile. This would be the name for the current settings. -
Region: AWS Region whose servers you want to send your requests to by default. This is typically the Region closest to you. -
AccessKeyId: Access key ID portion of the keypair configured to access your AWS account. -
SecretAccessKey: Secret access key portion of the keypair configured to access your AWS account.
-
| Access keys consist of an access key ID and secret access key, which are used to sign programmatic requests that you make to AWS. If you don’t have access keys, you can create them from the AWS Management Console. |
Key Classes
There are two ways of using the parameters from your Parameter Store. One is by using the available AwsParameterStoreHandler and the other one, is by including the parameters in your ConfigurationBuilder.
Handler
You have available the handler AwsParameterStoreHandler and its interface IAwsParameterStoreHandler with the following methods:
Returns |
Method |
Description |
Task<List<ParameterMetadata>> |
GetAllParameters(CancellationToken cancellationToken = default) |
Retreives a list with all the parameters metadata. |
Task<string> |
GetParameterValue(string parameterName, CancellationToken cancellationToken = default) |
Gets the parameter value given its name. |
You can create an instance of the Handler by using its constructor. You can also inject it in your Services Collection as follows:
AwsParameterStoreHandler awsParameterStoreHandler = new AwsParameterStoreHandler(awsCredentials, regionEndpoint);
services.AddSingleton<IAwsParameterStoreHandler>(awsParameterStoreHandler);Configuration Builder
Thanks to the AwsParameterStoreConfigurationBuilder you can include all the parameters very easily by adding them to the configuration builder as follows:
ConfigurationBuilder.AddParameterStoreHandler(awsCredentials, regionEndpoint);Set up in devon
Some templates have already all he packages referenced so you won’t need to install anything. If that is not the case, you can install it as explained in Set up in other projects.
| Read the template documentation to learn more about it. |
Set up in other projects
Install the package in your solution using the Package Manager or by running the following command in the Console:
install-package Devon4Net.Infrastructure.AWS.ParameterStoreDevon4Net.Infrastructure.AWS.Secrets
Secrets Manager allows you to replace hardcoded credentials, such as passwords, in your code with an API call to Secrets Manager to retrieve the secret programmatically. Because the secret no longer exists in the code, it cannot be compromised by someone examining your code. You can also set Secrets Manager to automatically rotate the secret for you on a predefined schedule. This allows you to replace long-term secrets with short-term ones, lowering the risk of compromise significantly.
Configuration
The following configuration is for AWS in general and can be done in appsettings.{environment}.json file as follows:
"AWS": {
  "UseSecrets": true,
  "UseParameterStore": true,
  "Credentials": {
    "Profile": "",
    "Region": "eu-west-1",
    "AccessKeyId": "",
    "SecretAccessKey": ""
  }
}-
UseSecrets: Boolean that indicates if AWS Secrets Manager is being used. -
UseParameterStore: Boolean to indicate if AWS Parameter Store is being used. -
Credentials: Credentials for connecting with AWS.-
Profile: A collection of settings is called a profile. This would be the name for the current settings. -
Region: AWS Region whose servers you want to send your requests to by default. This is typically the Region closest to you. -
AccessKeyId: Access key ID portion of the keypair configured to access your AWS account. -
SecretAccessKey: Secret access key portion of the keypair configured to access your AWS account.
-
Key Classes
We have to ways to work with this component. One of them is to inject the AwsSecretsHandler and use its methods, and the other way to use the component is using the Configuration Builder.
Handler
The IAwsSecretsHandler interface and AwsSecretsHandler implementation provides you with some asynchronous operations like the following:
Returns |
Method |
Description |
Task<IReadOnlyList<SecretListEntry>> |
GetAllSecrets(CancellationToken cancellationToken) |
Retreives all secrets list. |
Task<T> |
GetSecretString<T>(string secretId) |
Retrieves a string secret from Secrets Manager by its Id. |
Task<byte[]> |
GetSecretBinary(string secretId) |
Retrieves a binary secret from Secrets Manager by its Id. |
Task<GetSecretValueResponse> |
GetSecretValue(GetSecretValueRequest request, CancellationToken cancellationToken = default) |
Retrieves the contents of the encrypted fields SecretString or SecretBinary from the specified version of a secret, whichever contains content. |
To use it inject the class AwsSecretsHandler provided with the package or create an instance. The handler instance will need the awsCredentials and the regionEndpoint.
There is no configuration class for the component so you will need to do something similar to the following in your startup project if you want to use it via depencency injection:
AwsSecretsHandler awsSecretsHandler = new AwsSecretsHandler(awsCredentials, regionEndpoint);
services.AddSingleton<IAwsSecretsHandler>(awsSecretsHandler);
Configuration Builder
The AwsSecretsConfigurationBuilder allows you to configure the component in a different way, by including all the paremeters in the configuration builder, you can do it as follows:
ConfigurationBuilder.AddSecretsHandler(awsCredentials, regionEndpoint);Set up in devon
Some templates have already all he packages referenced so you won’t need to install anything. If that is not the case, you can install it as explained in Set up in other projects.
| Read the template documentation to learn more about it. |
Set up in other projects
For setting it up in other projects you will need to install the package:
install-package Devon4Net.Infrastructure.AWS.SecretsAnd then you can start using via dependency injection or by creating instances as shown in the Configuration section.