Contribute to help us improve!
Are there edge cases or problems that we didn't consider? Is there a technical pitfall that we should add? Did we miss a comma in a sentence?
If you have any input for us, we would love to hear from you and appreciate every contribution. Our goal is to learn from projects for projects such that nobody has to reinvent the wheel.
Let's collect our experiences together to make room to explore the novel!
To contribute click on Contribute to this page on the toolbar.
Ionic to Android
This page is written to help developers to go from the source code of an ionic application to an android one, with this in mind, topics such as: environment, commands, modifications,… are covered.
Assumptions
This document assumes that the reader has already:
-
Source code of an Ionic application and wants to build it on an android device,
-
A working installation of Node.js
-
An Ionic CLI installed and up-to-date.
-
Android Studio and Android SDK.
From Ionic to Android project
When a native application is being designed, sometimes, functionalities that uses camera, geolocation, push notification, … are requested. To resolve these requests, Capacitor can be used.
In general terms, Capacitor wraps apps made with Ionic (HTML, SCSS, Typescript) into WebViews that can be displayed in native applications (Android, IOS) and allows the developer to access native functionalities like the ones said before.
Installing capacitor is as easy as installing any node module, just a few commands have to be run in a console:
-
cd name-of-ionic-4-app -
npm install --save @capacitor/core @capacitor/cli
Then, it is necessary to initialize capacitor with some information: app id, name of the app and the directory where your app is stored. To fill this information, run:
-
npx cap init
Modifications
Throughout the development process, usually back-end and front-end are on a local computer, so it’s a common practice to have different configuration files for each environment (commonly production and development). Ionic uses an angular.json file to store those configurations and some rules to be applied.
If a back-end is hosted on http://localhost:8081, and that direction is used in every environment, the application built for android will not work because computer and device do not have the same localhost. Fortunately, different configurations can be defined.
Android Studio uses 10.0.0.2 as alias for 127.0.0.1 (computer’s localhost) so adding http//10.0.0.2:8081 in a new environment file and modifying angular.json accordingly, will make possible connect front-end and back-end.

    "build": {
    ...
        "configurations": {
            ...
            "android": {
                "fileReplacements": [
                    {
                        "replace": "src/environments/environment.ts",
                        "with": "src/environments/environment.android.ts"
                    }
                ]
            },
        }
}From Android project to emulated device
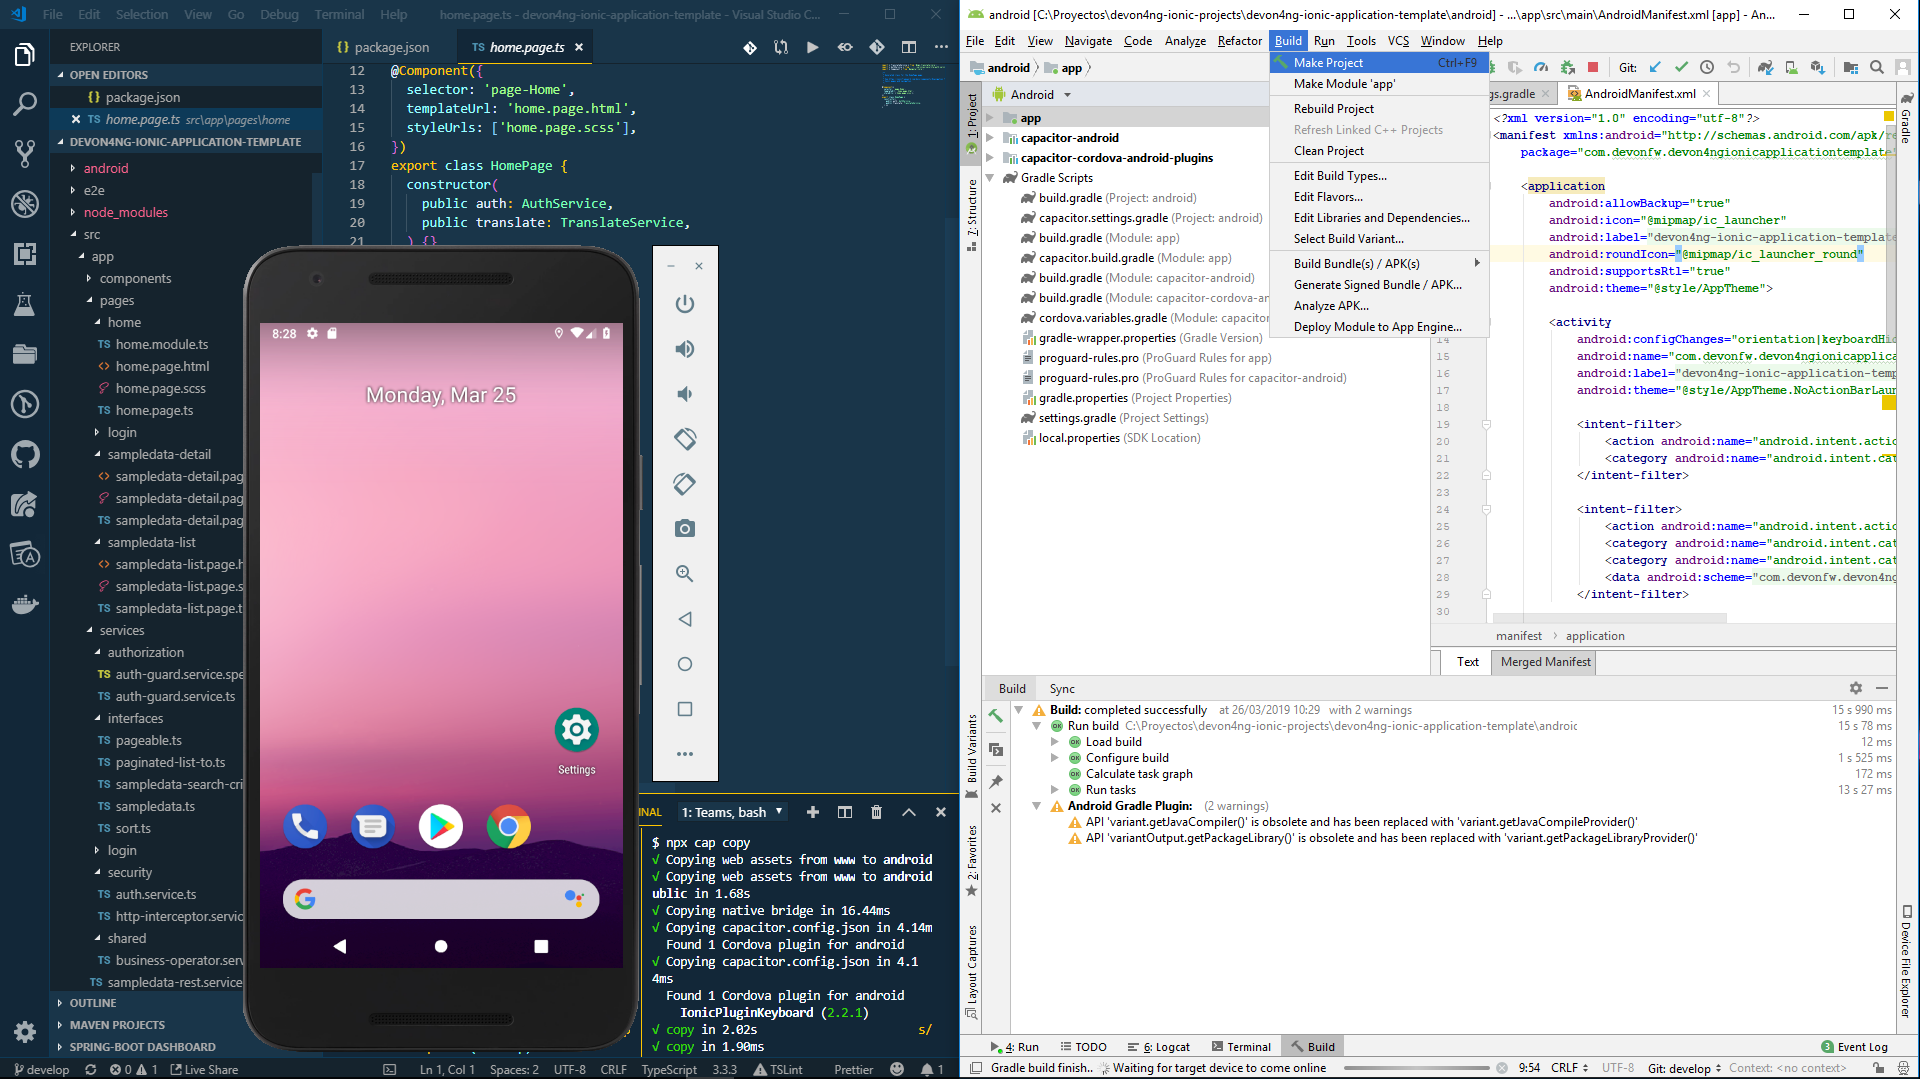
Once Android Studio is opened, follow these steps:
-
Click on "Build" → Make project.
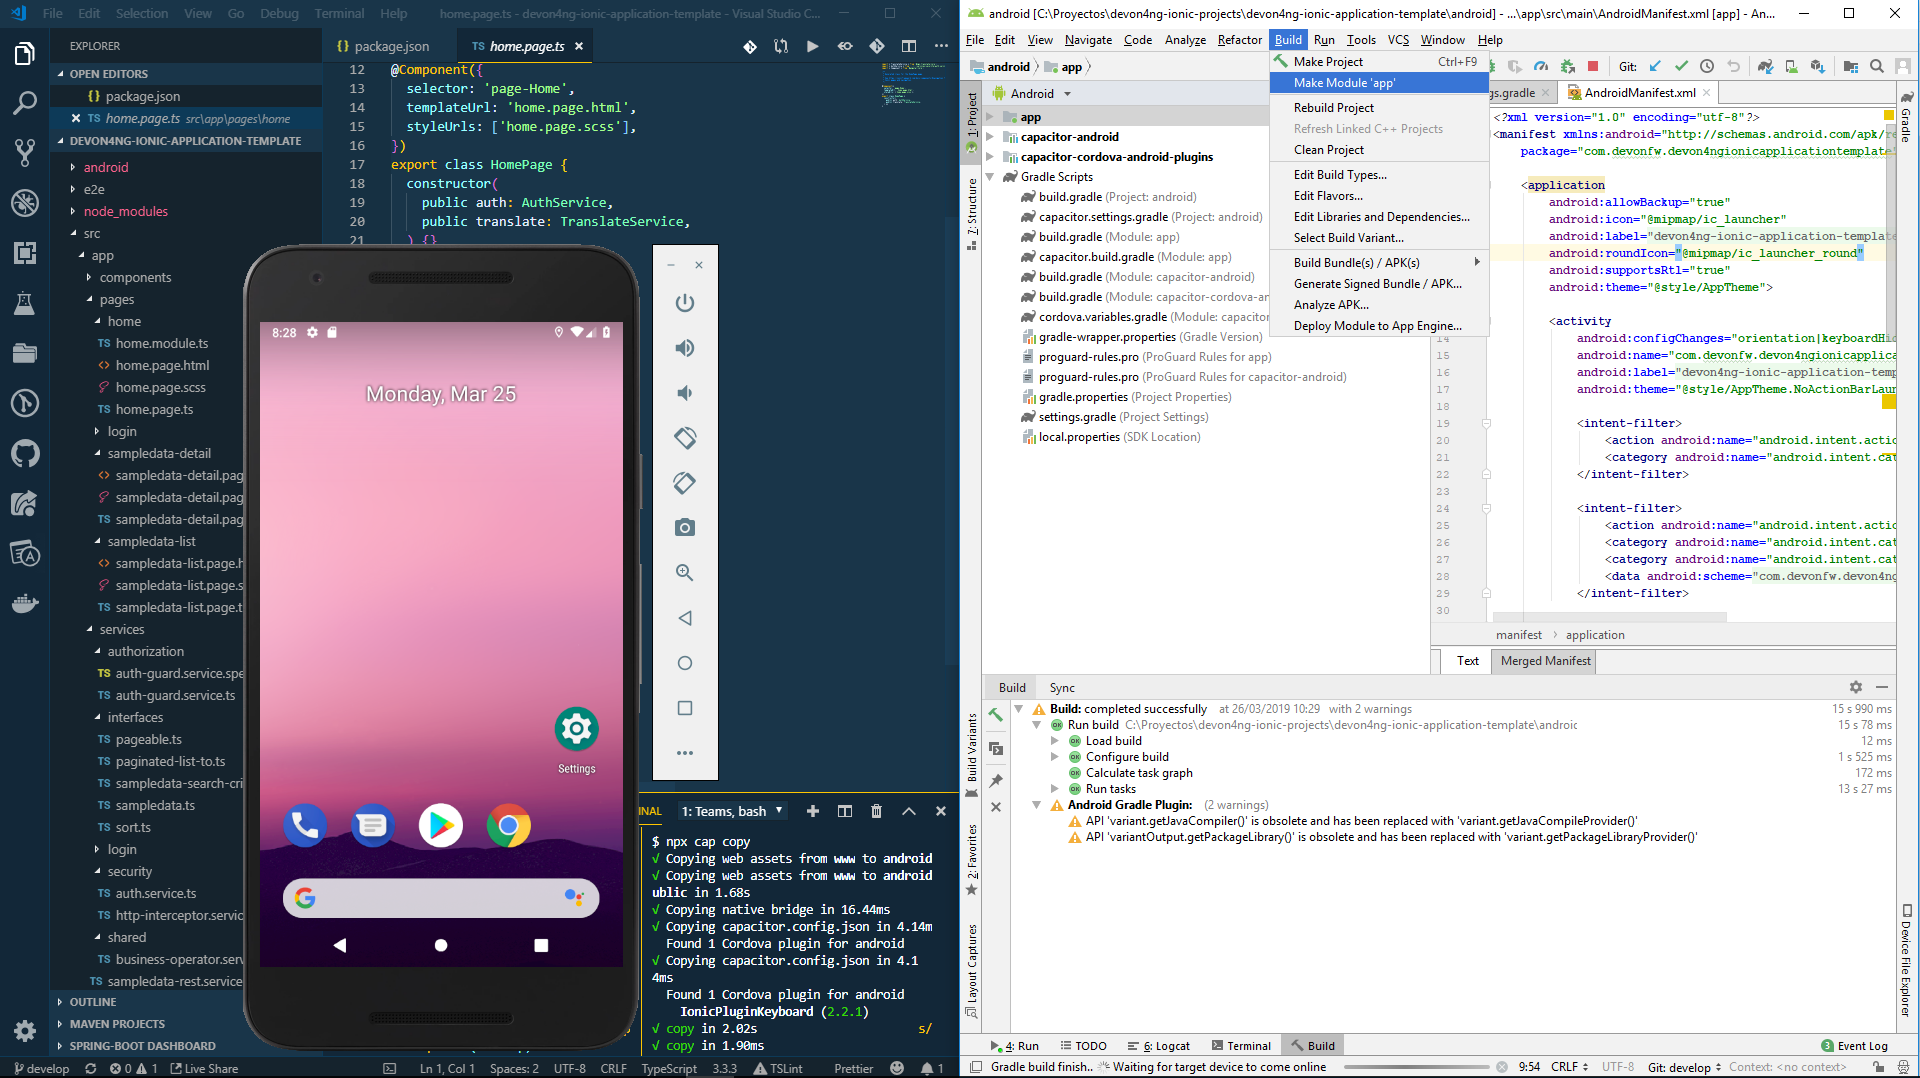
-
Click on "Build" → Make Module 'app' (default name).
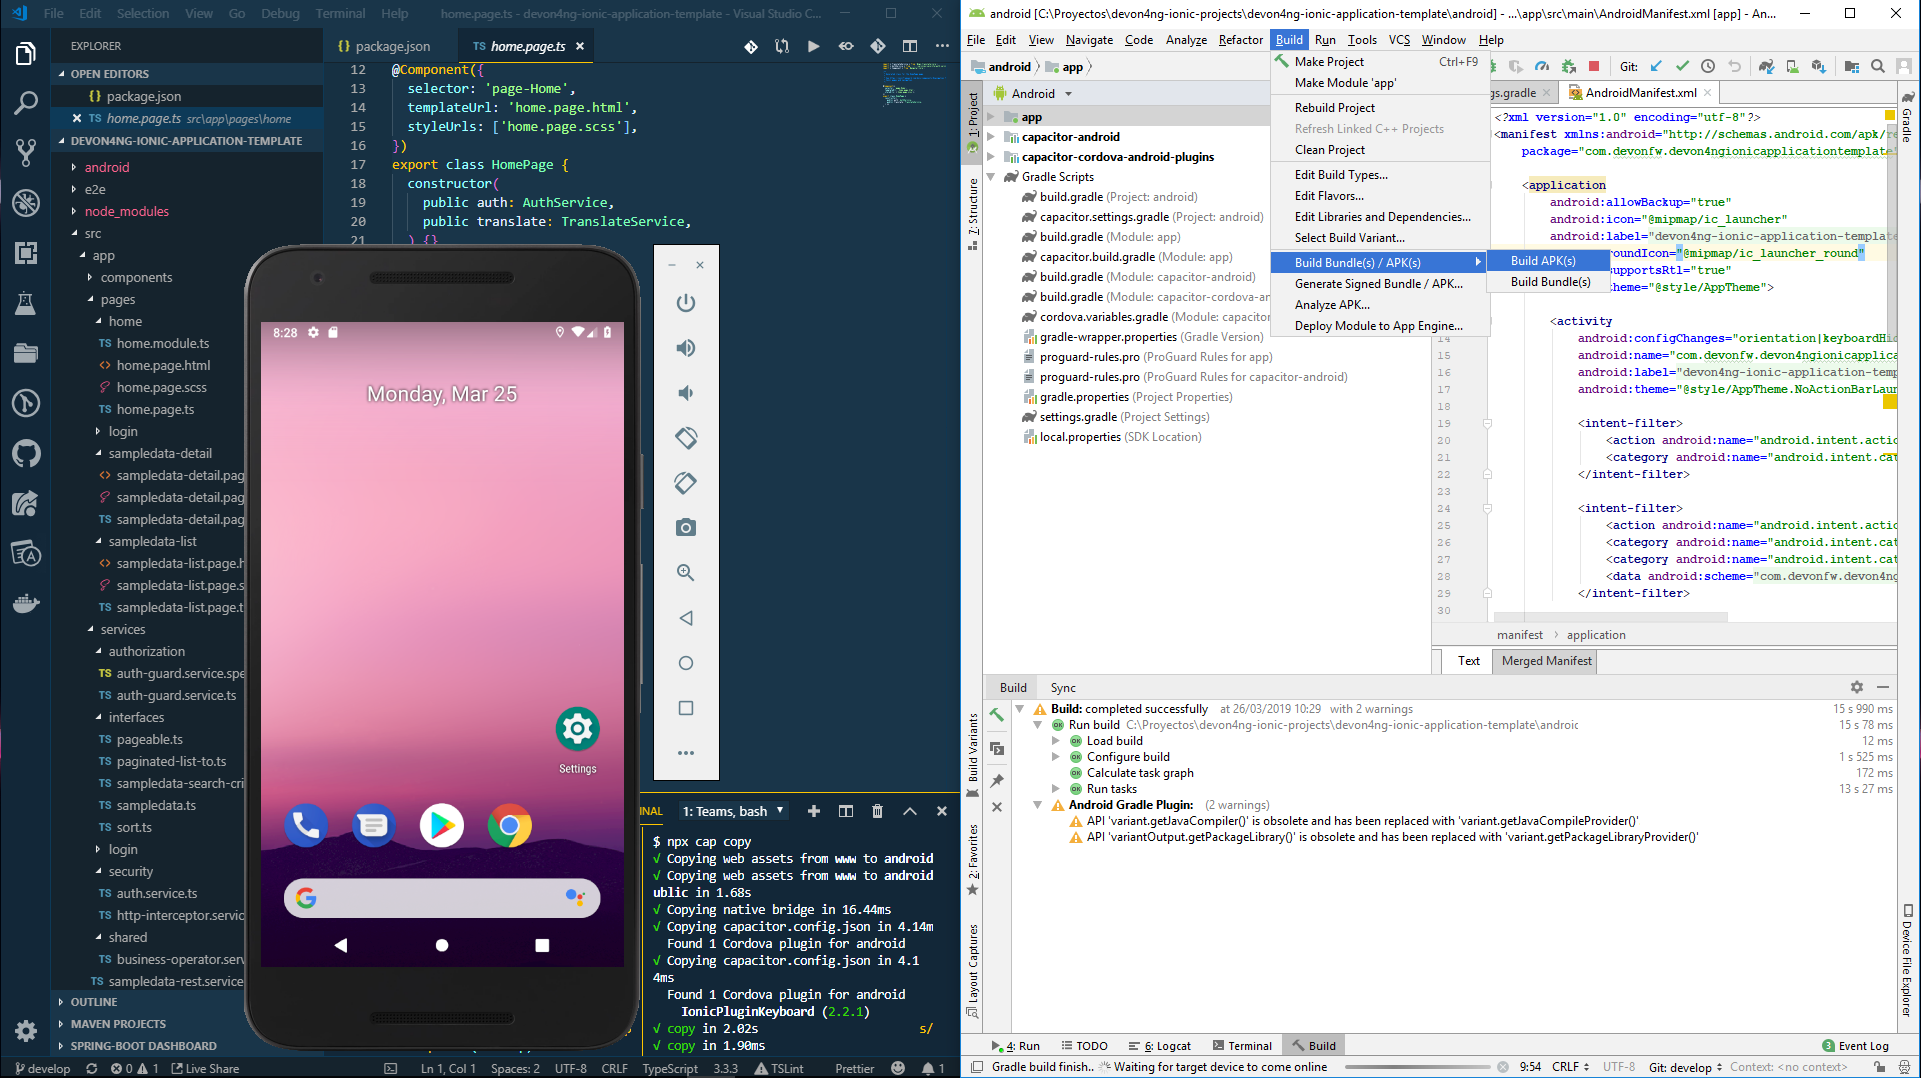
-
Click on" Build" → Build Bundle(s) / APK(s) → Build APK(s).
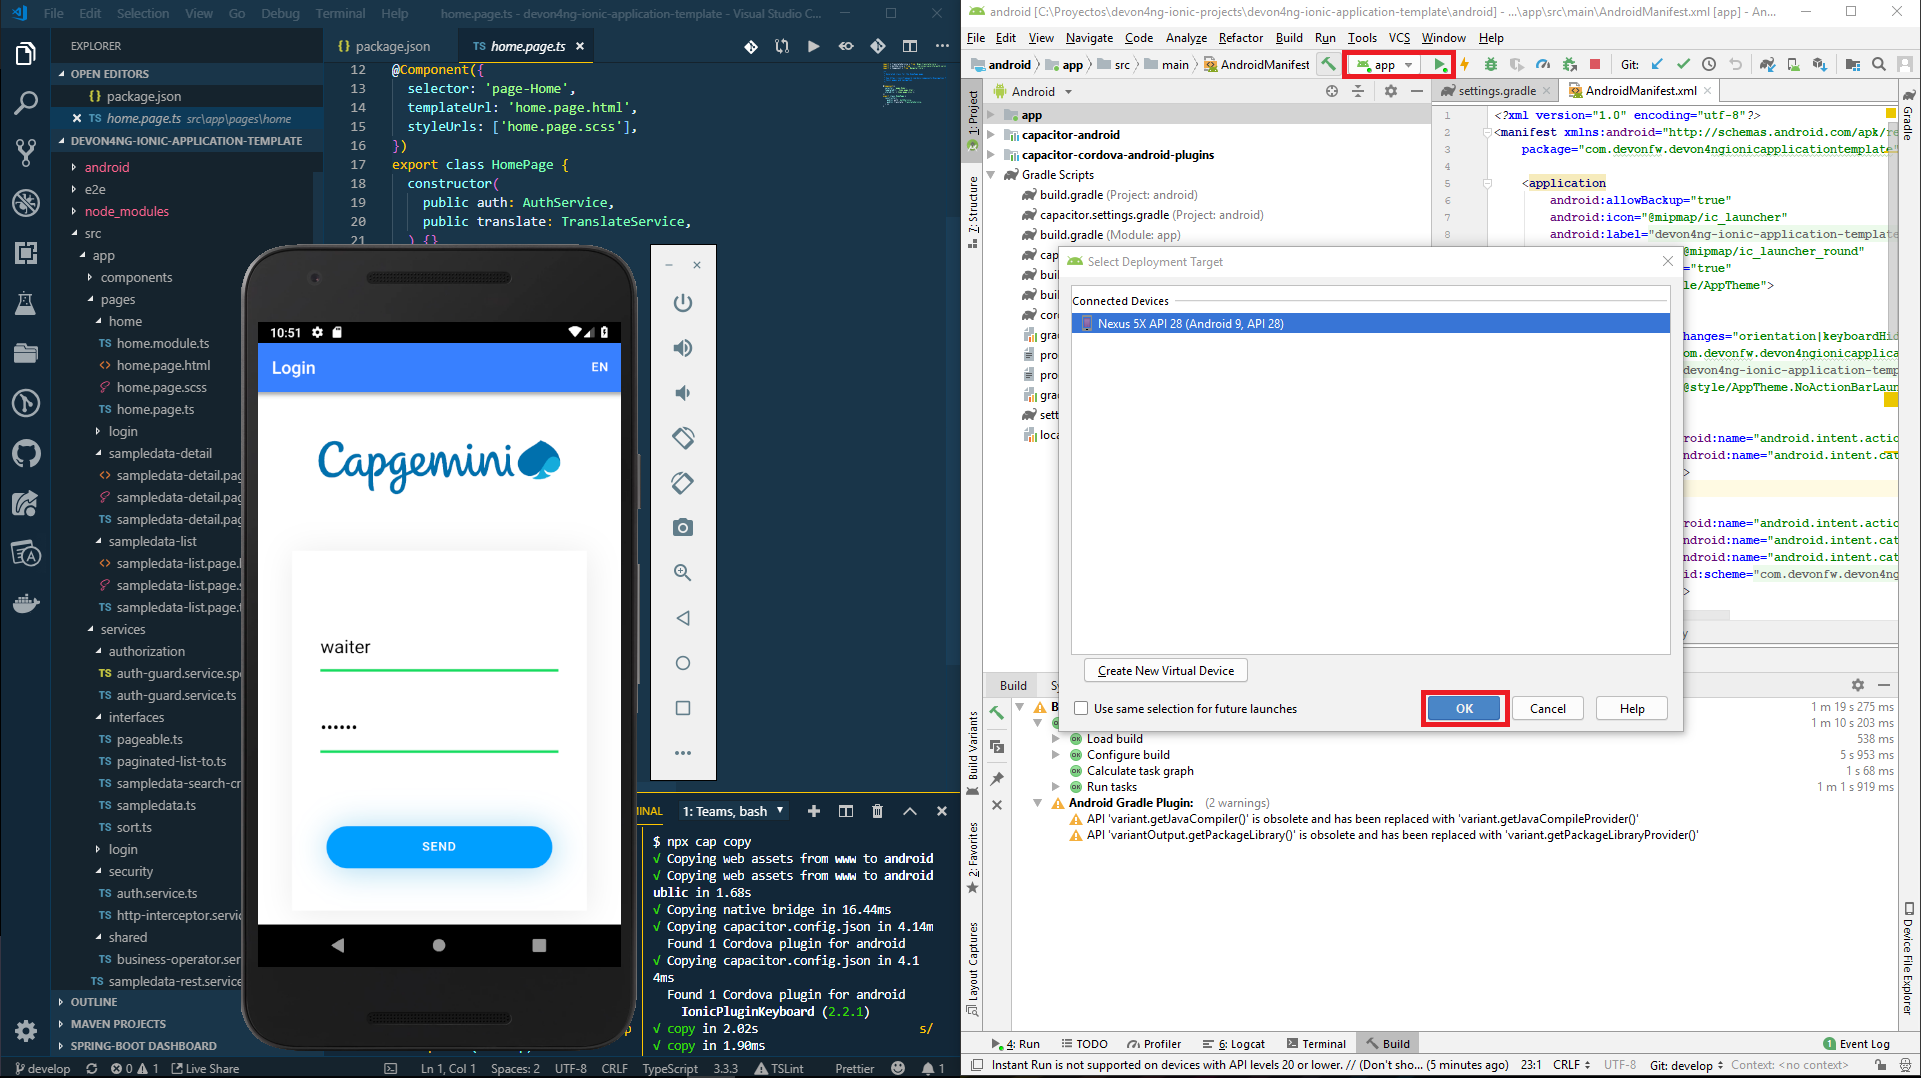
-
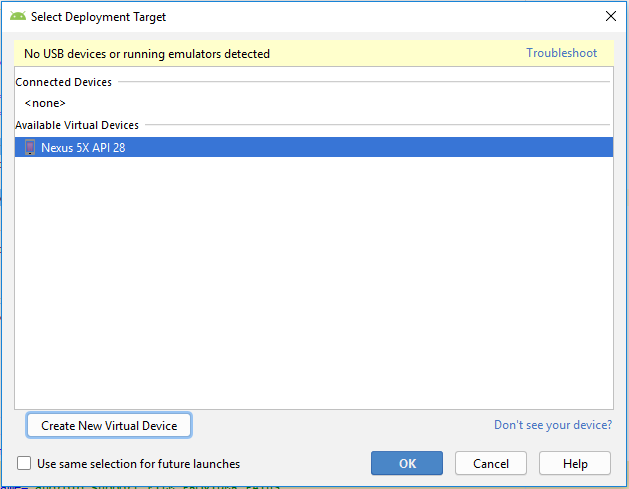
Click on run and choose a device.


If there are no devices available, a new one can be created:
-
Click on "Create new device"
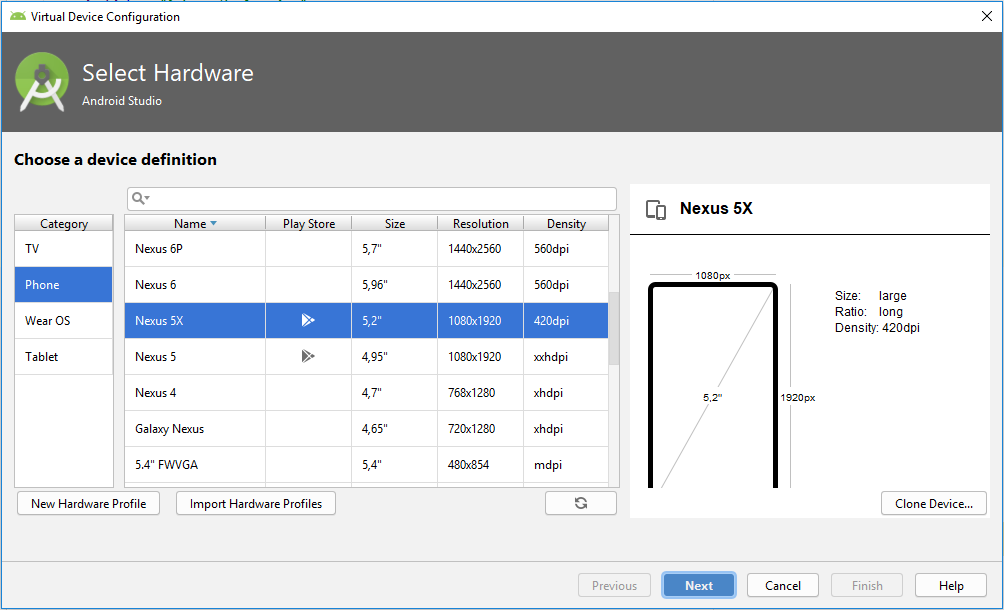
-
Select hardware and click "Next". For example: Phone → Nexus 5X.
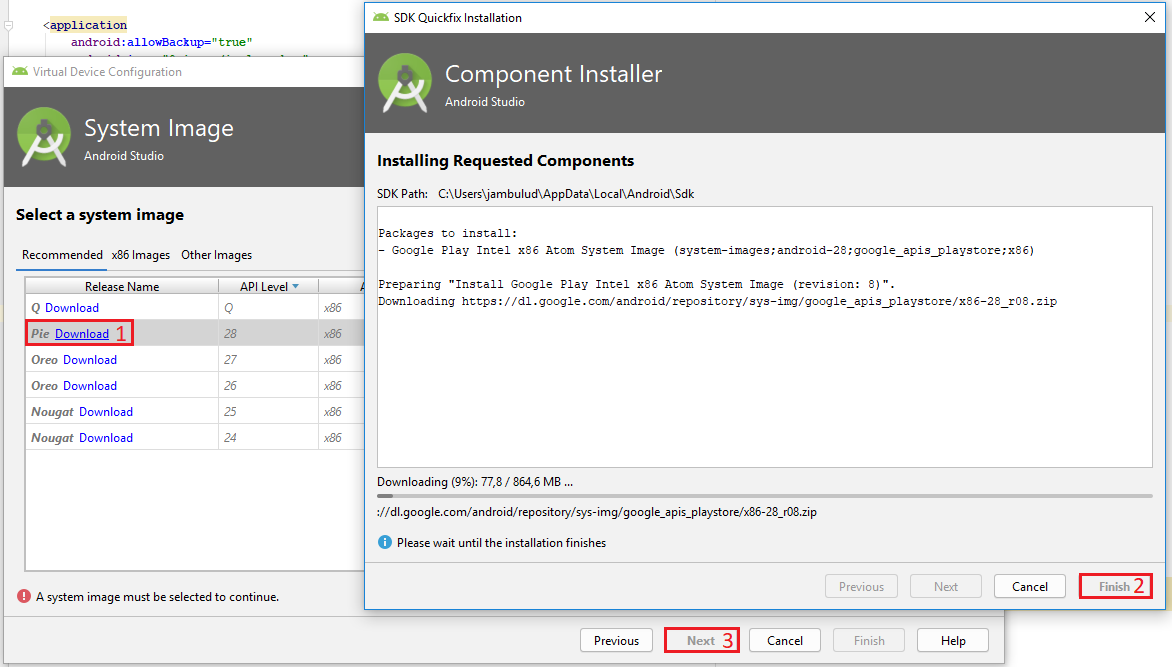
-
Download a system image.
-
Click on download.
-
Wait until the installation finished and then click "Finish".
-
Click "Next".
-
-
Verify configuration (default configuration should be enough) and click "Next".
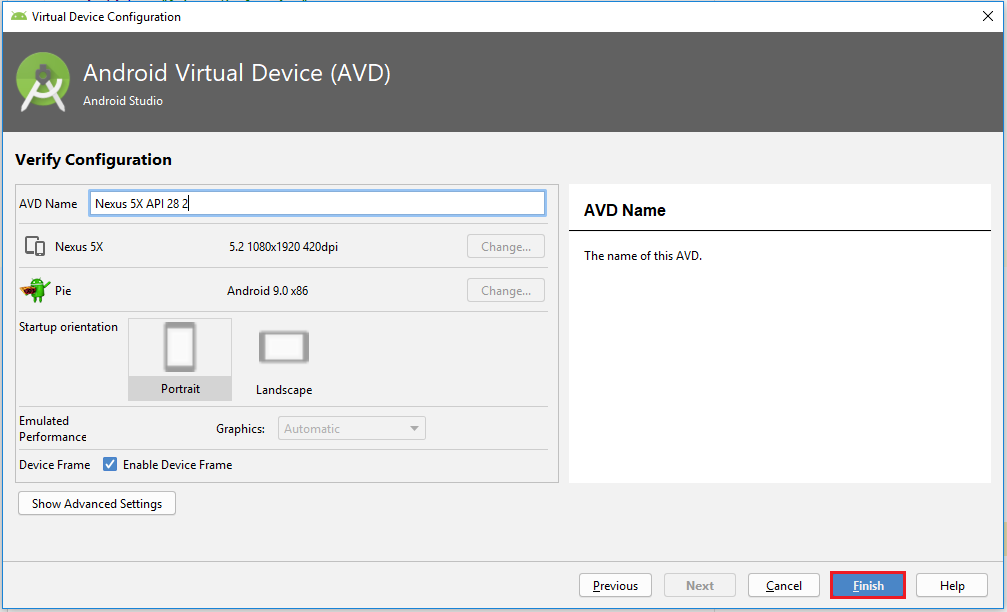
-
Check that the new device is created correctly.


From Android project to real device
To test on a real android device, an easy approach to communicate a smartphone (front-end) and computer (back-end) is to configure a WiFi hotspot and connect the computer to it. A guide about this process can be found at https://support.google.com/nexus/answer/9059108?hl=en
Once connected, run ipconfig on a console if you are using windows or ifconfig on a linux machine to get the IP address of your machine’s Wireless LAN adapter WiFi.

This obtained IP must be used instead of "localhost" or "10.0.2.2" at environment.android.ts.

After this configuration, follow the build steps in "From Ionic to Android project" and the first three steps in "From Android project to emulated device".
Send APK to Android through USB
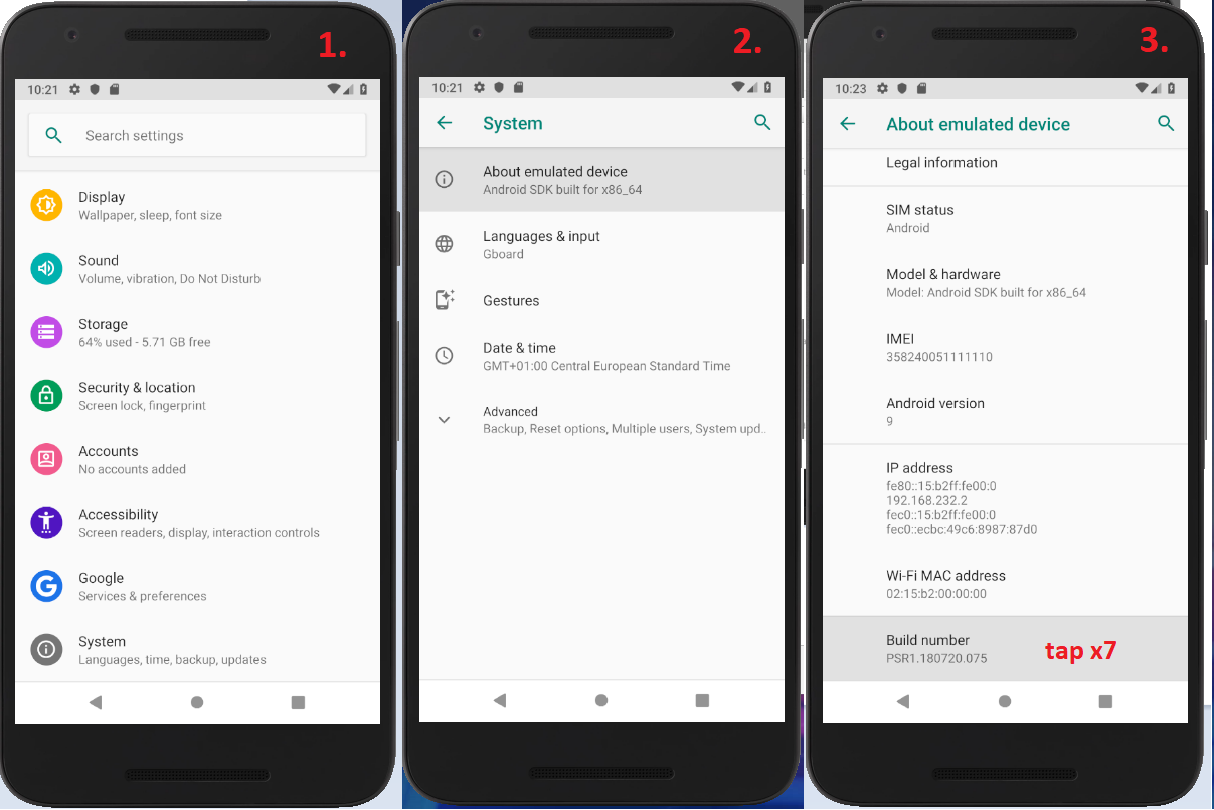
To send the built application to a device, you can connect computer and mobile through USB, but first, it is necessary to unlock developer options.
-
Open "Settings" and go to "System".
-
Click on "About".
-
Click "Build number" seven times to unlock developer options.
-
Go to "System" again an then to "Developer options"
-
Check that the options are "On".
-
Check that "USB debugging" is activated.


After this, do the step four in "From Android project to emulated device" and choose the connected smartphone.

