Contribute to help us improve!
Are there edge cases or problems that we didn't consider? Is there a technical pitfall that we should add? Did we miss a comma in a sentence?
If you have any input for us, we would love to hear from you and appreciate every contribution. Our goal is to learn from projects for projects such that nobody has to reinvent the wheel.
Let's collect our experiences together to make room to explore the novel!
To contribute click on Contribute to this page on the toolbar.
Ionic Progressive Web App
This guide is a continuation of the guide Angular PWAs, therefore, valid concepts explained there are still valid in this page but focused on Ionic.
Assumptions
This guide assumes that you already have installed:
-
Node.js
-
npm package manager
-
Angular CLI
-
Ionic 5 CLI
-
Capacitor
Also, it is a good idea to read the document about PWA using Angular.
Sample Application
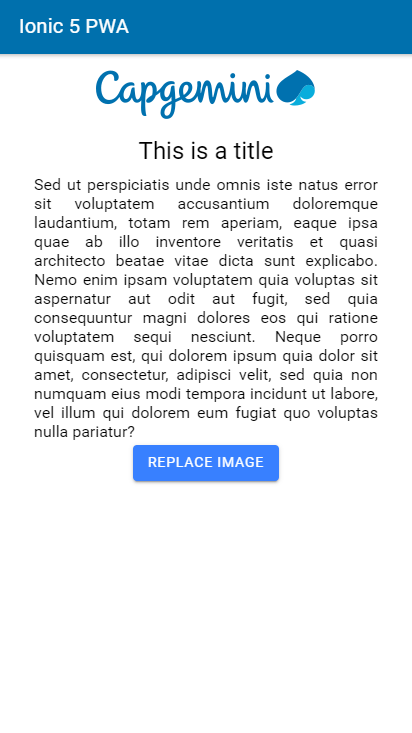
To explain how to build progressive web apps (PWA) using Ionic, a basic application is going to be built. This app will be able to take photos even without network using PWA elements.
Step 1: Create a new project
This step can be completed with one simple command: ionic start <name> <template>, where <name> is the name and <template> a model for the app. In this case, the app is going to be named basic-ion-pwa.
Step 2: Structures and styles
The styles (scss) and structures (html) do not have anything specially relevant, just colors and ionic web components. The code can be found in devon4ng samples.
Step 3: Add functionality
After this step, the app will allow users take photos and display them in the main screen. First we have to import three important elements:
-
DomSanitizer: Sanitizes values to be safe to use. -
SafeResourceUrl: Interface for values that are safe to use as URL. -
Plugins: Capacitor constant value used to access to the device’s camera and toast dialogs.
  import { DomSanitizer, SafeResourceUrl } from '@angular/platform-browser';
  import { Plugins, CameraResultType } from '@capacitor/core';
  const { Camera, Toast } = Plugins;
The process of taking a picture is enclosed in a takePicture method. takePicture calls the Camera’s getPhoto function which returns an URL or an exception. If a photo is taken then the image displayed in the main page will be changed for the new picture, else, if the app is closed without changing it, a toast message will be displayed.
  export class HomePage {
    image: SafeResourceUrl;
    ...

    async takePicture() {
      try {
        const image = await Camera.getPhoto({
          quality: 90,
          allowEditing: true,
          resultType: CameraResultType.Uri,
        });

        // Change last picture shown
        this.image = this.sanitizer.bypassSecurityTrustResourceUrl(image.webPath);
      } catch (e) {
        this.show('Closing camera');
      }
    }

    async show(message: string) {
      await Toast.show({
        text: message,
      });
    }
  }
Step 4: PWA Elements
When Ionic apps are not running natively, some resources like Camera do not work by default but can be enabled using PWA Elements. To use Capacitor’s PWA elements run npm install @ionic/pwa-elements and modify src/main.ts as shown below.
...

// Import for PWA elements
import { defineCustomElements } from '@ionic/pwa-elements/loader';

if (environment.production) {
  enableProdMode();
}

platformBrowserDynamic().bootstrapModule(AppModule)
  .catch(err => console.log(err));

// Call the element loader after the platform has been bootstrapped
defineCustomElements(window);
Step 5: Make it Progressive.
Turning an Ionic 5 app into a PWA is pretty easy, the same module used to turn Angular apps into PWAs has to be added, to do so, run: ng add @angular/pwa. This command also creates an icons folder inside src/assets and contains angular icons for multiple resolutions. If you want use other images, be sure that they have the same resolution, the names can be different but the file manifest.json has to be changed accordingly.
Step 6: Configure the app
manifest.json
Default configuration.
ngsw-config.json
At assetGroups → resources add a URLs field and a pattern to match PWA Elements scripts and other resources (images, styles, …):
"urls": ["https://unpkg.com/@ionic/pwa-elements@1.0.2/dist/**"]Step 7: Check that your app is a PWA
To check if an app is a PWA lets compare its normal behaviour against itself but built for production. Run in the project’s root folder the commands below:
ionic build --prod to build the app using production settings.
npm install http-server to install an npm module that can serve your built application. Documentation here. A good alternative is also npm install serve. It can be checked here.
Go to the www folder running cd www.
http-server -o or serve to serve your built app.
In order not to install anything not necessary npx can be used directly to serve the app. i.e run npx serve [folder] will automatically download and run this HTTP server without installing it in the project dependencies.
|

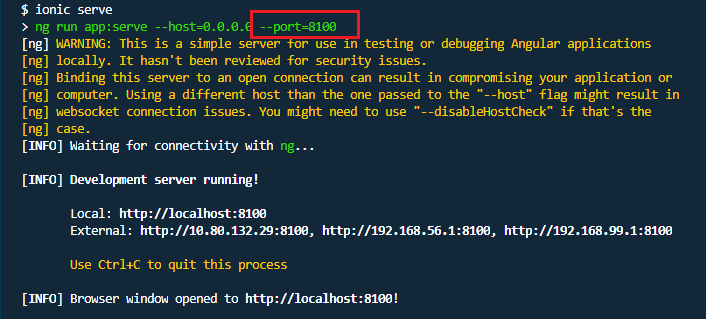
In another console instance run ionic serve to open the common app (not built).
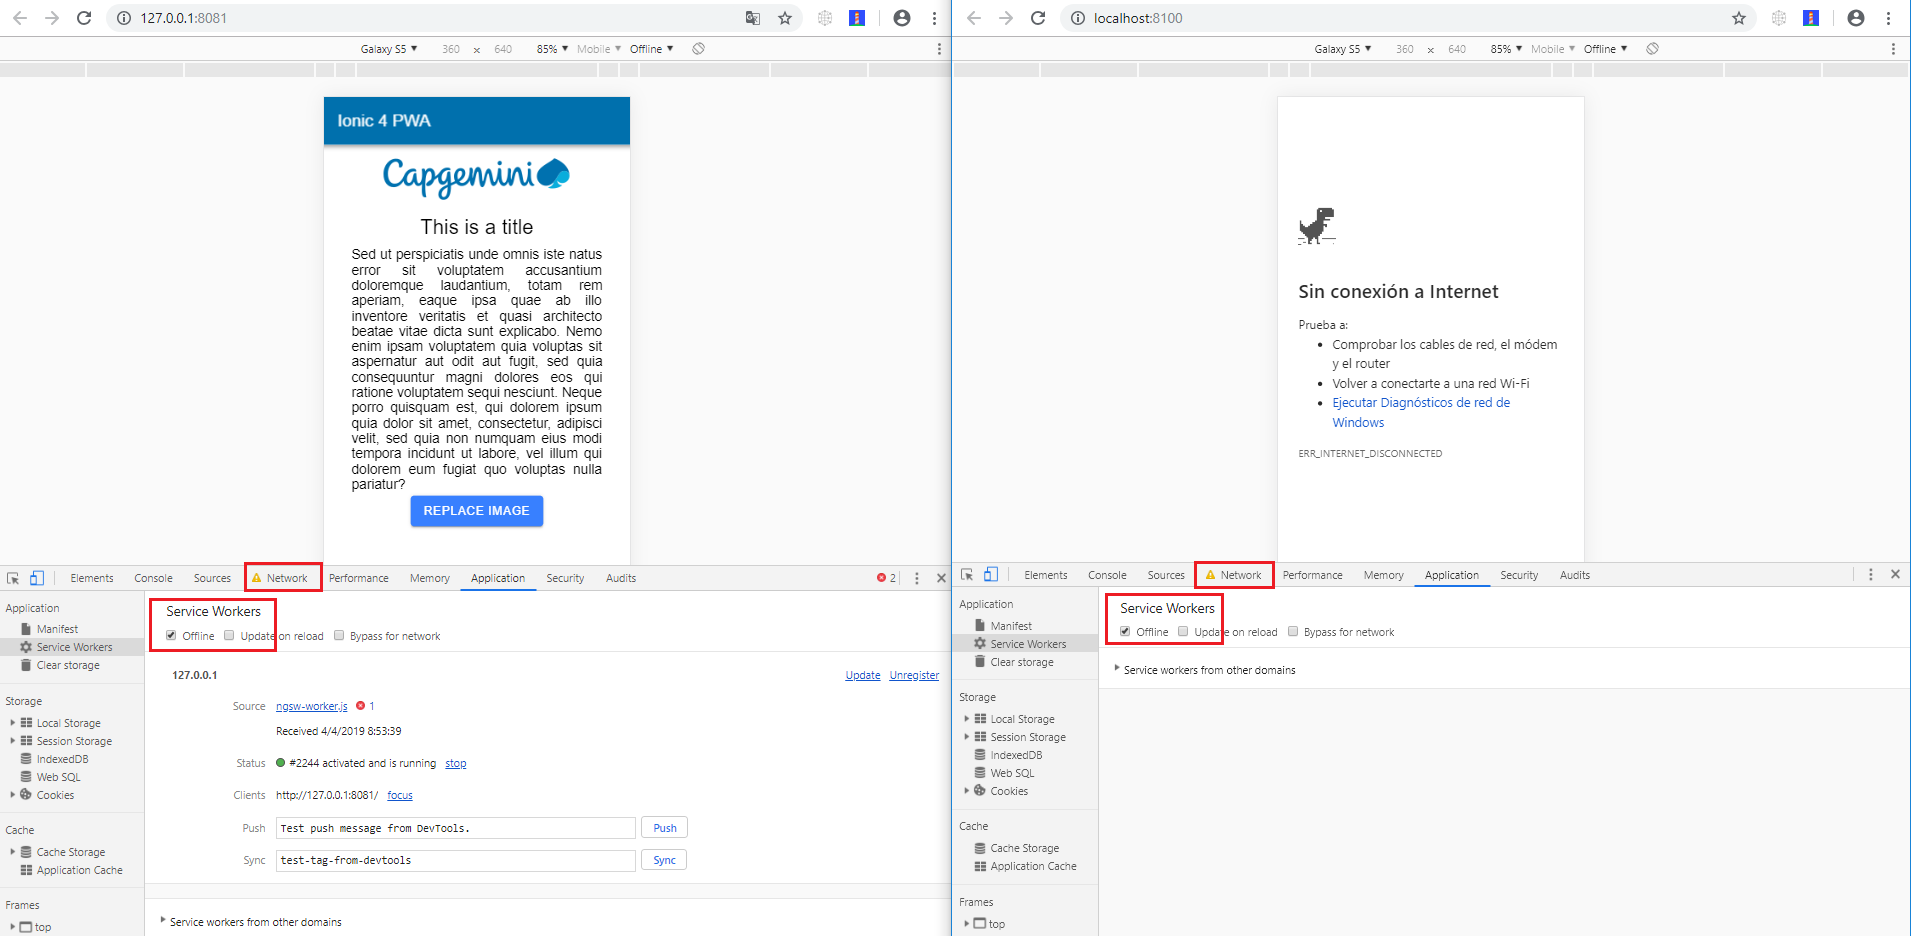
The first difference can be found on Developer tools → application, here it is seen that the PWA application (left) has a service worker and the common one does not.
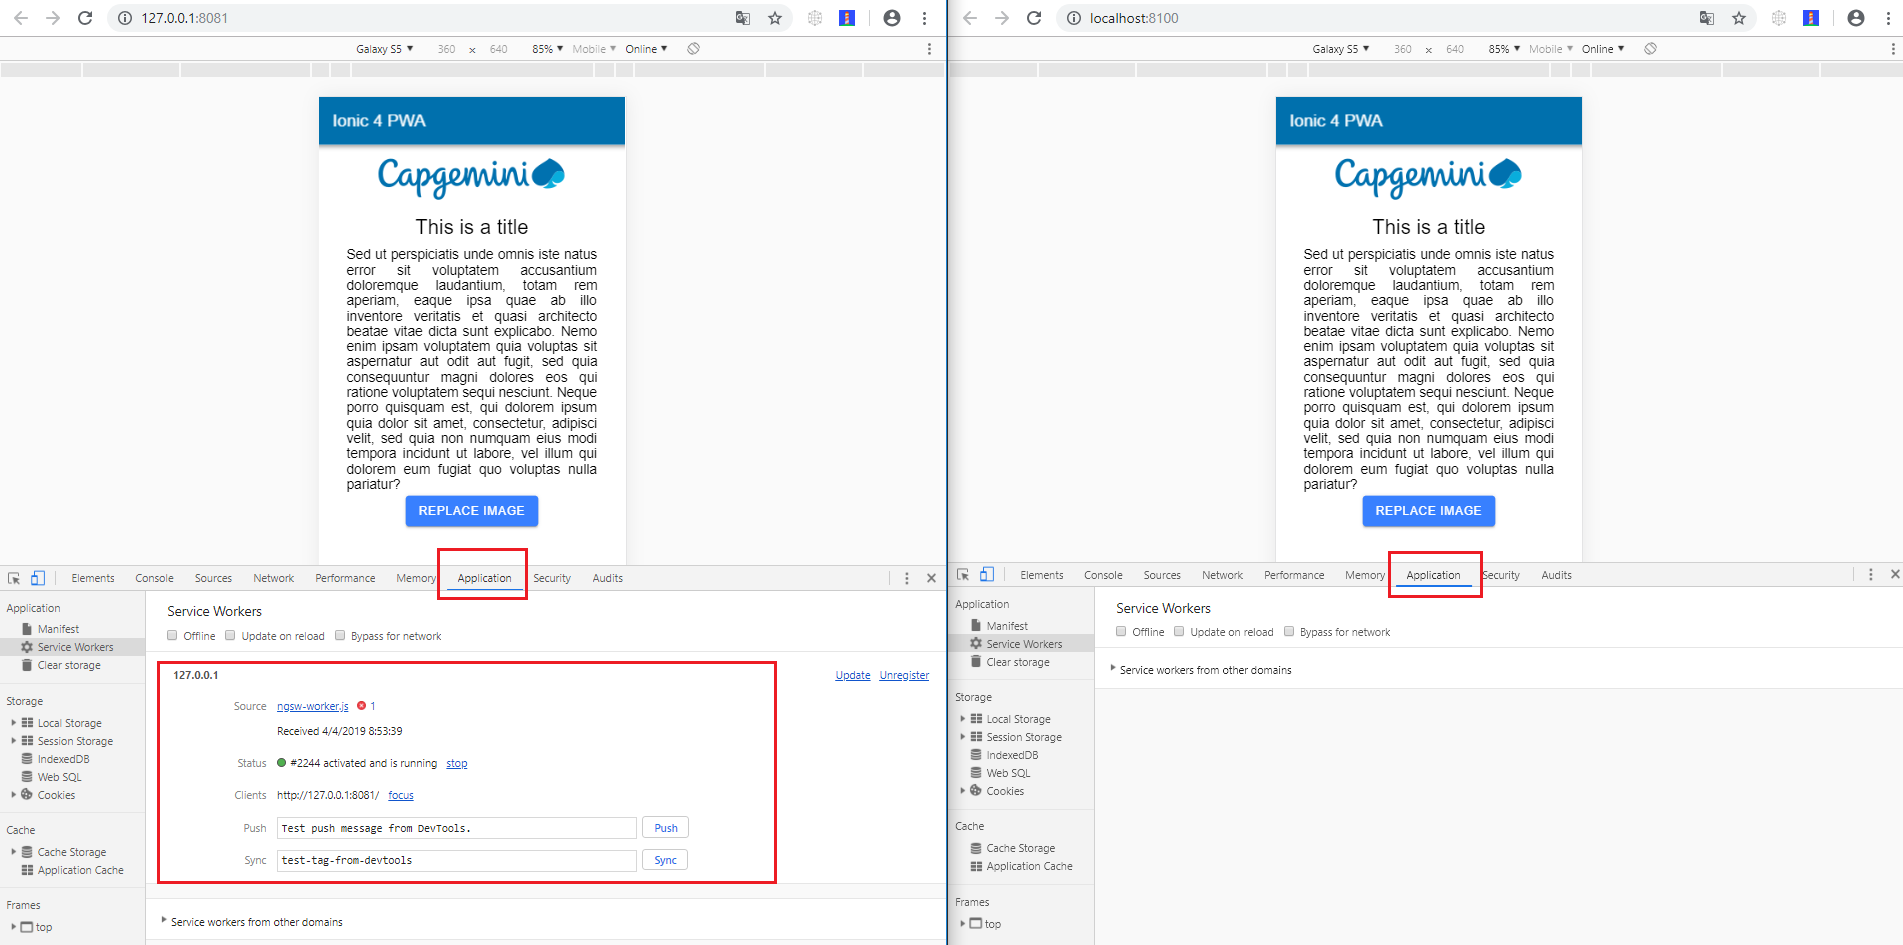
If the "offline" box is checked, it will force a disconnection from network. In situations where users do not have connectivity or have a slow, one the PWA can still be accessed and used.
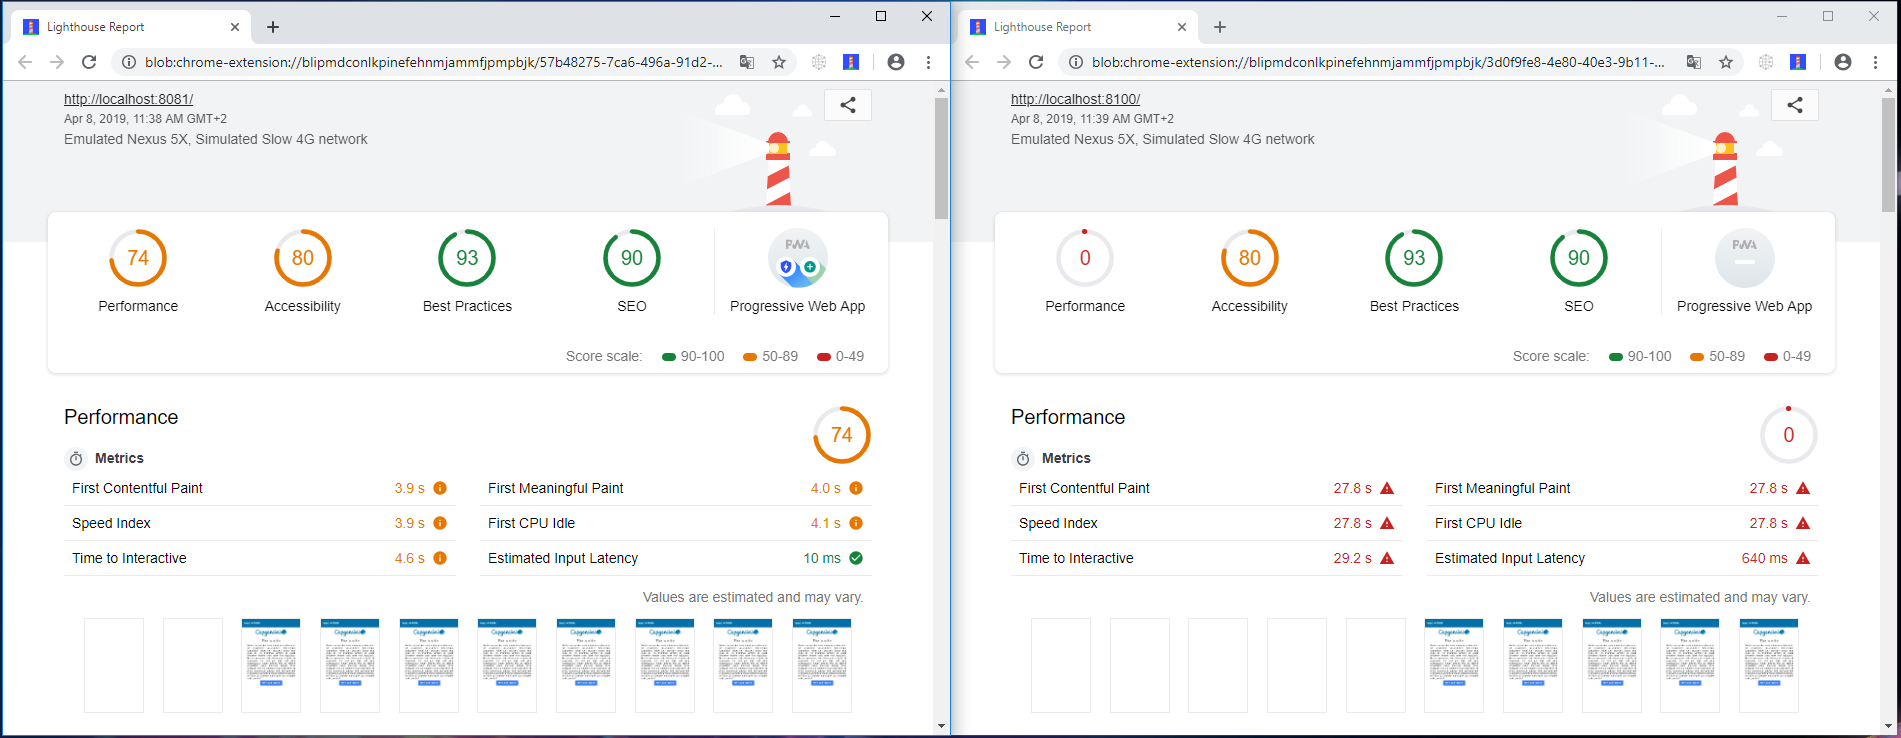
Finally, plugins like Lighthouse can be used to test whether an application is progressive or not.