
In this scenario, you will learn how to write a simple mock service that helps us by feeding data into our components.
Prerequisites
-
GitHub account
-
Basic Angular knowledge
Learning goals
-
After completing this scenario, You will learn how to test classes which have dependencies in isolation by using Mocks.
More information about Angular Mock Service on https://github.com/devonfw/devon4ng/wiki/guide-angular-mock-service
The definition of each step of this tutorial can be found at https://github.com/devonfw-tutorials/tutorials/tree/main/angular-mock-service/.
Feel free to report any errors to us or fix them yourself. Errors can be reported by creating an issue in the tutorials repository. To fix the error fork the repository and create a pull request. Errors in the wiki can be reported and fixed in the Tutorial-compiler repository. You can find a description of what to look for when creating a pull request at the devonfw contribution guide: https://devonfw.com/website/pages/community/community.html#community.asciidoc_contributing-to-devonfw. If you want to create a tutorial you can start with the katacoda tutorial and read the description for creating your own tutorials: https://github.com/devonfw-tutorials/tutorials/wiki/Development.
devonfw setup
If you already installed the devonfw IDE, you can skip this step.
Prerequisites
-
You need to have a tool to extract
.tar.gzfiles. On Windows lower Windows 10 use can use 7-Zip. The most other platforms support this feature by default. -
You need to have Git and Curl installed. On Windows you have to install Git for Windows. On Linux systems you might need to install the following tools in case they are not present (
sudo apt-get install git curlorsudo yum install git-core curl)
Create a new directory in the location where you want to install the devonfw IDE. If you are using the terminal, navigate to this location and run mkdir devonfw and cd devonfw to create the directory and navigate into it.
Download
Now you have to download the latest release of the devonfw IDE. You can download it from here.
In the Terminal execute Invoke-WebRequest -OutFile devonfw-ide-scripts.tar.gz 'https://repository.sonatype.org/service/local/artifact/maven/redirect?r=central-proxy&g=com.devonfw.tools.ide&a=devonfw-ide-scripts&v=LATEST&p=tar.gz' if you are using Windows.
On Linux use wget -c 'https://repository.sonatype.org/service/local/artifact/maven/redirect?r=central-proxy&g=com.devonfw.tools.ide&a=devonfw-ide-scripts&v=LATEST&p=tar.gz' -O devonfw-ide-scripts.tar.gz -.
On MacOS, depending on your setup, you can either use the same wget command specified for the Linux installation (install wget via homebrew brew install wget) or use any other available download command i.e. curl -o devonfw-ide-scripts.tar.gz https://repository.sonatype.org/service/local/artifact/maven/redirect?r=central-proxy&g=com.devonfw.tools.ide&a=devonfw-ide-scripts&v=LATEST&p=tar.gz.
After that you need to extract the downloaded file. To do this, run tar -xvzf devonfw-ide-scripts.tar.gz. Or you can simply use a tool (e.g. 7-Zip) for this.
Setup
First, you need to prepare a settings repository to specify the tools to be installed within the devonfw IDE. Normally this is done by your project. If you just want to test the devonfw IDE, you can use the default URL, which is https://github.com/devonfw/ide-settings.
For now clone the repository on https://github.com/devonfw/ide-settings or your own fork of it.
For this tutorial you have to write DEVON_IDE_TOOLS=(ng npm vscode) into the devon.properties file of the cloned settings repository. These settings will now be passed into the installation process of the devonfw-ide.
Start the setup process by executing .\setup 'path/to/settings' (Windows) or bash setup path/to/settings.git (Linux).
You can also just execute .\setup (Windows) or bash setup (Linux) and press Enter when the setup assistent asks for the URL to the settings repository. This will also download the default settings and install the default tools within the devonfw IDE.
What is mock data and service?
Mock Data
Mock data is fake data which is artificially inserted into a piece of software. Mocking is essentially simulating the behaviour of real data in controlled ways. So in order to use mock data effectively, it is essential to have a good understanding of the software under test and more importantly how it uses its data. As with most things, there are both advantages and disadvantages to doing this.
One of the big advantages with mock data is that it makes it possible to simulate errors and circumstances that would otherwise be very difficult to create in a real world environment. A disadvantage however is that without good understanding of the software, it will be possible to manipulate data in ways which would never actually happen in the real world.
Mock Service
Services are often the smoothest files to unit test. A mock service imitates a real REST or SOAP API – it contains definitions for operations that clients call, receives requests, and returns simulated responses.
When testing a component with service dependencies, the best practice is mocking them, in order to test the component in an isolated environment. In fact, our purpose is testing the component, not the services, that can be trouble, especially if they try to interact with a server.
Here, we will go through a angular-mock-service sample app.
The app presents 3 pages as follows:
-
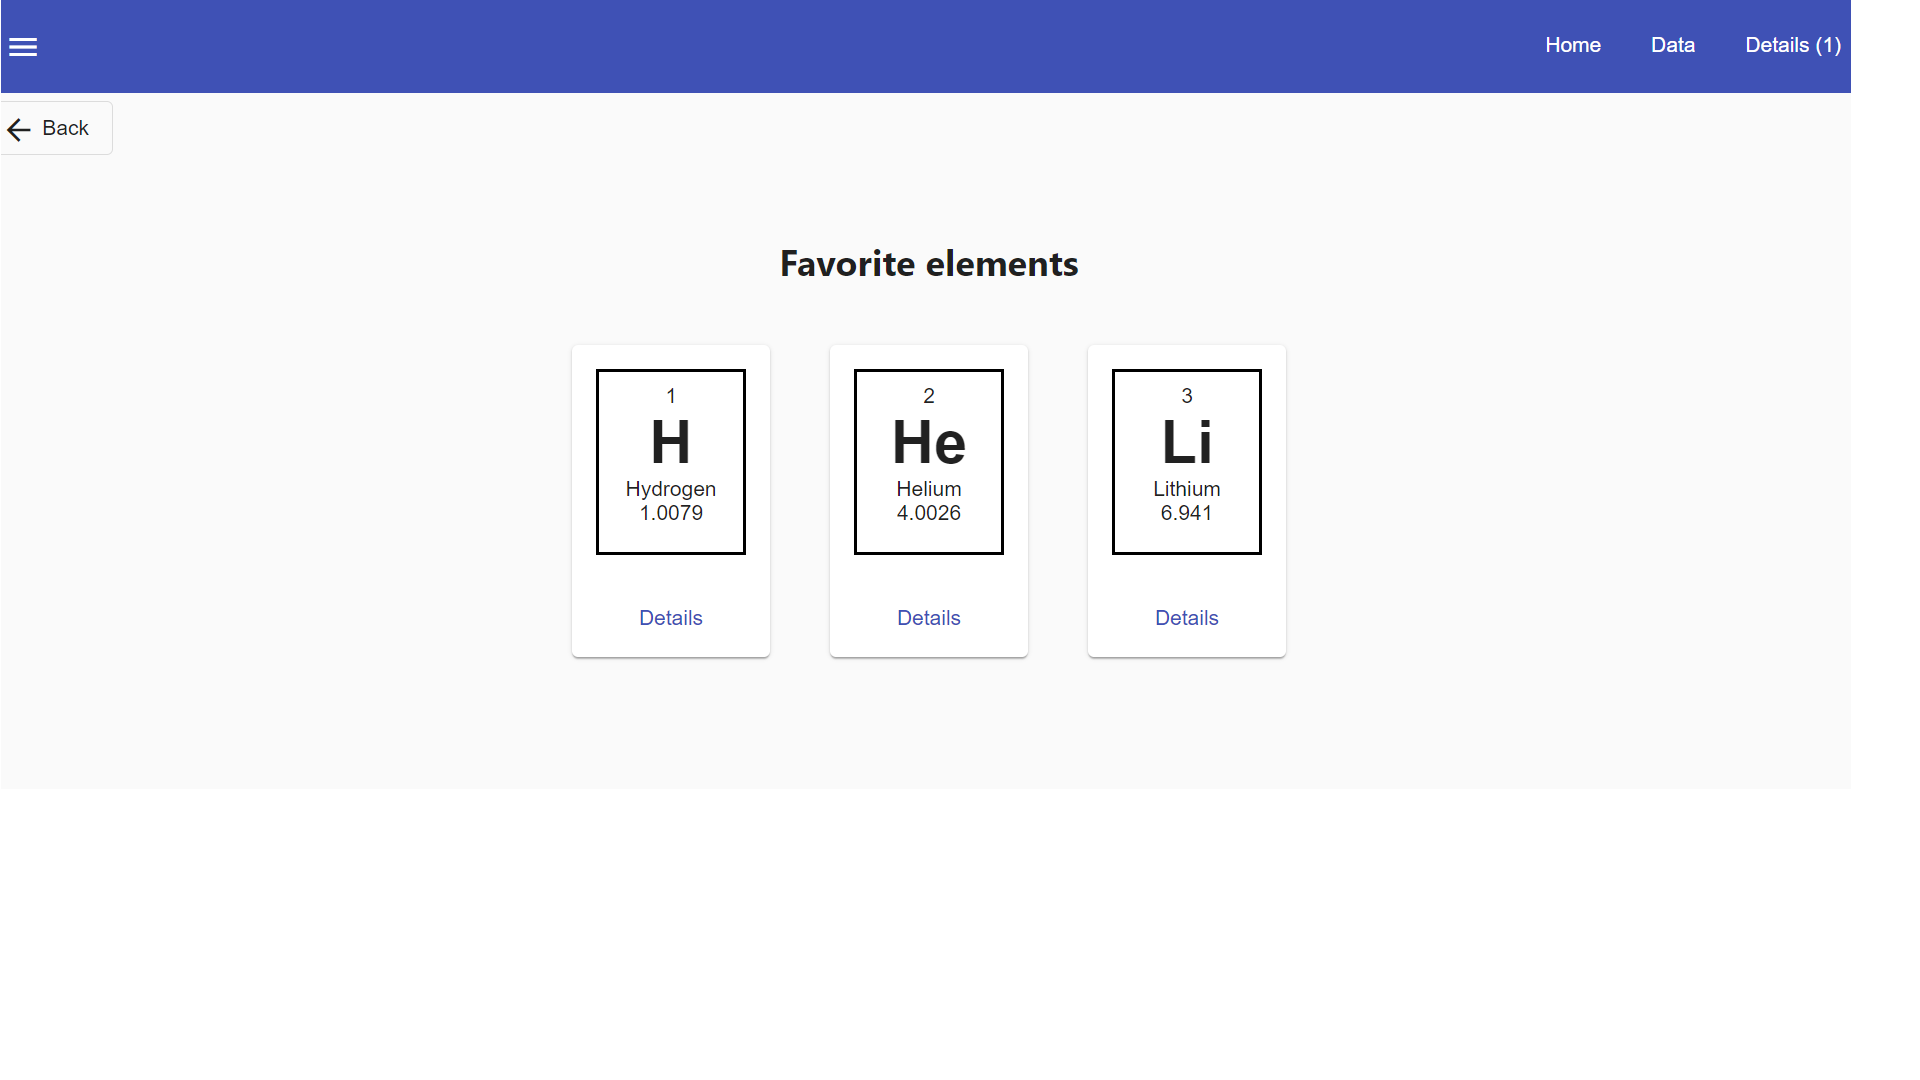
A leader board with the top 3 elements A leader board can be understood as "the most popular items in a set", "the latest updated items", "you favorite items" etc.
-
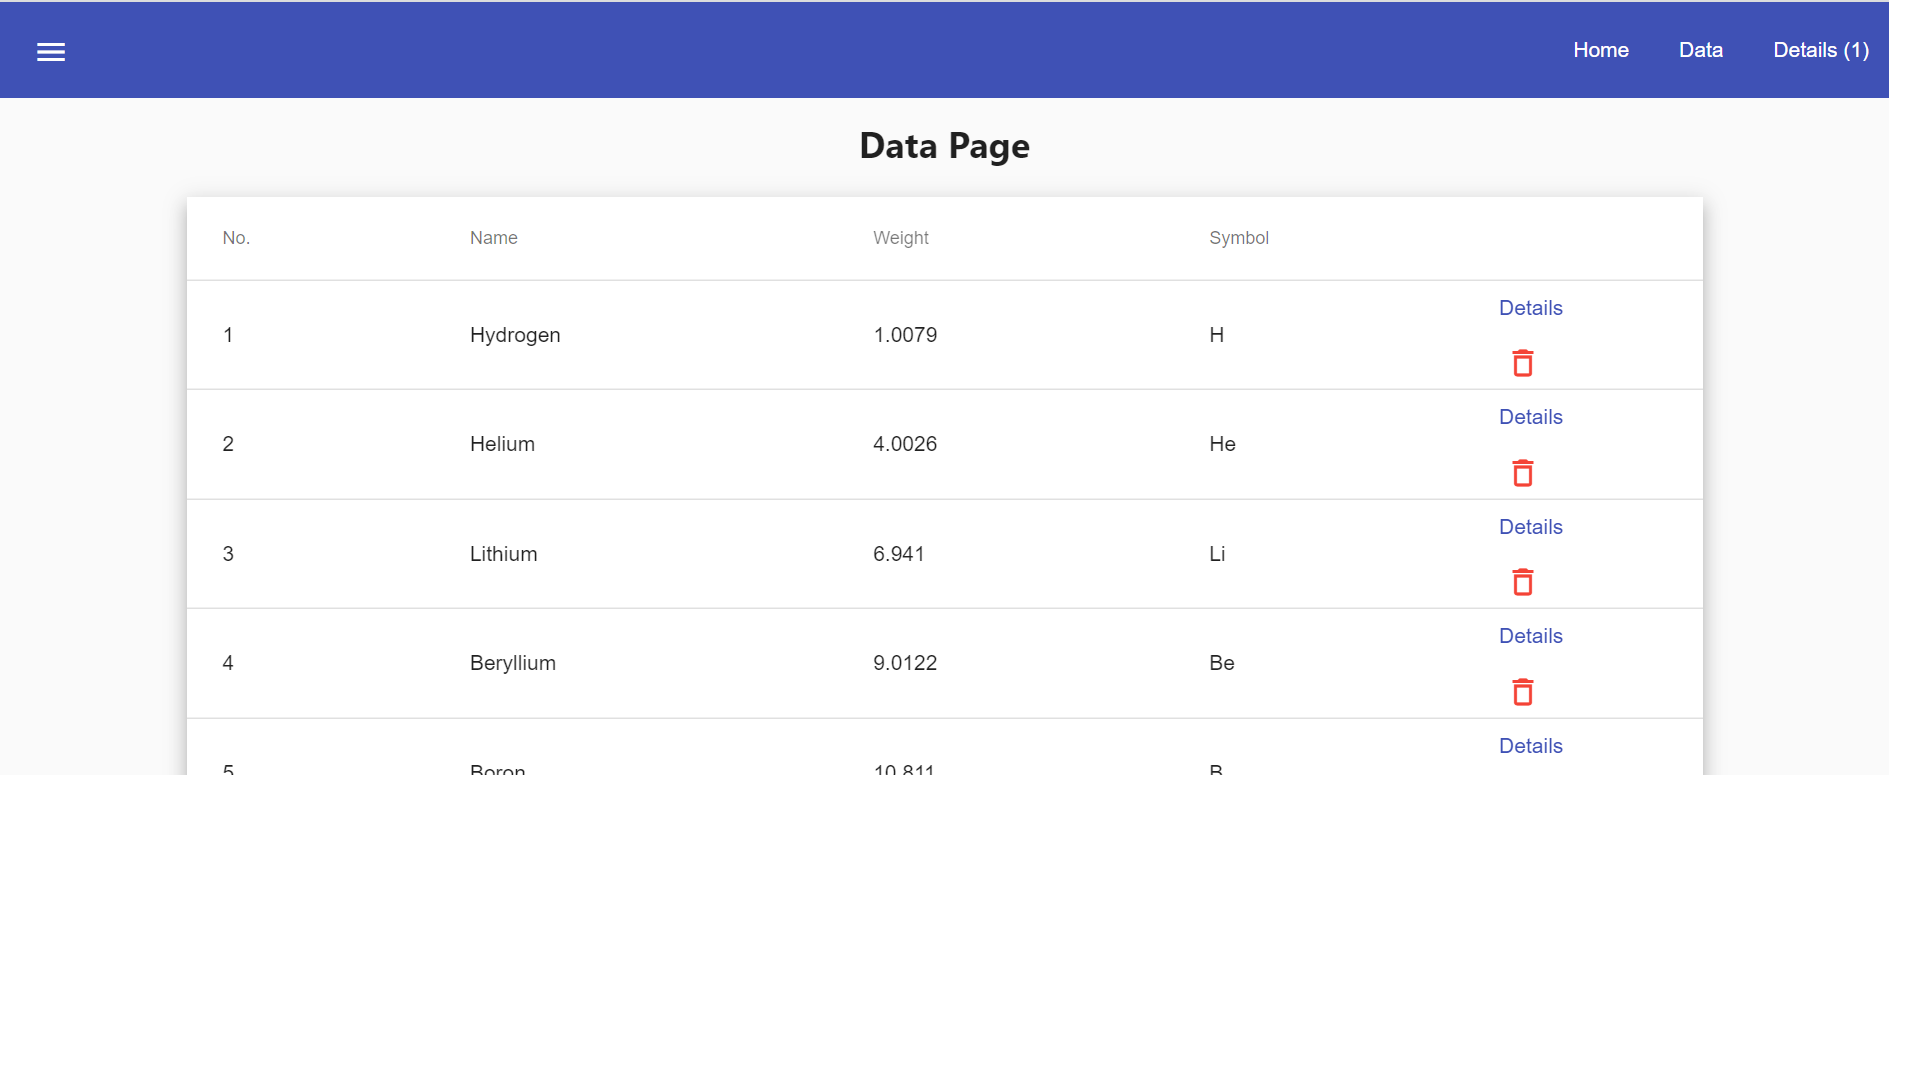
A data table with all the elements A data table with CRUD operations is very useful (in our case we only view details or delete an item, but they illustrate two important things: the details view shows how to navigate and consume a parametric route, the delete action shows how to invoke service operations over the loaded data - this means that the component is reusable and when the data comes with an API, only the service will need it’s implementation changed)
-
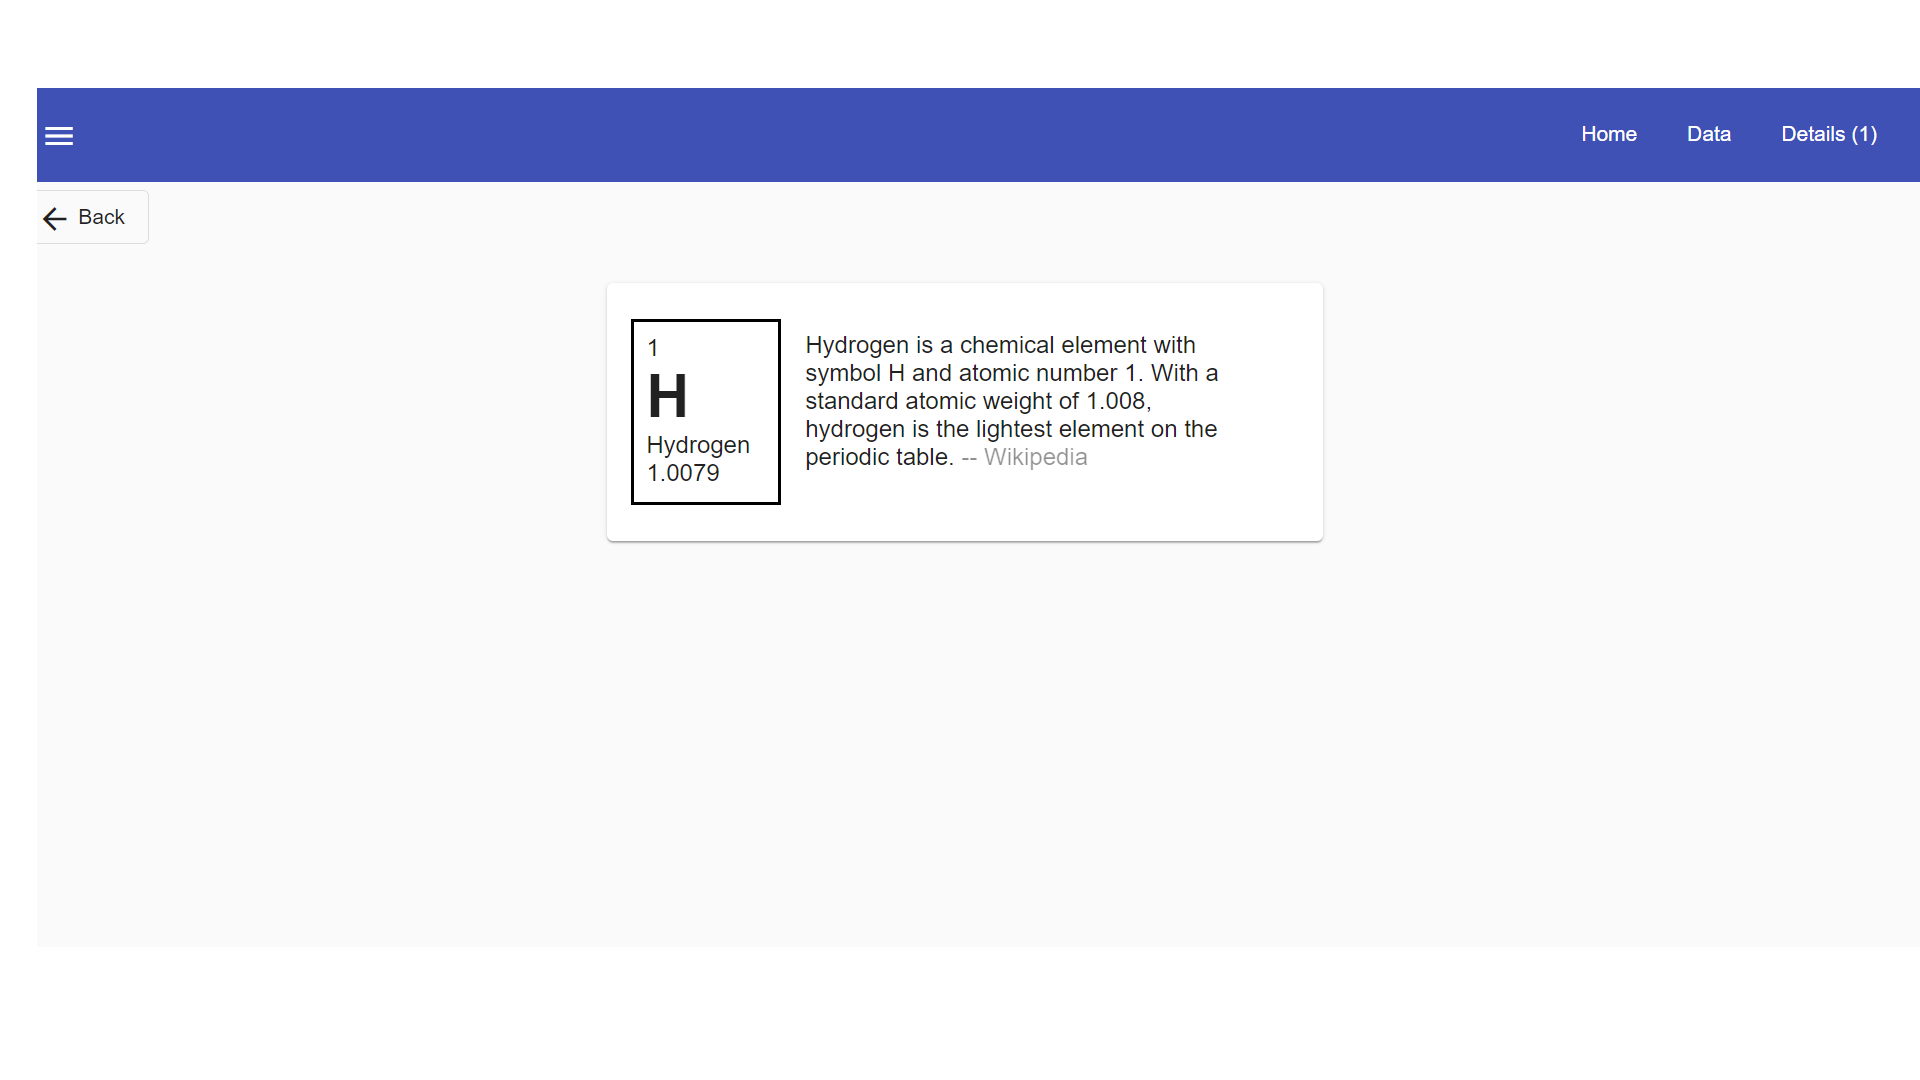
A details page that reads a route parameter and displays the details of the element.
Clone Repository
First, we have to clone the Devon4ng repository to access Angular Mock Service Sample.
Prerequisites
-
You need to have Git installed. You can download Git here for your OS and install it by following the instructions.
Download
Open a terminal in your current workspace.
Firstly, you have to move to the directory where the repository should be cloned to.
If the directory does not exist yet, you can create it by using the mkdir command in the terminal.
In this case execute mkdir -p /home/runner/work/wiki-tutorials/wiki-tutorials/compiler/build/working/devonfw/workspaces/main.
After that, move to the target directory by executing cd /home/runner/work/wiki-tutorials/wiki-tutorials/compiler/build/working/devonfw/workspaces/main in the terminal.
To clone a Git repository execute git clone https://github.com/devonfw/devon4ng.git in the terminal.
Implementing Mock Data
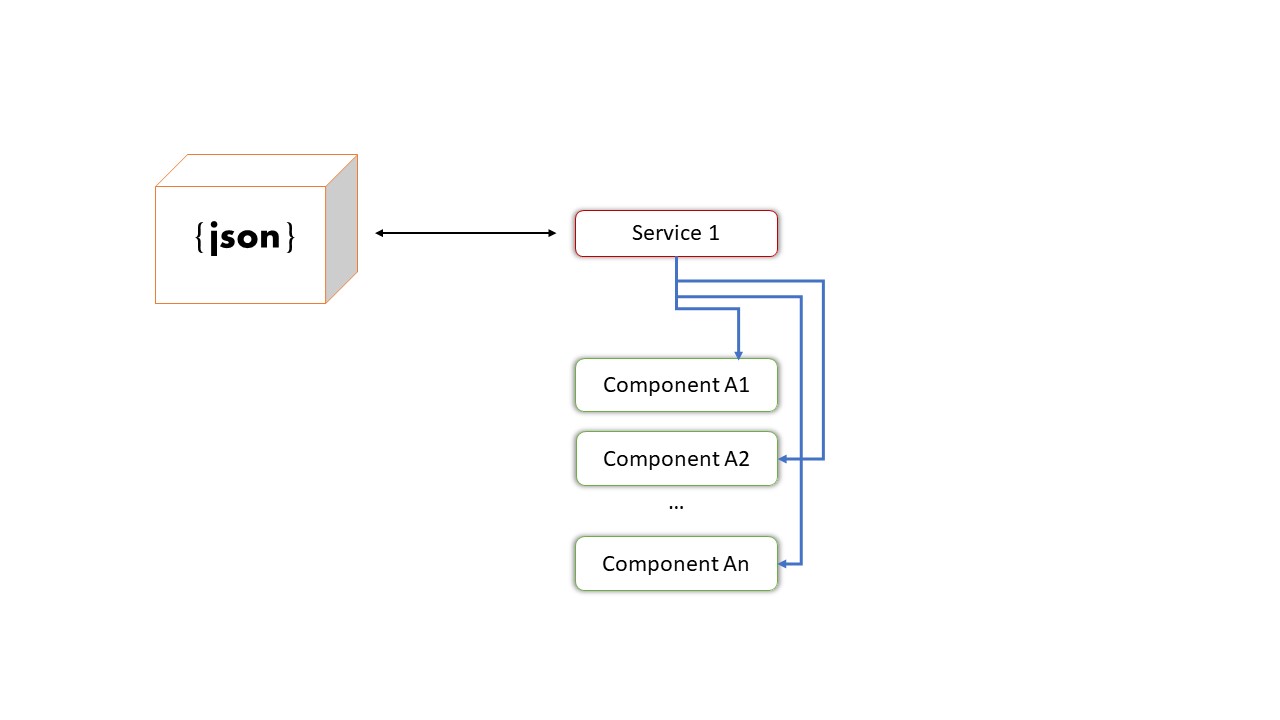
Let’s consider a 'box of data' represented in JSON. Physically this means a folder with some JSON/TS files in it. They are located in the app/mock folder. The example uses only one mock data file. The file is typed according to our data model.
The model is represented by the interfaces we make. These interfaces describe the data structures we will use in our application. In this example, there is one data model, corresponding with the 'type' of data that was mocked. In the models folder you will find the .ts script file that describes chemical elements. The corresponding mock file defines a set is chemical element objects, in accordance to our interface definition.
Implementing Mock Service
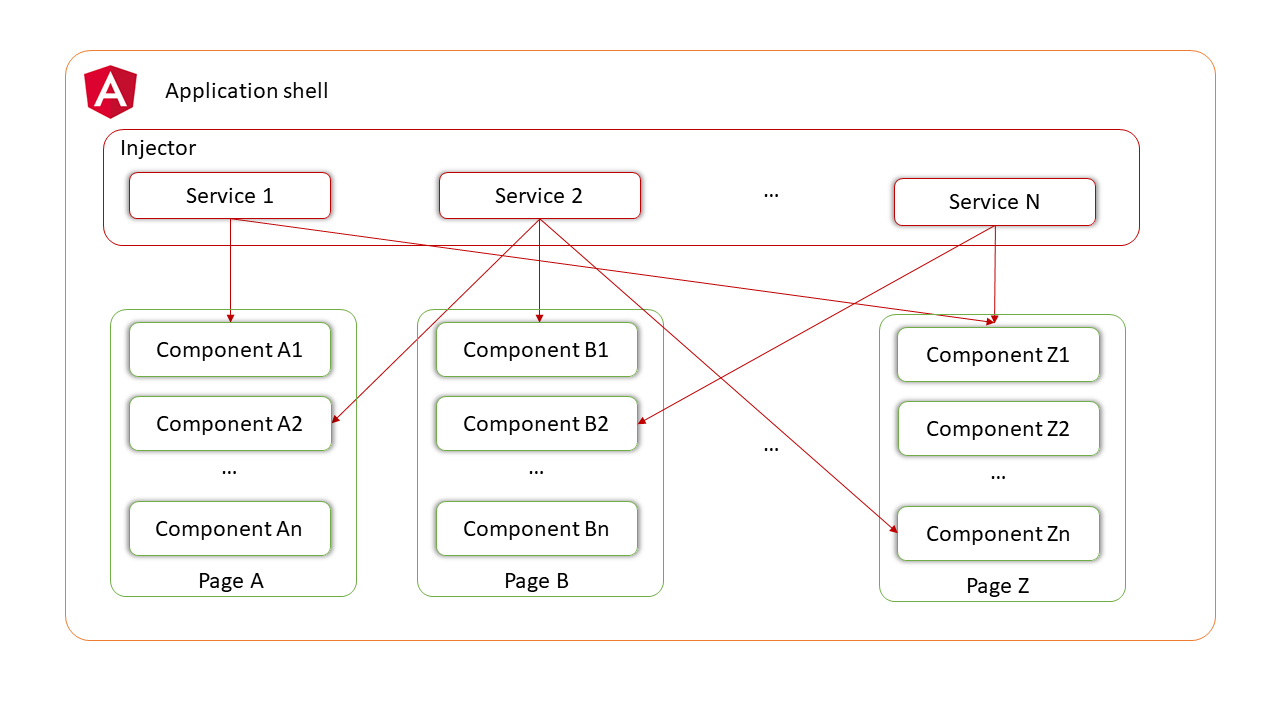
A service is an injectable logic that can be consumed by all the components that need it. It can carry manipulation functions and ,in our case, fetch data from a provider. Inside the Angular App, an Injector gives access to each component to their required services. It’s good coding practice to use a distinct service to each data type you want to manipulate. The type is described in a interface.
Here we simply fetch and display the data of elements and their details.
Conclusion
To conclude, in this tutorial you learned
-
the concepts of mock data and services
-
the mock architecture with the help of sample app