
MrChecker download
Windows
Advanced installation
Java installation
There is one important pre-requisite for Mr Checker installation - Java has to be installed on the computer and an environmental variable has to be set in order to obtain optimal functioning of the framework.
-
Install Java 1.8 JDK 64bit
Download and install Java download link
(To download JDK 8 from Oracle you have to have an account. It is recommended to get a JDK build based on OpenJDK from AdoptOpenJDK)
-
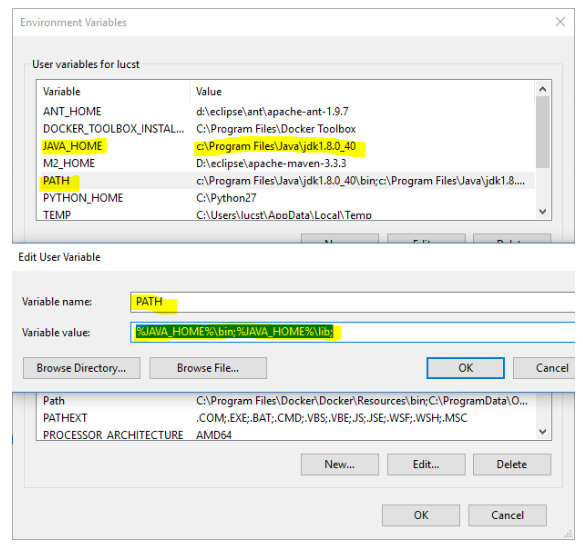
Windows Local Environment - How to set:
-
Variable name: JAVA_HOME | Variable value: C:\Where_You’ve_Installed_Java
-
Variable name: PATH | Variable value: %JAVA_HOME%\bin;%JAVA_HOME%\lib
-
-
Next, verify it in the command line:
> java --version
Other components installation
Install each component separately, or update the existing ones on your PC.
-
Maven 3.5
-
Unzip Maven in following location C:\maven
-
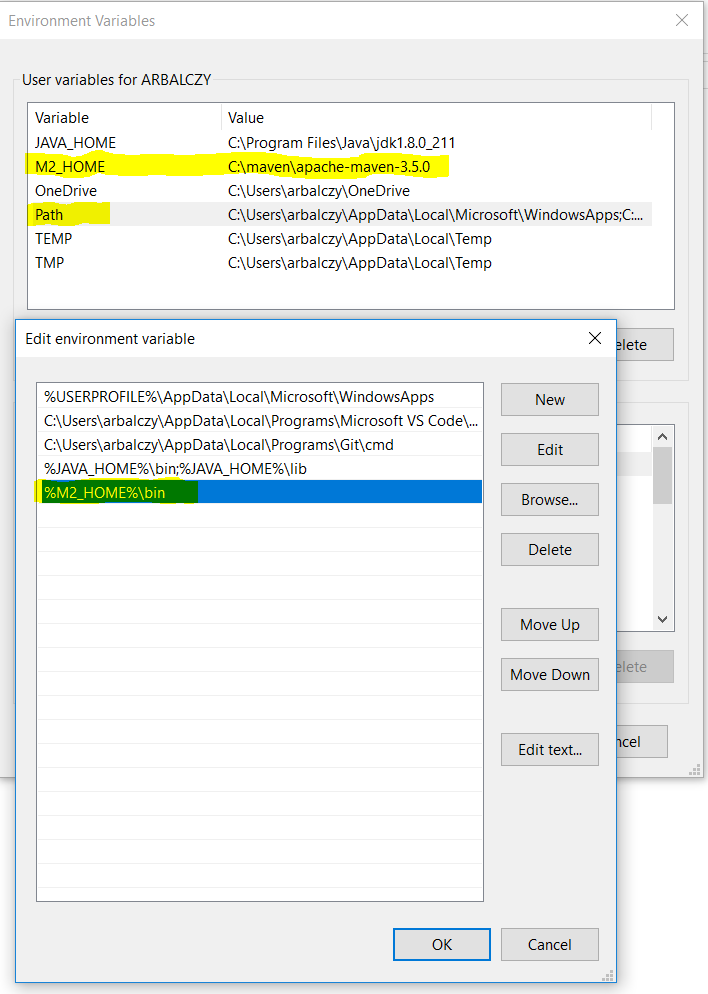
Set Windows Local Environment
-
Variable name: M2_HOME | Variable value: C:\maven\apache-maven-3.5.0
-
Variable name: PATH | Variable value: %M2_HOME%\bin
-
-
Verify it in the command line:
> mvn --version
-
IDE
-
Download a most recent Eclipse
-
Download a MrChecker Project https://downgit.github.io//home?url=https://github.com/devonfw/mrchecker/tree/develop/template[Template] to start a new project or Mrchecker Project https://downgit.github.io//home?url=https://github.com/devonfw/mrchecker/tree/develop/example[Example] to get better understanding what we are capable of.
-
You should consider installing some usefull plugins such as: csvedit, cucumber editor.
-
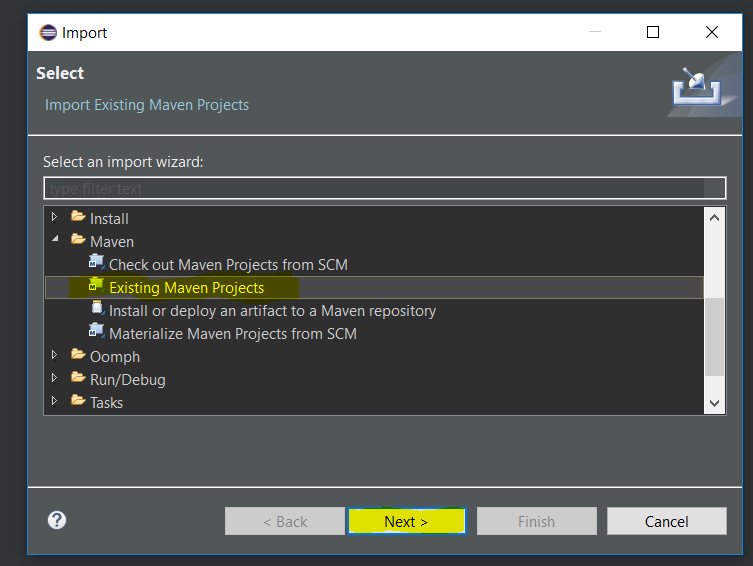
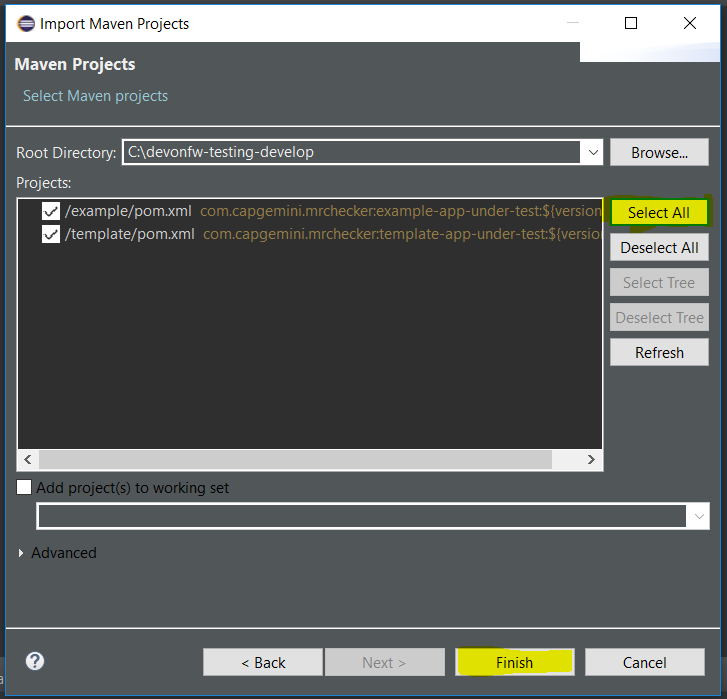
Import:

-
Projects from folders
-
Open already created projects:
-
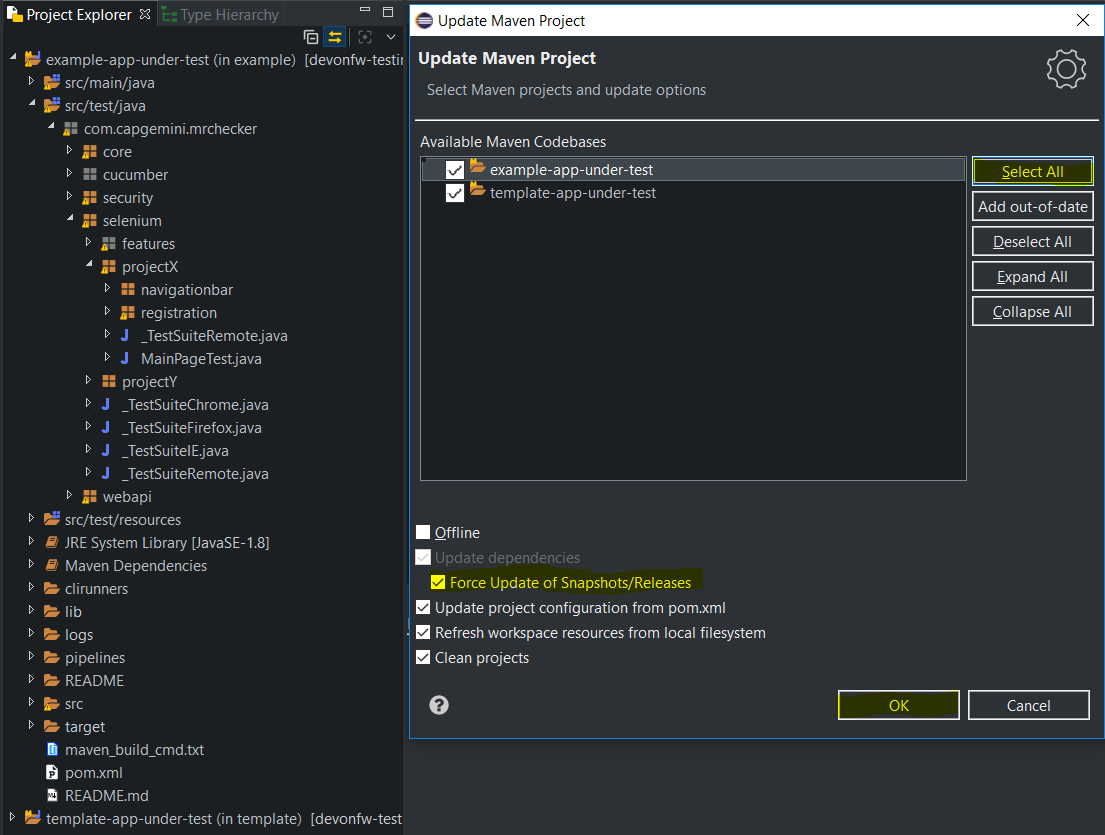
Update project structure - ALT + F5
-
Mac
MrChecker macOS installation
On this page, you can find all the details regarding MrChecker installation on your Mac.
Java installation
There is one important pre-requisite for Mr Checker installation - Java has to be installed on the computer and an environmental variable has to be set in order to obtain optimal functioning of the framework.
-
Install Java 1.8 JDK 64bit
Download and install Java download link
(To download JDK 8 from Oracle you have to have an account. It is recommended to get a JDK build based on OpenJDK from AdoptOpenJDK)
-
Next, verify thx in the command line:
> java --version
Other components installation
Install each component separately, or update the existing ones on your Mac.
-
Maven 3.5
-
Unzip Maven in the following location /maven
-
Add Maven to PATH
> $ export PATH=$PATH:/maven/apache-maven-3.5.0/bin/
-
Verify in terminal:
> $ mvn -version
-
Eclipse IDE
-
Download and unzip Eclipse
-
Download MrCheckerTestFramework source code
-
Import:
-
Select Projects from folders:
-
Open already created projects:
-
Update project structure - ALT + F5
-
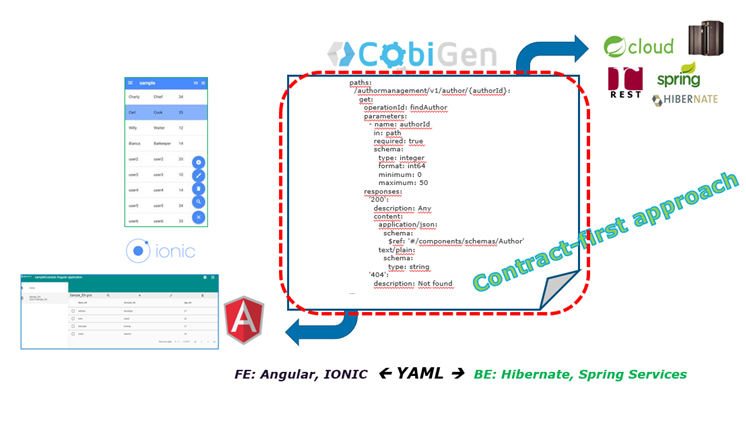
My Thai Star
My Thai Star application setup
My Thai Star is a reference application for DevonFW so it was used extensively in majority of our examples. To make them run properly you definitely should set it up somewhere and configure environment.csv accordingly. You can get the app from its official repository here https://github.com/devonfw/my-thai-star.
Setting up My Thai Start app
Most of the important informations are covered in https://github.com/devonfw/my-thai-star#deployment.
-
Get the machine with docker and docker-compose
-
Download the repository
-
Run docker-compose up
-
Go to your project to set up envrionment.csv
-
The variables we are interested in are MY_THAI_STAR_URL and MY_THAI_STAR_API_URL
-
If you set up My Thai Star application on different host adjust the values accordingly
-
The web aplication should be available using localhost:8081/restaurant
-
The web api should be avaulable using localhost:8081/api