
Environment Setup
Overview
This guide will explain how to configure the full system environment to make the Devon4Net.Template.WebAPI operate in Visual Studio Code.
Setting up the environment
For Windows
Visual Studio Code
Download and install Visual Studio Code:
-
Download the latest version here
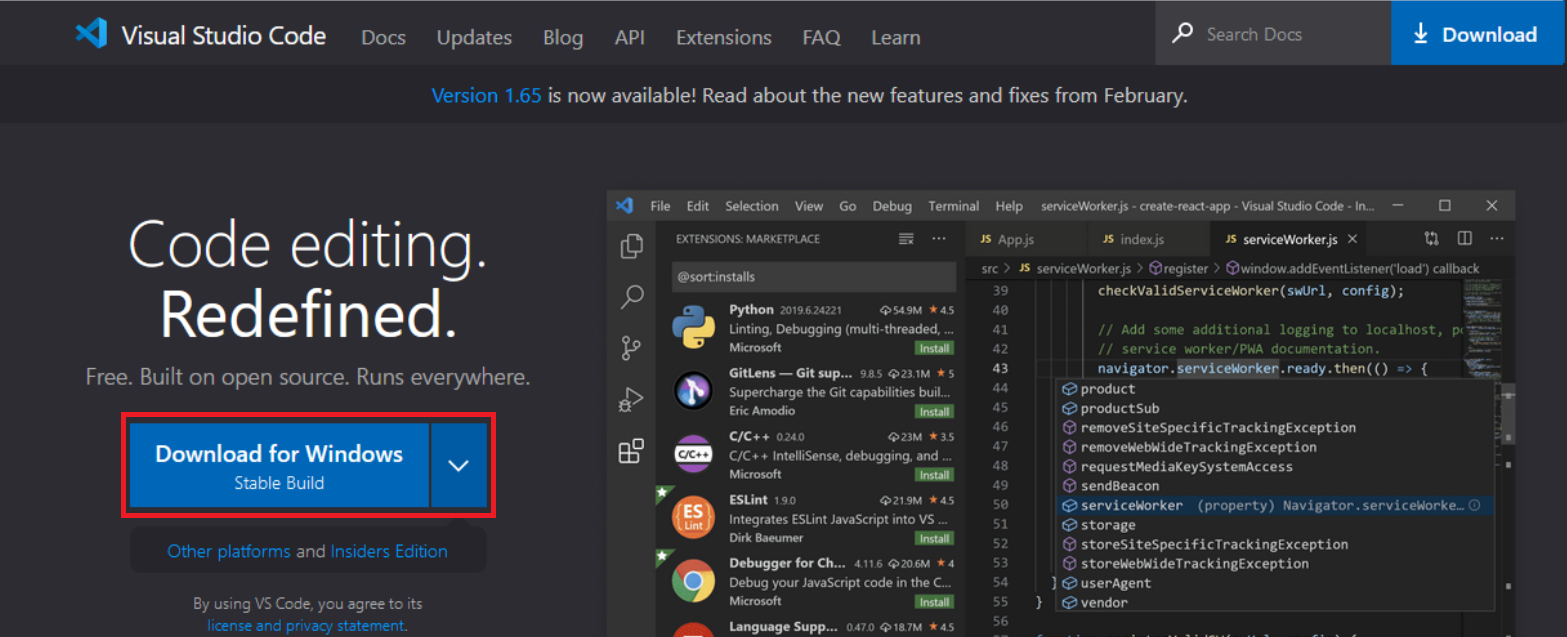 Figure 103. Download Page
 -
Open the downloaded installer, accept the terms and conditions, and then click next:
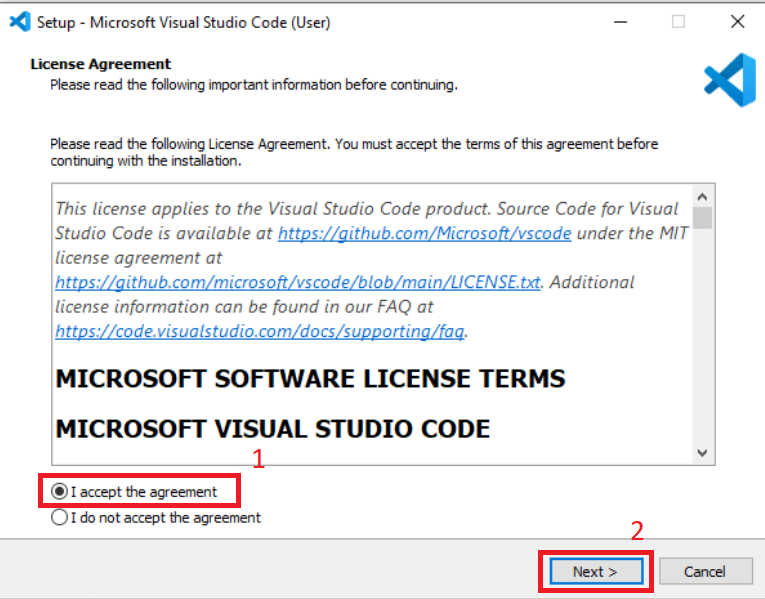 Figure 104. License Agreement
 -
Select the location where Visual Studio Code will be installed. :
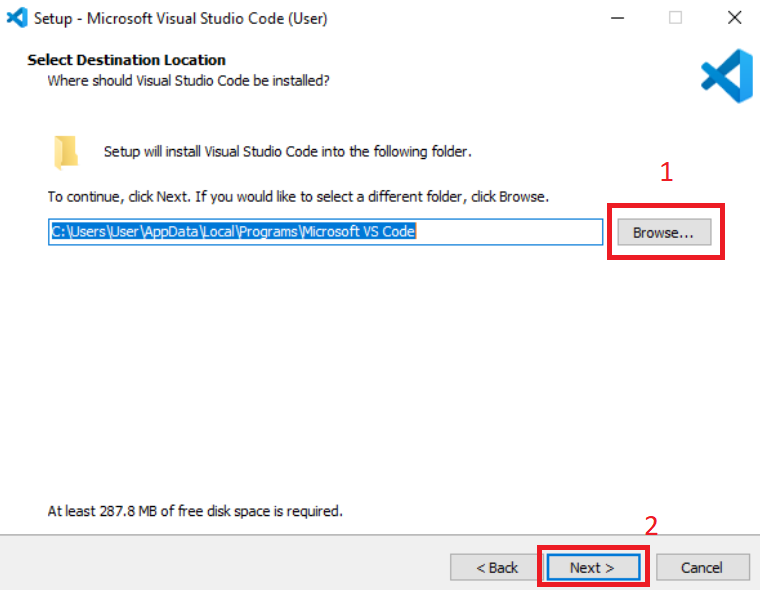 Figure 105. Destination Folder
 -
Check the option if you do not wish to create a Start Menu folder, then click next:
 Figure 106. Start Menu Setup
 -
Check the boxes next to the options you wish to install for your environment, and then click next:
Select the "Open with Code" options; this is a really useful tool, and if you don’t mark them, you won’t be able to configure them again unless you reinstall the application. 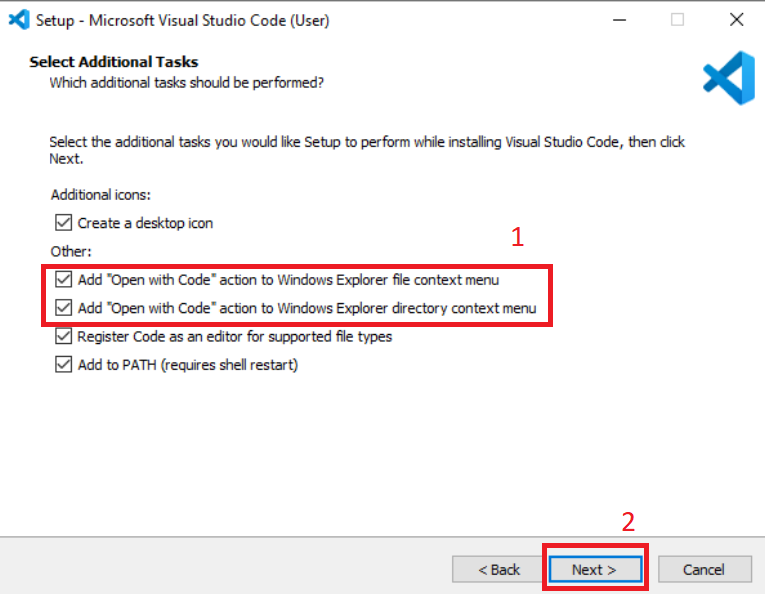 Figure 107. Setup Additional Tasks
 -
Select next to begin the installation:
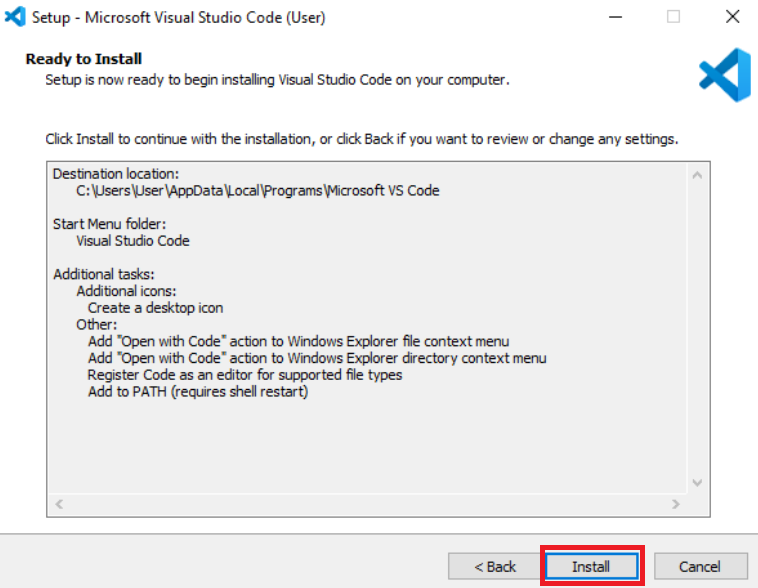 Figure 108. Final Setup
 -
Select finish to end the installation and launch visual studio code:
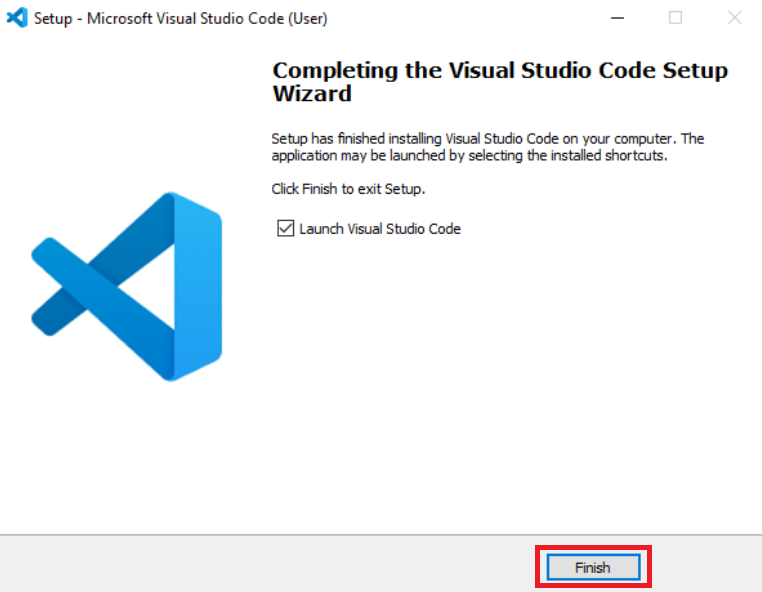 Figure 109. Completed Instalation
.Net Core SDK
Download and install .Net Core SDK:
-
Download .Net SDK x64 for .Net 6.0
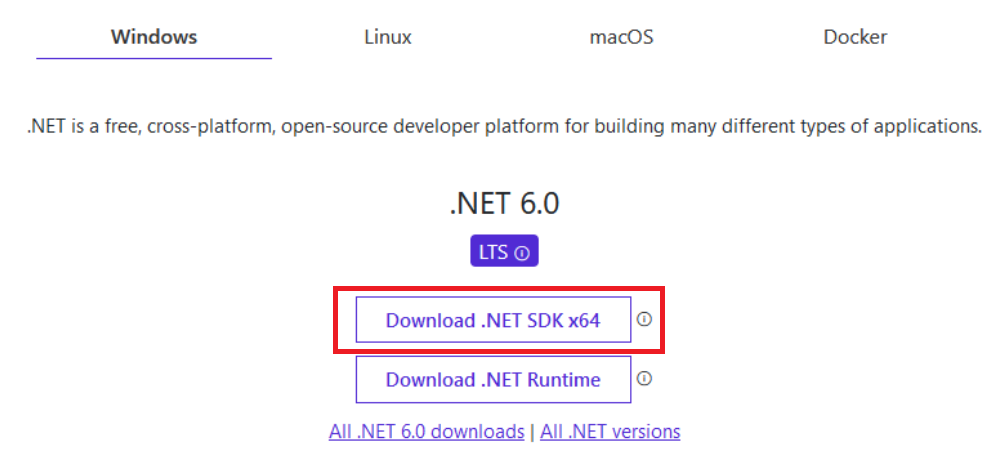 Figure 110. Download Page .Net 6.0
 -
Open the downloaded installer, and click on the install button:
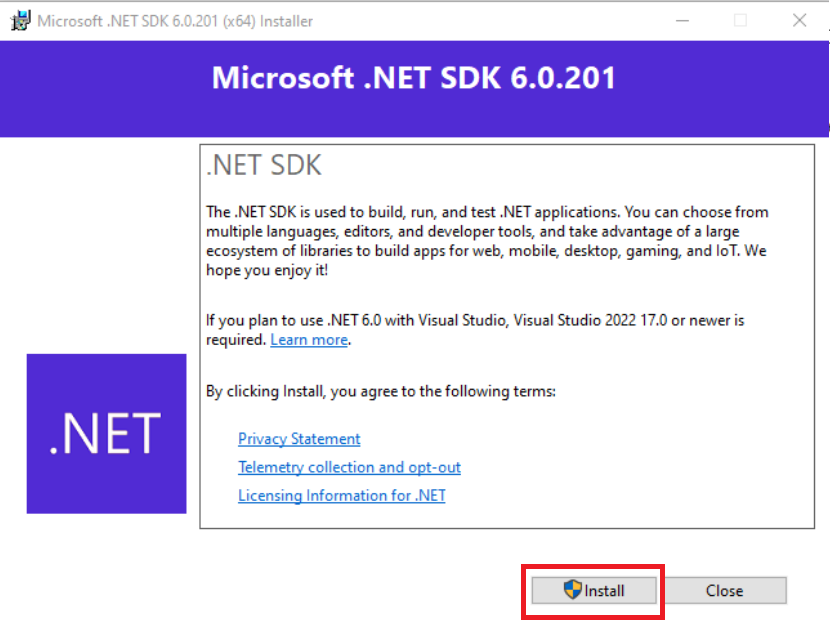 Figure 111. Microsoft .NET SDK Installer
 -
Click in the close button to finish the installation:
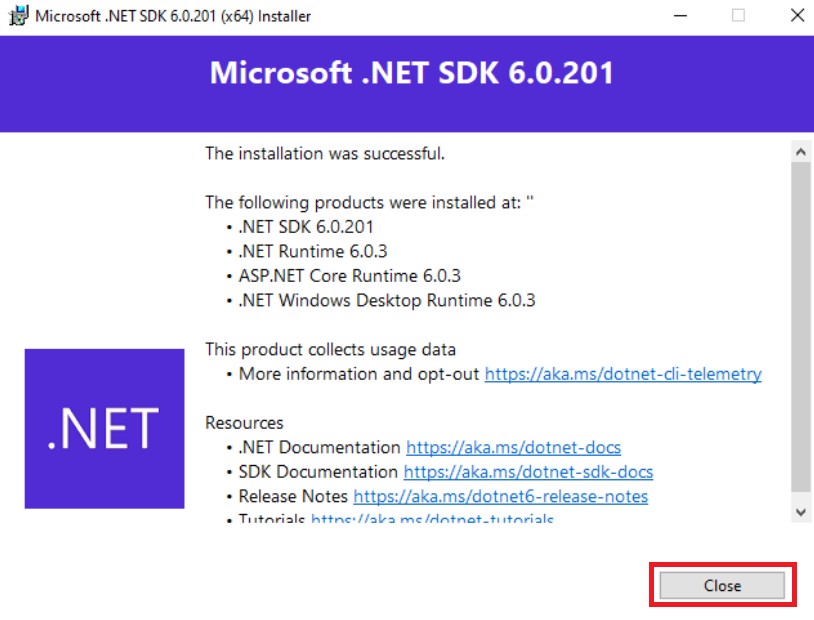 Figure 112. Microsoft .NET SDK Installer
 -
To verify the installation, open a command prompt and enter the following command:
dotnet --version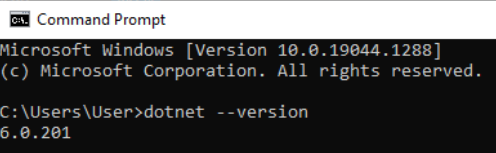 Figure 113. CMD dotnet command
OmniSharp extension
Download and install C# extension (by OmniSharp):
-
Open Visual Studio, go to the extensions section (1), search for C# extensions (2) and install the C# extension by OmniSharp:
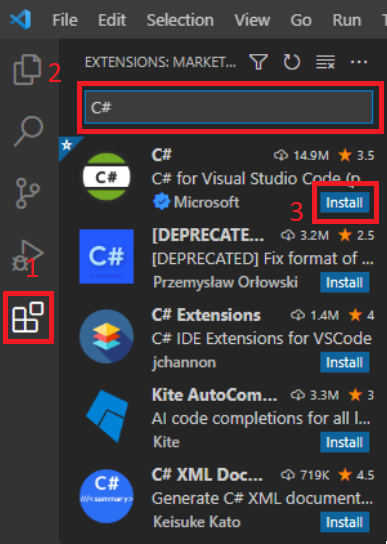 Figure 114. Extensions Site in Visual Code Studio
For Linux Systems
This guide is intended for Ubuntu/Debian distributions; if you are using another Linux distribution, please refer to the official Visual Code Studio documentation
Visual Studio Code
Download and install Visual Studio Code:
-
Download the latest version here
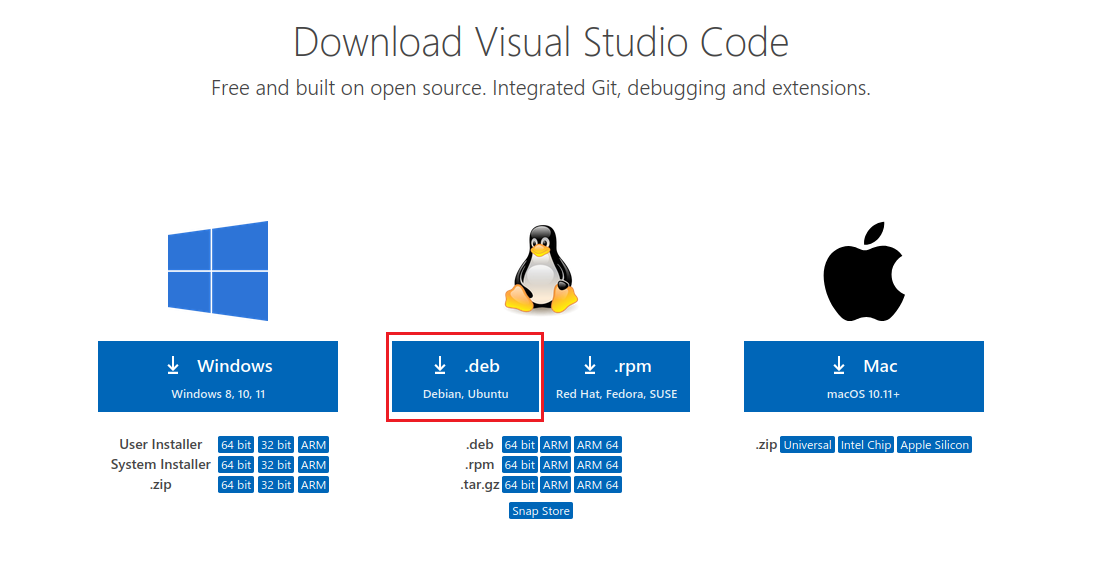 Figure 115. Download Page
 -
To install, open a terminal within the Downloads folder (or the location where the binary was downloaded) and run the following command:
sudo apt install ./<file>.deb

# If you're on an older Linux distribution, you will need to run this instead:
# sudo dpkg -i <file>.deb
# sudo apt-get install -f # Install dependencies
Where
<file>is the name of the binary that was downloaded in step 1.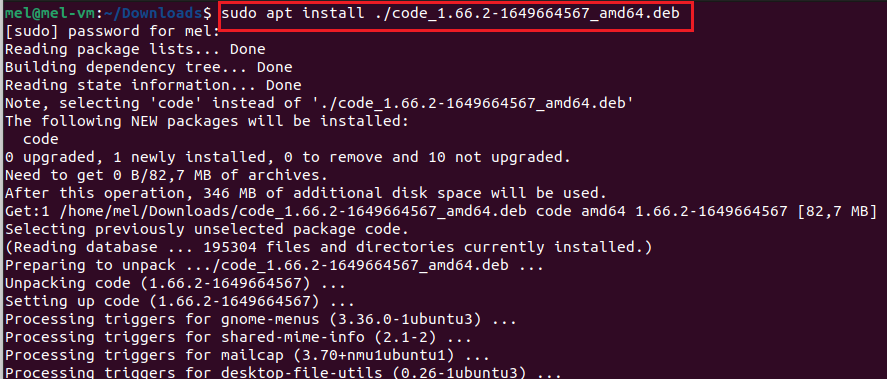 Figure 116. Terminal command example
 -
Then update the package cache and install the package using:
sudo apt install apt-transport-https
sudo apt update
sudo apt install code # or code-insiders
.Net Core SDK
Download and install .Net Core SDK:
-
To install, open a terminal and run the following command:
sudo apt-get update; \
sudo apt-get install -y apt-transport-https && \
sudo apt-get update && \
sudo apt-get install -y dotnet-sdk-6.0
If you receive an error message similar to Unable to locate package dotnet-sdk-6.0, see the APT troubleshooting section of the official documentation. -
To verify the installation, open a terminal and enter the following command:
dotnet --version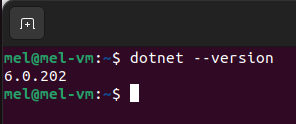 Figure 117. CMD dotnet command
| This guide is intended for Ubuntu/Debian distributions; if you are using another Linux distribution, please refer to the Official Microsoft Documentation |
OmniSharp extension
Download and install C# extension (by OmniSharp):
-
Open Visual Studio, go to the extensions section (1), search for C# extensions (2) and install the C# extension by OmniSharp:
Figure 118. Extensions Site in Visual Code Studio
For MacOS
Visual Studio Code
Download and install Visual Studio Code:
-
Download the latest version here
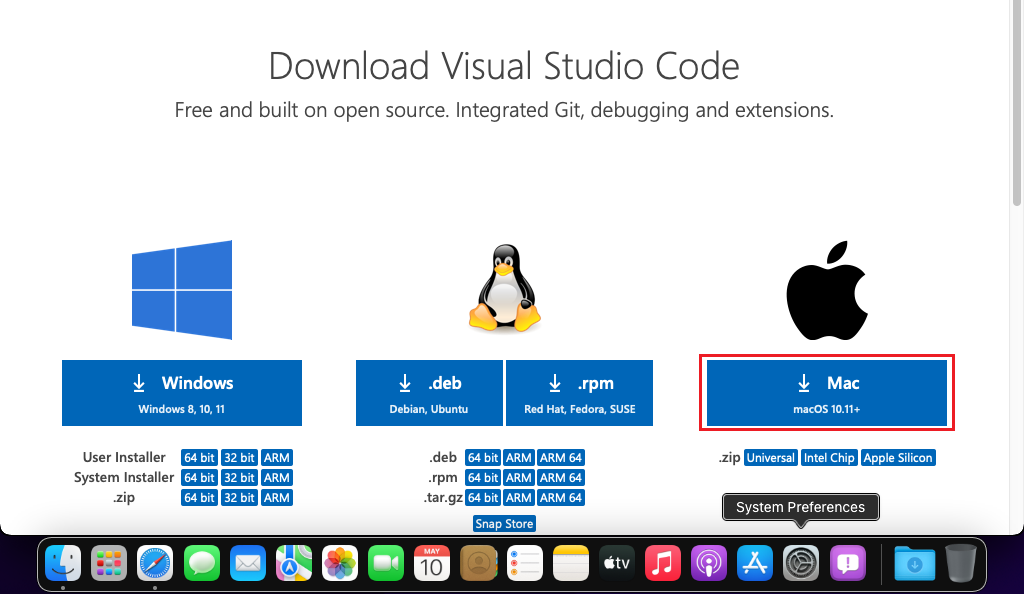 Figure 119. Download Page
 -
Allow the download for this website by clicking the Allow button:
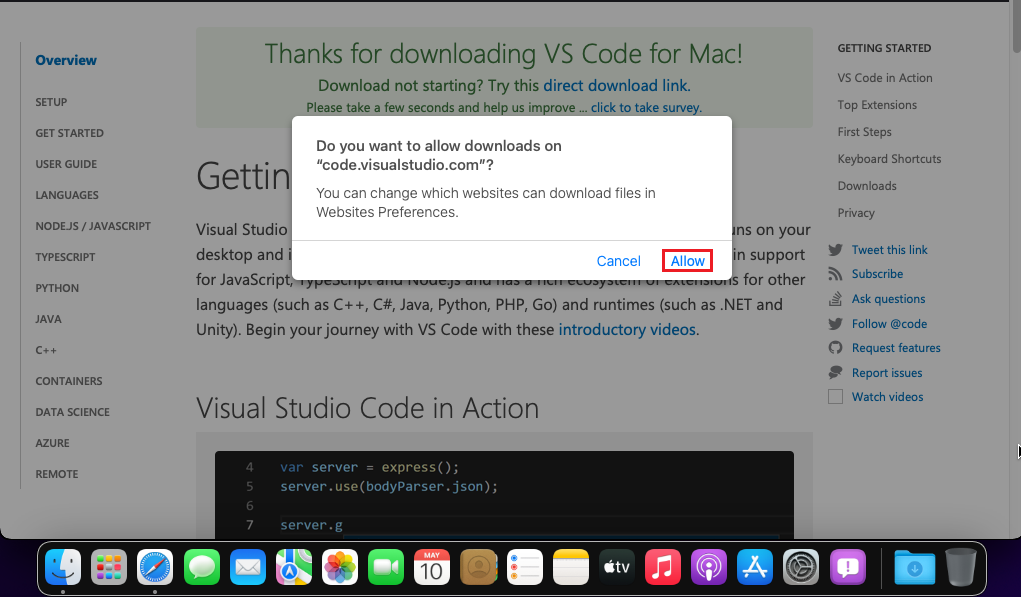 Figure 120. Download Page
 -
Go to the Downloads folder and Drag
Visual Studio Code.appto the Applications folder, making it available in the macOS Launchpad: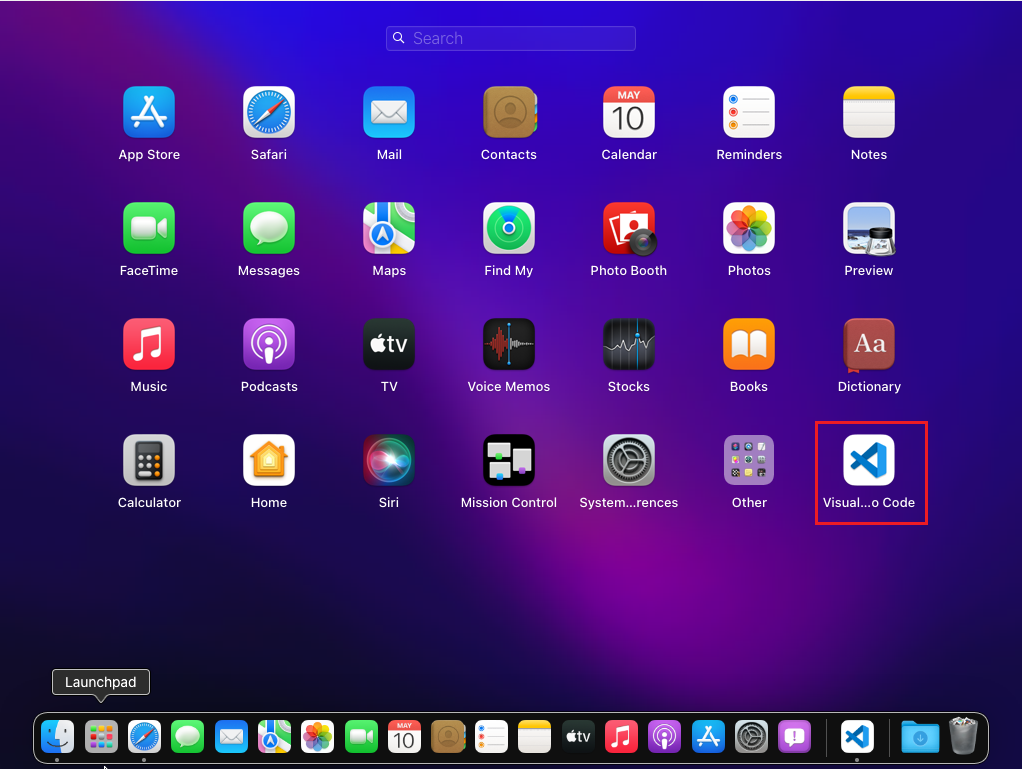 Figure 121. MacOS Launchpad
 -
Launch Visual Studio Code:
When you initially start Visual Studio Code, you must authorize the program to launch by clicking the open button.
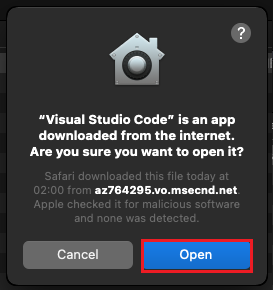 Figure 122. Opening VSCode
Add VS Code to your Dock by right-clicking on the icon, located in the Dock, to bring up the context menu and choosing Options, Keep in Dock
.Net Core SDK
-
Download .Net 6.0 SDK for your cpu architecture (x64 or Arm64).
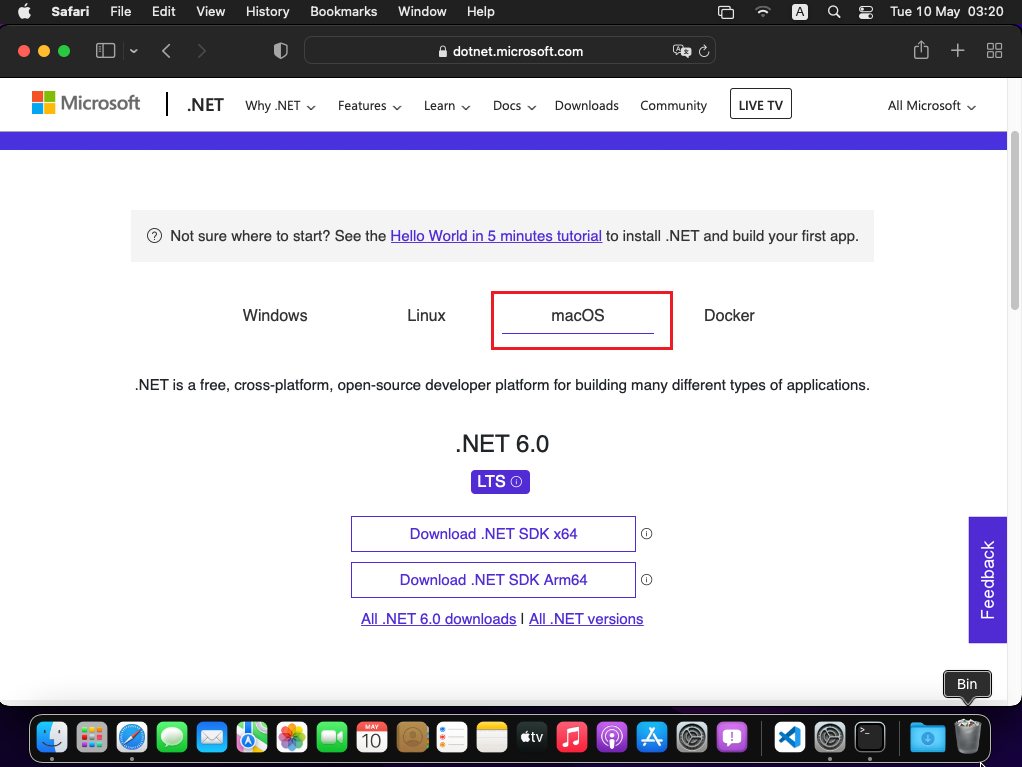 Figure 123. Download Page .Net 6.0
 -
Allow the download clicking the allow button in the next window:
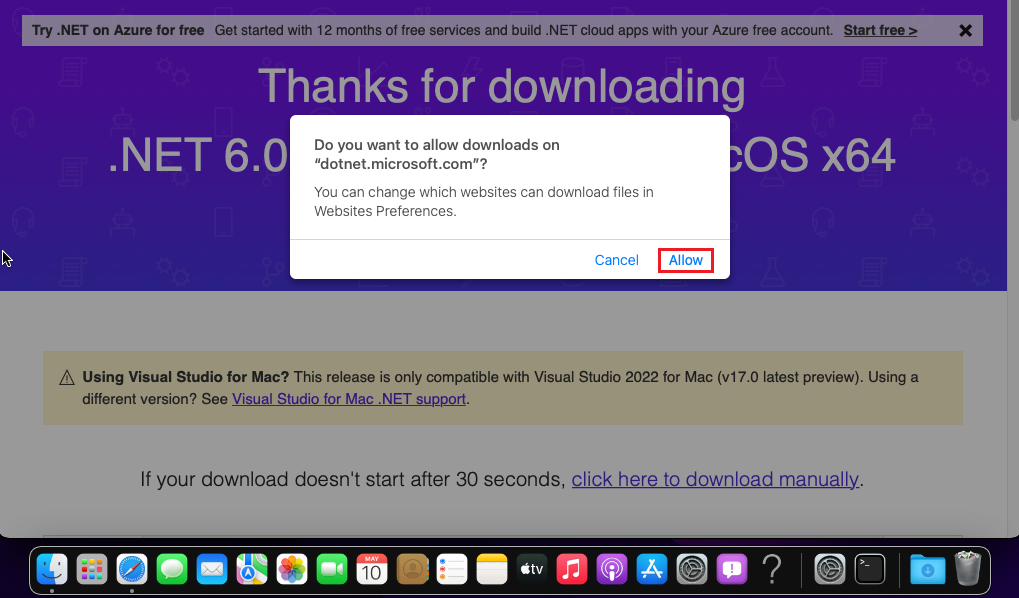 Figure 124. Download Page .Net 6.0
 -
Go to the downloads folder, open the downloaded installer, and click on the continue button:
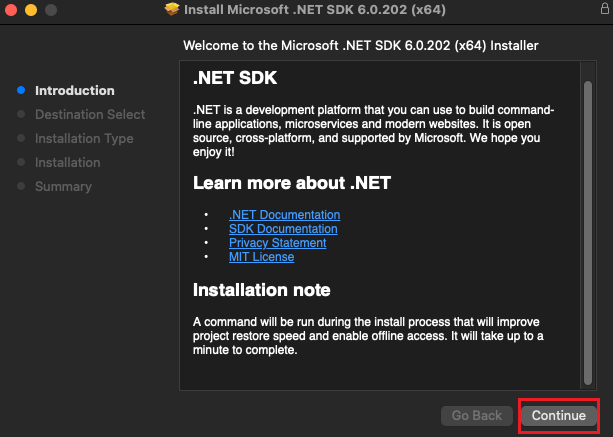 Figure 125. Microsoft .NET SDK Installer
 -
Select the destination disk where you want to install the Microsoft .NET SDK, and click continue:
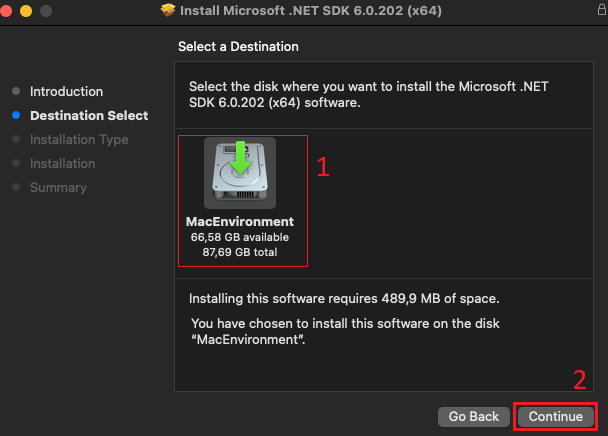 Figure 126. Microsoft .NET SDK Installer
 -
Click on the install button to perform a standard installation:
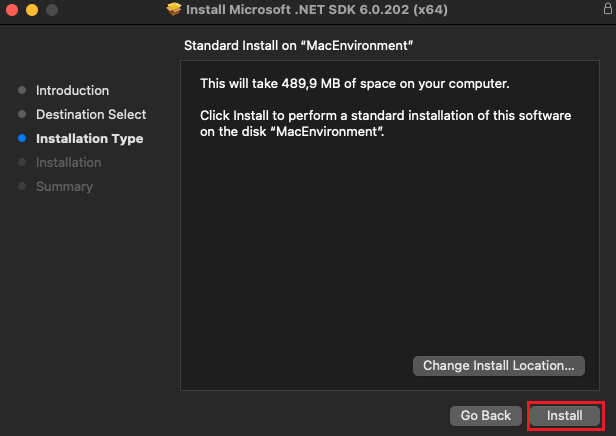 Figure 127. Microsoft .NET SDK Installer
 -
Type your credentials and click the Install Software button to begin the installation:
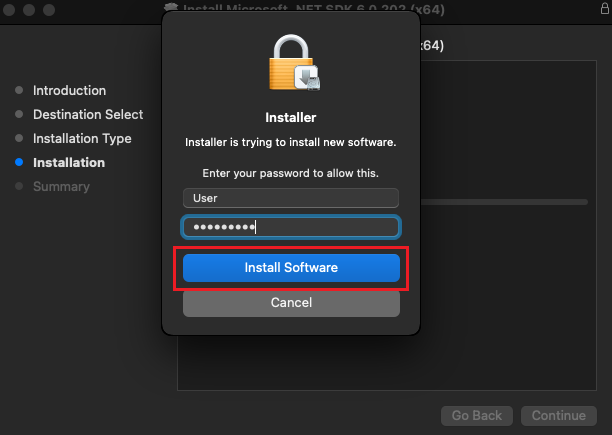 Figure 128. Microsoft .NET SDK Installer
 -
To verify the installation, open a terminal and enter the following command:
dotnet --version Figure 129. CMD terminal command
OmniSharp extension
Download and install C# extension (by OmniSharp):
-
Open Visual Studio, go to the extensions section (1), search for C# extensions (2) and install the C# extension by OmniSharp:
Figure 130. Extensions Site in Visual Code Studio
Devon4net.Web.Api.Template
For Windows
-
Open a project:
-
Open Visual Studio Code.
-
Click on the Explorer icon on the left menu and then click Open Folder.
-
Select the folder you want your C# project to be in and click Select Folder. For our example, we’ll create a folder for our project named
'ApiTest'.
-
-
Initialize a C# project:
-
Open the Integrated Terminal from Visual Studio Code by typing
Left CTRL + backtick. Alternatively, you can select View > Terminal from the main menu. -
You must select Command Prompt instead of PowerShell:
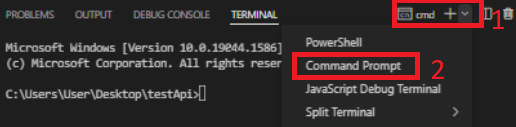 Figure 131. CMD in Visual Code Studio
 -
In the terminal window, type:
dotnet new -i Devon4Net.WebAPI.Template -
This will install the Devon4Net.WebAPI.Template with the latest version, next to create your project you must run the following command.
dotnet new Devon4NetAPI
-
-
Run the "ApiTest" program:
-
Go to the path where the Program.cs file is found typing the following command:
cd Templates\WebAPI\Devon4Net.Application.WebAPIAnd then type:
dotnet run -
You can now test the template by going to the swagger page at: https://localhost:8085/swagger/index.html.
-
You may now start working with C# and the devon4net api template in the Visual Studio Code environment.
For Linux Systems
-
Open a project:
-
Open Visual Studio Code.
-
Click on the Explorer icon on the left menu and then click Open Folder.
-
Select the folder you want your C# project to be in and click Select Folder. For our example, we’ll create a folder for our project named
'ApiTest'.
-
-
Initialize a C# project:
-
Open the Integrated Terminal from Visual Studio Code by typing
Left CTRL + backtick. Alternatively, you can select View > Terminal from the main menu. -
In the terminal window, type:
dotnet new -i Devon4Net.WebAPI.Template -
This will install the Devon4Net.WebAPI.Template with the latest version, next to create your project you must run the following command.
dotnet new Devon4NetAPI
-
-
Run the "ApiTest" program:
-
Go to the path where the Program.cs file is found typing the following command:
cd Templates/WebAPI/Devon4Net.Application.WebAPIAnd then type:
dotnet run -
You can now test the template by going to the swagger page at: https://localhost:8085/swagger/index.html.
-
You may now start working with C# and the devon4net api template in the Visual Studio Code environment.
For MacOS
-
Open a project:
-
Open Visual Studio Code.
-
Click on the Explorer icon on the left menu and then click Open Folder.
-
Select the folder you want your C# project to be in and click Select Folder. For our example, we’ll create a folder for our project named
'ApiTest'.
-
-
Initialize a C# project:
-
Open the Integrated Terminal from Visual Studio Code by typing
Left CTRL+ Left Shift + backtick. Alternatively, you can select View > Terminal from the main menu. -
In the terminal window, type:
dotnet new -i Devon4Net.WebAPI.Template -
This will install the Devon4Net.WebAPI.Template with the latest version, next to create your project you must run the following command.
dotnet new Devon4NetAPI
-
-
Run the "ApiTest" program:
-
Go to the path where the Program.cs file is found typing the following command:
cd Templates/WebAPI/Devon4Net.Application.WebAPIAnd then type:
dotnet run -
You can now test the template by going to the swagger page at: https://localhost:8085/swagger/index.html.
-
You may now start working with C# and the devon4net api template in the Visual Studio Code environment.
Troubleshoot
It’s possible that when you execute the program, you’ll get the following error:
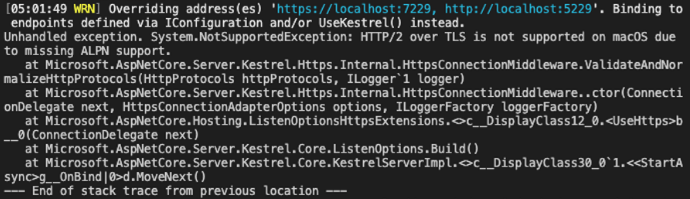
That is why Kestrel does not support HTTP/2 with TLS in macOS.
To fix this, navigate to the appsettings.json file and disable the TLS protocol in the Kestrel server setup as follows:
{
  "devonfw": {
    "Kestrel": {
      "UseHttps": true,
      "HttpProtocol": "Http1AndHttp2", //Http1, Http2, Http1AndHttp2, none
      "ApplicationPort": 8085,
      "SslProtocol": "none", //Tls12, Tls13, none. For Https2 Tls12 is needed
    }
  }
}| HTTP/2 without TLS should only be used during app development. Production apps should always use transport security. |
Debug
-
Open for example Program.cs by clicking on it. The first time you open a C# file in Visual Studio Code, OmniSharp will load in the editor.
-
To open the Debug view, click on the Debugging icon on the left side menu.
-
Visual Studio Code will prompt you to add the missing assets to build and debug your app. Select Yes.
-
Locate the green arrow at the top of the pane. Make sure the drop-down next to it has
.NET Core Launch (web)selected. -
Add a breakpoint to your project by clicking on the editor margin (the space on the left of the line numbers in the editor).
-
Select F5 or the green arrow to start debugging. The debugger stops execution of your program when it reaches the breakpoint you set in the previous step.
-
While debugging you can view your local variables in the top left pane or use the debug console.
-
-
Select the green arrow at the top to continue debugging, or select the red square at the top to stop.
The following figure summarizes the most important points:
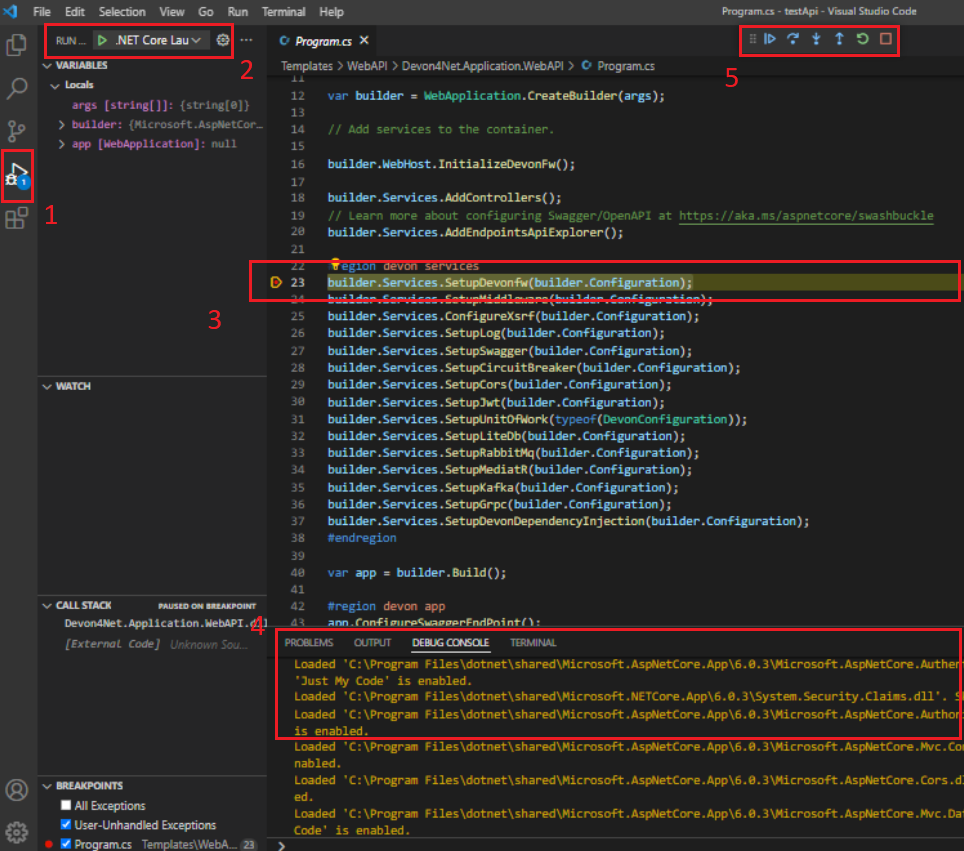
Where:
-
Debug Section
-
Launch button
-
Break Point
-
Debug Console
-
Debug Navigation Buttons
|
For more information and troubleshooting tips on .NET Core debugging with OmniSharp in Visual Studio Code, see Instructions for setting up the .NET Core debugger. |