Home
Home page
This is the main page that you will find after your profile creation and the page where you will start from henceforth.
It contains three sections as below:
-
Toolbar
-
Sidebar
-
Content
[[devonfw-guide_dashboard.wiki_home-page.asciidoc_topbar-+]]
== Topbar
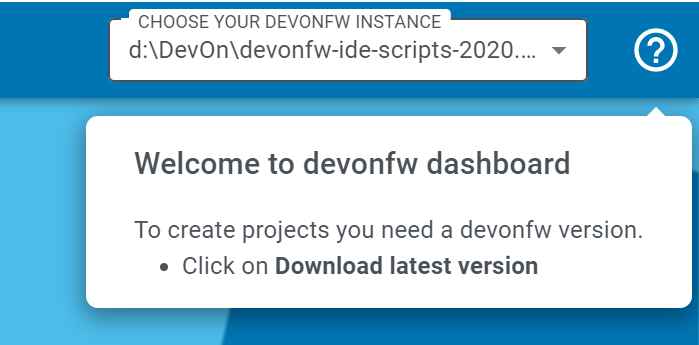
This section is at the top of the page, it contains devonfw instance dropdown to select devonfw-ide that can be used as a base for the projects.

Next to the devonfw instance dropdown, there is a quick help icon, clicking on it will open a popup which gives some tips for how to use Devon Dashboard IDE.
[[devonfw-guide_dashboard.wiki_home-page.asciidoc_sidebar-+]]
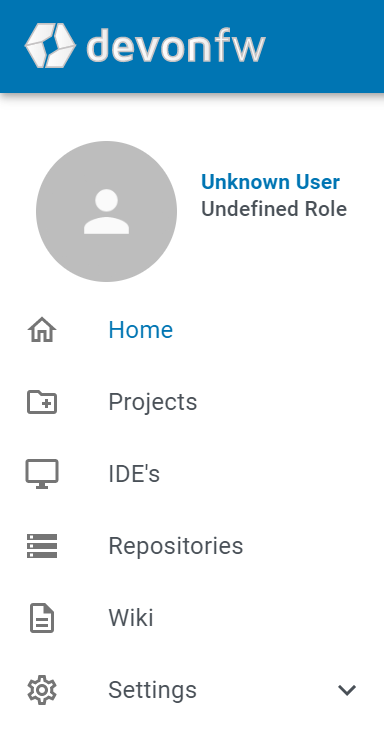
== Sidebar
The sidebar has divided into two sections:
-
User Profile - Users can see his/her pic, name, and role.
-
Links to access to different sections of the dashboard.
Content Section
The Content section has also divided into three sections:
-
A small introduction about the devonfw IDE
-
A button to Download latest version of devonfw IDE
-
A "Project" block which shows the total number of Projects which are available in different devonfw IDE
[[devonfw-guide_dashboard.wiki_home-page.asciidoc_steps-to-download-and-install-devonfw-ide-+]]
== Steps to download and Install devonfw IDE
Step 1: Click on Download latest version button which is in the Content section. Check the below screen for the reference.

Step 2: By clicking Download latest version button, Installing devonfw popup will open.
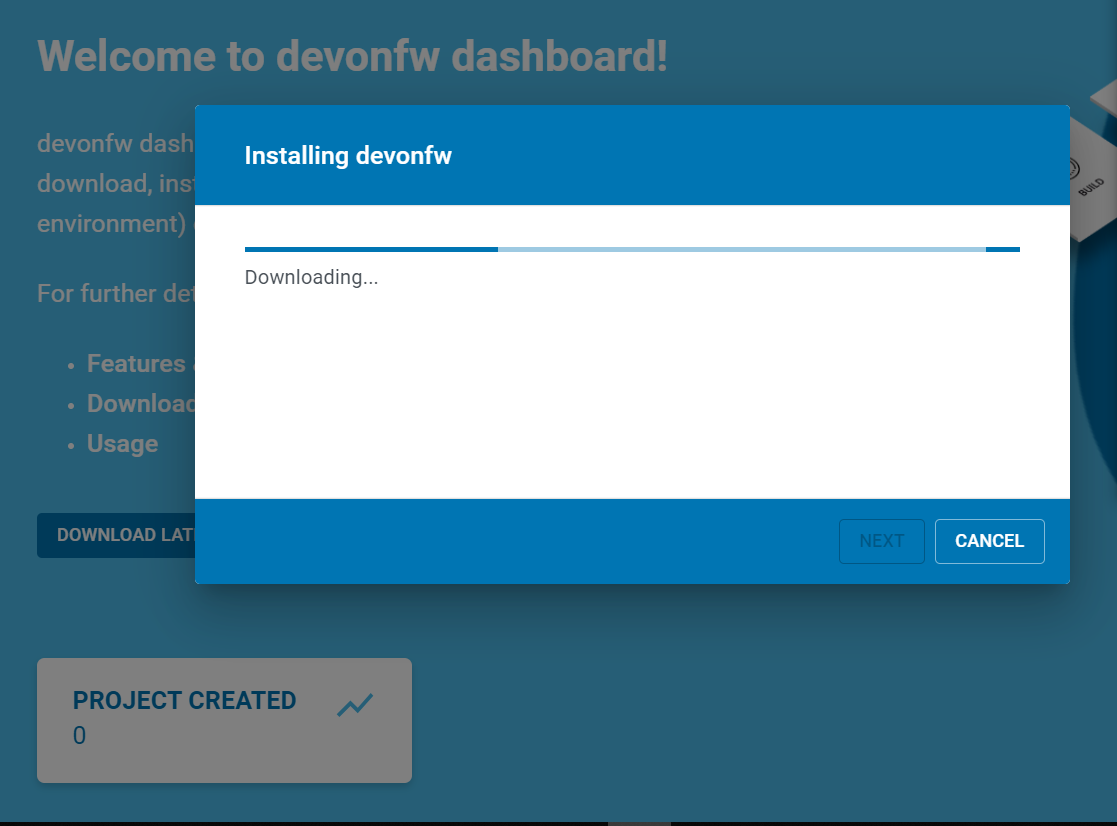
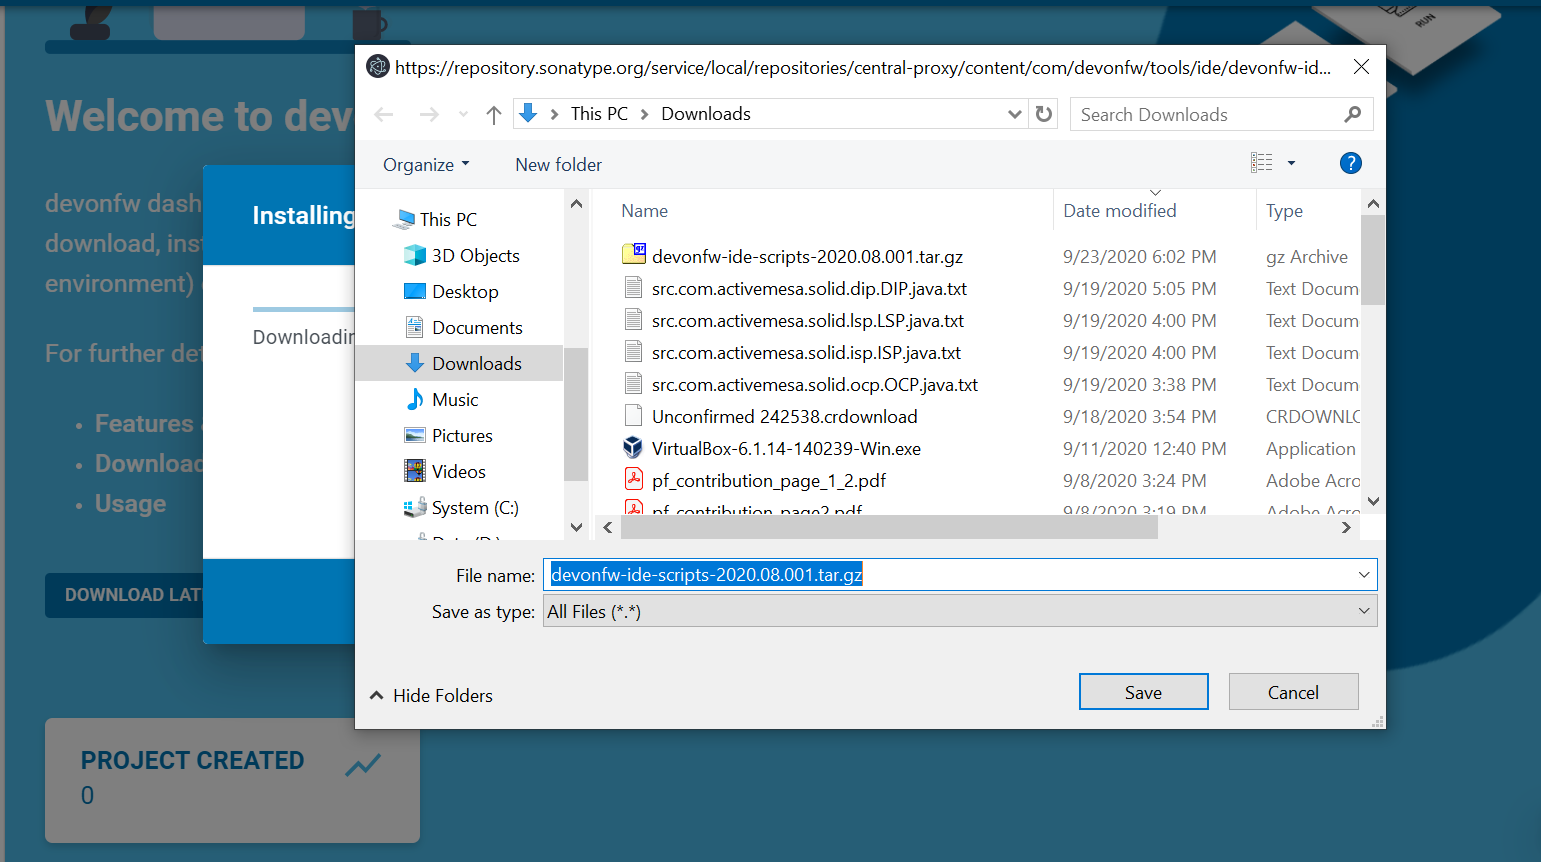
Step 3: Installing devonfw popup will automatically trigger one more popup to specify the location for downloading Devonfw IDE. Specify the location and click the Save button to download.
Step 3: Once the download completes successfully, the Next button will be enabled for the further installation process.

Step 4: By Clicking Next button in the Installing devonfw pop up, two options are shown:
1: Select the Git url for the installation setup.
2: Skip this process.
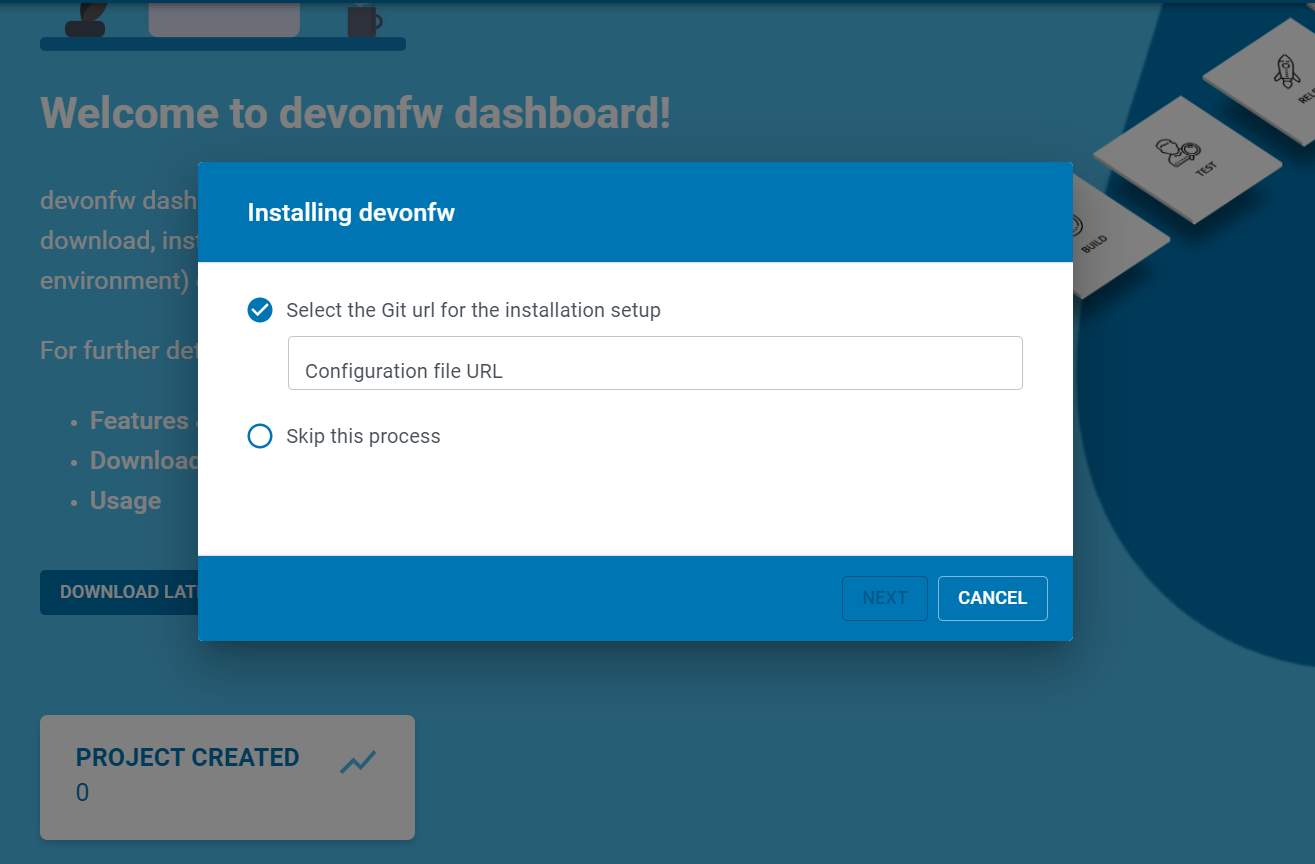
Step 5: Select one of the above options.
-
If the selection is Git url, then Configuration file url should be filled in the input box and needs to click Next button to start the further installation process.
-
In case the user doesn’t have Git url, then simply Skip the process and click the Next button to start the further installation process.
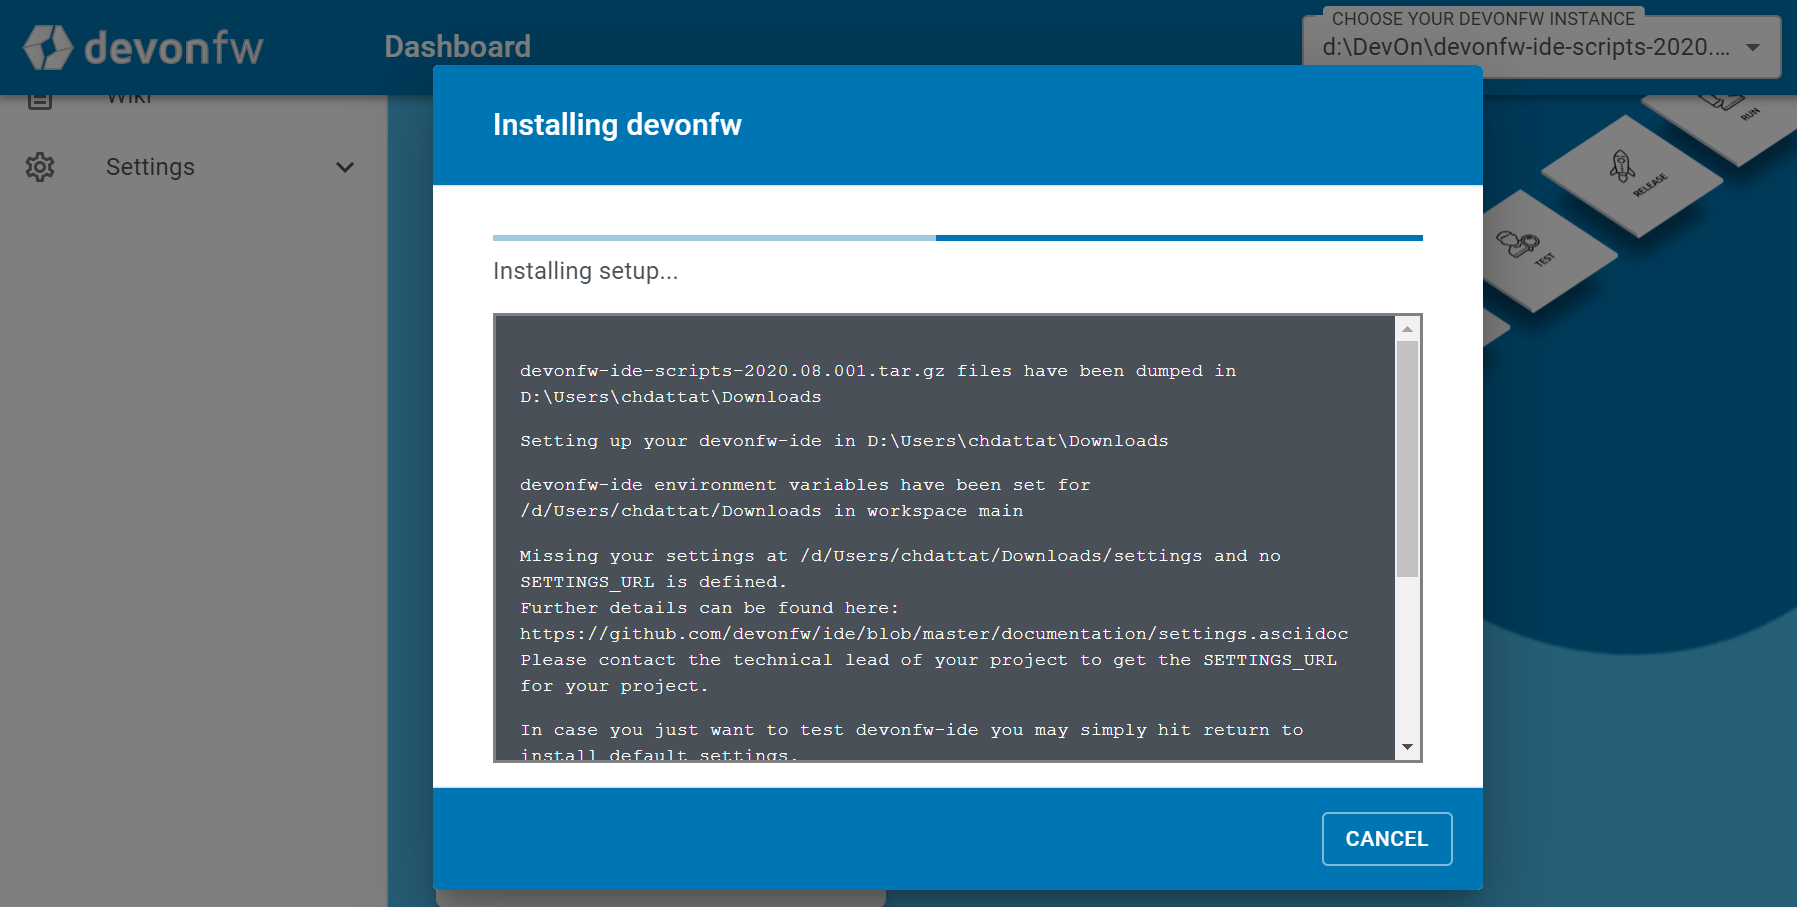
Step 6: Click on the Next button for the final installation process. Wait for some time to complete the installation setup. Once the installation setup completes, the Close button will appear. Just click on it and go to the specified folder location.